• This Forum is for adults 18 years of age or over. By continuing to use this Forum you are confirming that you are 18 or older. No content shall be viewed by any person under 18 in California.

Induction brass annealer redux

@SGK
Further thoughts from your comment.
The shoulder has more mass. So needs more heat either by more current or more time.
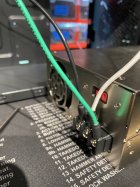
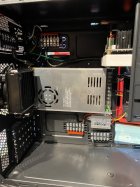
The existing power supply is (more than) adequate
Higher current in one area has a lot of discussion. So this is hard or complicated.
More time is easier. This just requires some calibration runs for time.
Other issues maybe field collapse.
A short interruption to engage / reengage the field can be adjust out.
At least from a concept it looks doable.
"A short interruption to engage / reengage the field can be adjust out." -> Yes - pulses. One way of taking care of local "overaccumulation" of heat (a (steep temperature gradient). I heard the AMP making ticking sounds - just like my home made annealer using pulses - and suspected it to use pulses or bursts. Engaging/re-engaging.

I stumbled upon the manual for the AMP and their description of Aztec - and they actually write that Aztec codes are different from their standard codes.

In their news feed I also found (https://www.ampannealing.com/news/43/aztec-mode-coming-soon/)
"Aztec runs in a different manner to our standard programs, and they don’t correlate. It doesn’t do the series of pulses which you would be used to. It is quicker and quieter than our standard programs. The end result is the same neck and shoulder annealed hardness. Because it is quicker, about one millimetre less of the body down from the shoulder is annealed. That is just a "run out” area anyway, and is not significant."

Another "easy" way is adjusting the field, instead of pulses adjusting voltage? which would make the field stronger or weaker/ more or less current drawn.
 
I built a case from folded sheetmetal ( actually roofing iron flat sheet, before it gets roller formed ) the hole in the front panel was just big enough to pass the coil through, I applied a grommet type rubber edging to it.
It was probably a 40mm elongated hole.

My first Gina design copy use ACM panel ( two thin sheets of ali with a plastic composite in between ) that used 8 mm holes for each copper leg to pass through, insulated with short sections of pvc tubing ( left over from the radiator / pump runs ) both appeared to have no parasitic losses.

Ferrite cores need not be expensive but may take a while to arrive these days. Rather than cut a round toroid i just ground down two of the "legs" on two c shaped cores.
cores via ali express
I tried changing my N30 material toroid core with 2 U-shaped made of 3C90 (should be suitable for frequencies below 200KHz). (Part no. UR64/40/20-3C90 from digikey - fast delivery btw)
WHAT a difference!
The previous core was allright - worked fine. This one is insane. A lot more power - with voltage adjusted down the current draw around 10A under load (depends on case), around 2.5 with no load. Had to adjust the voltage down (found out the hard way my cheap Chinese 25A SSR relays are too cheap - the cheap 40A versions hold up still).

First test, fixed time setting, no pulses or magic added (need to retrain my prediction model, totally different beast) - 1.5 second to make a 3006 case start to glow.

 
Regarding choosing the right ferrite for the job.

Look at the datasheets for the material from the manufacturer - they will provide info on intended frequency range, operating temperatures (permeability, initial and at different temperatures, loss etc).

I've tested different types - the best results have been from ones made of MnZn. The ones I tested made from powdered iron got really hot very fast, and one actually started "screaming" and cracked.

PC40 and 3C90 (the "square sides" U-core and the one mounted in the picture) have been excellent - almost no heat in core. Only litz-wire heating up during cycle, and cooling off quick enough between to not even make terminals on ZVS hot. And that's with 50% duty cycle.

IMG_4128.jpeg
 
Last edited:
This is my first post and I need help. I bought all the parts for the annealer and started assembling them. The issue I have right now is the main power supply. It’s a Mean Well 48v 12.5 amp supply(SE-600-48). It turns with a click when I supply it AC power the fan is going, then green light comes on then slowly dims off. During that light on and subsequent dimming I can detect output voltage constantly declining until the light goes out. When I shut AC power off to the unit the same thing the light comes on then DC power dissipates. Is this unit damaged or is it not hooked up right? Any guidance or help is greatly appreciated.
 

Attachments

  • 48E97E56-9F5D-40EF-9C55-9A63905D5C66.jpeg
    48E97E56-9F5D-40EF-9C55-9A63905D5C66.jpeg
    427.5 KB · Views: 51
  • 46E2C25A-BB62-4E92-AE0D-FE519B2D682C.jpeg
    46E2C25A-BB62-4E92-AE0D-FE519B2D682C.jpeg
    458.2 KB · Views: 48
This is my first post and I need help. I bought all the parts for the annealer and started assembling them. The issue I have right now is the main power supply. It’s a Mean Well 48v 12.5 amp supply(SE-600-48). It turns with a click when I supply it AC power the fan is going, then green light comes on then slowly dims off. During that light on and subsequent dimming I can detect output voltage constantly declining until the light goes out. When I shut AC power off to the unit the same thing the light comes on then DC power dissipates. Is this unit damaged or is it not hooked up right? Any guidance or help is greatly appreciated.
Aj, the only thing I can tell from the pics is that the ground is correct (all other case markings are blocked).

My first thought was that you were turning on the power supply with the zvs connected to it, but the second pic seems to show that nothing is connected. Next, I considered that the red switch is in the 220V position, not the 115V position, causing the unit to be under powered, but again this is just supposition based on too little info.
The L is hooked to the black wire and N to the white wire. Yeah nothing is hooked up to it yet I was testing it and going to preset the volts from 48 down to Gina’s 43 volt initial setting. The 115 is showing on the 220/115 switch. So I’m starting to think it’s a bad power supply. The other 24v 20amp power supply is hooked up the same way and works fine. See in the pic the green light on steady and my meter tests show 24v output constant.
 

Attachments

  • 30F2612F-A1C3-4432-A2FC-466DC5F2923A.jpeg
    30F2612F-A1C3-4432-A2FC-466DC5F2923A.jpeg
    499.3 KB · Views: 57
Shame they're no longer available
Crazy, I ordered them February 16. (Plenty available back then) Got them 2 days ago, which is impressive - I live in DK, and they were shipped from US.

A slightly cheaper alternative - still in stock

UR64/40/20-3F3​

- made of 3F3 which might work really well (probably a lot better than the N30 toroid I have used previously): https://dtsheet.com/doc/1345635/3f3---ferroxcube
 
Last edited:
I tried changing my N30 material toroid core with 2 U-shaped made of 3C90 (should be suitable for frequencies below 200KHz). (Part no. UR64/40/20-3C90 from digikey - fast delivery btw)
WHAT a difference!
The previous core was allright - worked fine. This one is insane. A lot more power - with voltage adjusted down the current draw around 10A under load (depends on case), around 2.5 with no load. Had to adjust the voltage down (found out the hard way my cheap Chinese 25A SSR relays are too cheap - the cheap 40A versions hold up still).

First test, fixed time setting, no pulses or magic added (need to retrain my prediction model, totally different beast) - 1.5 second to make a 3006 case start to glow.

I'd try and wrap the Litz differently to lower the amp draw. For example, it would be very interesting to wrap it like the AMP, which is not only at the gap ends, but along the side walls as well.
 
Honestly, I don't understand the need to wrap it near the air gap. The whole point of the ferrite is that the flux travels through the ferrite. So it really shouldn't matter where it is wrapped. The number of turns will affect the frequency of operation, with higher frequencies creating more heat in the induction board caps. Although it may not work in @Standardelg 's build, I would place the core such that heat rising from the hot work piece (case) doesn't flow directly on the core/Litz wire and I'd wrap the Litz in Kapton tape.

(Check the Vf of your solid state relays. Many of these have very high voltage drop which is dissipated as heat and you can easily breach the safe operating area (SOA) of the device which will then go pop. Also, and I don't know if it is possible in your build, I would have those cases sit higher than they are in the video. I would target the point one shoulder width down the case wall to be at the mid-point of your ferrite cross section.)

Is your Litz wire stiff enough so that the winding can support the ferrite?

I'd be interested in knowing the frequency of oscillation your build operates at. Not sure if you have an oscilloscope or a multimeter that can read AC voltage signals (and display Vp and Hz).

PS Up your membership! :)
 
Last edited:
Honestly, I don't understand the need to wrap it near the air gap. The whole point of the ferrite is that the flux travels through the ferrite. So it really shouldn't matter where it is wrapped. The number of turns will affect the frequency of operation, with higher frequencies creating more heat in the induction board caps. Although it may not work in @Standardelg 's build, I would place the core such that heat rising from the hot work piece (case) doesn't flow directly on the core/Litz wire and I'd wrap the Litz in Kapton tape.

(Check the Vf of your solid state relays. Many of these have very high voltage drop which is dissipated as heat and you can easily breach the safe operating area (SOA) of the device which will then go pop. Also, and I don't know if it is possible in your build, I would have those cases sit higher than they are in the video. I would target the point one shoulder width down the case wall to be at the mid-point of your ferrite cross section.)

Is your Litz wire stiff enough so that the winding can support the ferrite?

I'd be interested in knowing the frequency of oscillation your build operates at. Not sure if you have an oscilloscope or a multimeter that can read AC voltage signals (and display Vp and Hz).

PS Up your membership! :)

My initial testing of various wrap locations on a ferrite has shown that it makes a difference to the intensity of the flux field on the brass. These are flux concentrator designs.
 
Honestly, I don't understand the need to wrap it near the air gap. The whole point of the ferrite is that the flux travels through the ferrite. So it really shouldn't matter where it is wrapped. The number of turns will affect the frequency of operation, with higher frequencies creating more heat in the induction board caps. Although it may not work in @Standardelg 's build, I would place the core such that heat rising from the hot work piece (case) doesn't flow directly on the core/Litz wire and I'd wrap the Litz in Kapton tape.

(Check the Vf of your solid state relays. Many of these have very high voltage drop which is dissipated as heat and you can easily breach the safe operating area (SOA) of the device which will then go pop. Also, and I don't know if it is possible in your build, I would have those cases sit higher than they are in the video. I would target the point one shoulder width down the case wall to be at the mid-point of your ferrite cross section.)

Is your Litz wire stiff enough so that the winding can support the ferrite?

I'd be interested in knowing the frequency of oscillation your build operates at. Not sure if you have an oscilloscope or a multimeter that can read AC voltage signals (and display Vp and Hz).

PS Up your membership! :)
Well, I get higher amps and faster annealing when the windings are located near the gap. Has it something to do with the core not being saturated (which would be bad) because of the gap(s) maybe?
I don't have the equipment to measure frequency - yet - have experimented with removing and adding turns to see the effect on current draw and annealing time. I have yet to experience caps getting hot. With high duty cycle on previous ferrites conduction to the board from the coil terminals made the pcb hot - and I added heat sinks on the terminal posts and the bottom of the board. Now they are cool.
I can easily adjust how high the cases are located - I use simple "riser plates". Just stacking up plates until desired height.
IMG_4145.jpeg
To make it easy for myself, I place cases so shoulder/body junction is located in the "middle" of the gap. That way I don't have to remember height adjustments for different cases, brands, neckturned or not.. Annealing in pulses/bursts addresses the issue of the top of the neck glowing long before any heat has reached lower part of neck and shoulder. (Or the special cases where shoulder/body junction glows before neck - yes - it can happen with a flux concentrator coil. Just crank up the voltage.)
IMG_4144.jpeg
My relays are mounted on heatsinks - and not getting hot or warm at all (heat sink recommended 10+A). Just read a post from someone who dissected a failed 25A SSR (failed at 11A). It was fake. "Just" a transistor - rated for 10A.
The Litz is 3000 strands, 0.05mm each. I have put a fibre glass sleeve on it to protect it, and heat from glowing cases doesn't affect it (or the ferrite at all). The wire is really soft, easy to manage - and heavy. I'm not sure why it would need to be stiff? It's easily kept in place by some cable strips. The fibre glass sleve is a little stiff though.
I was not aware of possibility to up membership - I'll look into it :)
 
You get leakage flux near the windings. I suspect that's not really a good thing.

It is the use of a ferrite that makes the flux field more concentrated across the air gap (with fringing). The use of a ferrite can therefore be said to be a "concentrator". This is because magnetic materials provide an easier path for the flux than over air.
 
Last edited:
I'd try and wrap the Litz differently to lower the amp draw. For example, it would be very interesting to wrap it like the AMP, which is not only at the gap ends, but along the side walls as well.
I'm not afraid of the amps - makes it possible to anneal cases with small diameter fast - in a core with wide gap - the power supply is capable - just had some bad SSR's. The 40A versions I normally use work great (ordered a bunch of 25A at some point - very cheap..)
I have tested on other cores - the amp draw will become lower, but so will the annealing effect (induction). I will give it a try though and let you know :)
 
The wire is really soft, easy to manage - and heavy. I'm not sure why it would need to be stiff? It's easily kept in place by some cable strips.
I was merely wondering - for my own purposes - whether the wiring could support the ferrite. I would need it to do so if I were to convert my build.

I need to find a good source of Litz wire. I've found 11.5AWG Litz but it is $62 plus postage for 10 feet (more than I'd ever need).

EDIT: just found a source of the same wire without the 10' minimum which helps.
 
Last edited:
I was merely wondering - for my own purposes - whether the wiring could support the ferrite. I would need it to do so if I were to convert my build.

I need to find a good source of Litz wire. I've found 11.5AWG Litz but it is $62 plus postage for 10 feet (more than I'd ever need).

EDIT: just found a source of the same wire without the 10' minimum which helps.
This is the one I'm using now: https://www.aliexpress.com/item/4000793787631.html

It arrived quite fast - about 2 weeks after I ordered it.

It's actually 0.04mm per strand and not 0.05 as I wrote above :)

You need the strands to be smaller than 40AWG to avoid skin and proximity effects: 0.08mm and below for 100+kHz. And a lot of them (around 2000 or more - I use 3000) to share the amps
 
Here is a US source for Cardas Litz hookup wire. These guys make quality stuff. I'm not yet sure of their strand composition. http://www.soniccraft.com/index.php/chassis-cardas-wire-c-296_175_188

What do you think the diameter of the wire you are using is? Thicker than 2.5mm? Looks like that wire isn't jacketed at all...just a silk outer layer.
Yes, it's "normal" for litz wires to have a silk outer layer. I bought some 4mm diameter fibreglass sleeve (flexible enough for the litz wire to easily fit in)


Another good source for Litz wire: https://www.elecify.com/pages/litz-wire

You really want to be at 40AWG or smaller per strand. And around 2000 strands. Less will work, but more current per strand.
 

Upgrades & Donations

This Forum's expenses are primarily paid by member contributions. You can upgrade your Forum membership in seconds. Gold and Silver members get unlimited FREE classifieds for one year. Gold members can upload custom avatars.


Click Upgrade Membership Button ABOVE to get Gold or Silver Status.

You can also donate any amount, large or small, with the button below. Include your Forum Name in the PayPal Notes field.


To DONATE by CHECK, or make a recurring donation, CLICK HERE to learn how.

Forum statistics

Threads
165,017
Messages
2,188,215
Members
78,646
Latest member
Kenney Elliott
Back
Top