• This Forum is for adults 18 years of age or over. By continuing to use this Forum you are confirming that you are 18 or older. No content shall be viewed by any person under 18 in California.

Induction annealer built around Annie

Very nicely done. I'm curious about your selection of the 12vdc 95cfm cooling fan. You have 115v input to the system, and a 150cfm muffin fan running on that power should draw somewhere around 1 amp so you wouldn't have to consider special switching or wire gauge restrictions and it would improve air flow dramatically. Is there a reason why the larger fan wasn't chosen?
 
Very nicely done. I'm curious about your selection of the 12vdc 95cfm cooling fan. You have 115v input to the system, and a 150cfm muffin fan running on that power should draw somewhere around 1 amp so you wouldn't have to consider special switching or wire gauge restrictions and it would improve air flow dramatically. Is there a reason why the larger fan wasn't chosen?

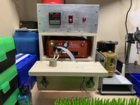
Having followed the Gina-Erik thread, I needed a 12vdc power supply for the timer power and the pump motor, so I chose the 12vdc fans. The primary choice on the fan was the sound (noise) level of 41 dbA, and the highest flow volume(99 cfm), and the lowest power level (3 watts). I really didn't want a loud unit, just to move the air over the tank, and to provide some flow for the 12vdc supply and the timer, which are convection cooled units themselves.

The Annie has an internal fan, and doesn't need extra airflow, but looking at the Annie case design with it's longitudinal fins, I felt that any airflow I could give it would help the Annie temperature and it's life. I just mounted the fan/tank/Annie in a flow path that would hit all of them, and flowing in the direction of Annie's internal fan.

Later when I added the radiator, I just used the same fan, as I still had adequate current capacity in the 12vdc power supply. So basically I have all the air flow I need, and it is fairly quiet.
 
I,too, am a retired analog IC Design engineer. So, I started designing my own annealer. After frying a few power MOS transistors, I found building stuff wasn't so much fun anymore, even with a professional lab in my garage from when I consulted.
So, I became an early adopter of the ANNIE!

I have had it almost since Fluxeon started building them. I've had plenty of time to experiment with different coils and wire types and settled for the water cooled non flux concentrater. I and my bottles of 750 Tempelac found ideal times for each of my cases I shoot.

Then, I wanted a fixture to hold the cases in a consistent position. I saw all the solenoid dropping set-ups and decided to go the easy way.

I bought a piece of 1/2" white plastic sheet that was 6" X 12" on ebay and carefully cut half round slots on the two sides to clear and align to the rubber feet on my Annie. The Annie sits on the back of the 12" side so the coil sits over the front of the assembly. I also bought some 0.2" dia glass rods (yup! on ebay) and drilled a 3/8" inch deep 0.2" dia or so hole under and concentric with the coil. Then, I measured carefully and made a glass rod just long enough so when I drop a case over it, the center of the neck is right in the middle of the coil. The one sticking out of the coil is the one for 6BRX cases and the short one laying on the plastic is for 284 WIN cases. The longer piece is a spare ready to be cut for 7X57 or 30-06 or maybe K31 cases. I measure them carefully and scribe a line with a small model file and snap the piece off. Then I fire smooth the end with a propane torch and I'm ready to go. Only problem in dropping cases on pointed down is that 6BR and 6brx are not heavy enough to stay down! I have to hold the primer end down while it anneals as
the inductive force wants to center the case in the field and that doesn't agree with the part of the case I want to anneal!

My pump is a $2 ebay aquarium pump and today after annealing 100 6BRX cases, the 1 quart of water in the reservoir barely got warm to the touch.Annie base.jpg
 
Last edited:
I am retired and it was a project to keep me busy and to play design engineer, like I used to be. So It was not a "build it as low cost as possible". I liked that Fluxeon had worked out the induction and coil and water cooling, I just packaged it all. It took longer to draw the detail parts than to build it, as I had to wait to get the parts to measure them to make the CAD layout.
I have a pretty complete woodworking shop in my basement, and I built the metal parts at my son's manufacturing plant. He makes steel shooting targets. https://www.custommetalprod.com/ So I had access to the metals, a plasma table, welders and a Bridgeport to drill the parts. The wood was $30, and the metals were free (mostly 1" sq tube, and 10 gauge steel).

approximate costs:
Annie, coil, water cooling stuff............................$568
Fan, Timer, Solenoid, DC supply..........................$ 71
Misc switches, cables, filters, fuses etc.................$ 55

total....... $ 694
Yep, took one look at that incredible contraption and the complexity of the build and the time and cost involved and said to myself "That man MUST be retired". Superb work and you are the RARE person who has my envy.
 
......."I could be completely wrong with my entire take on the situation and maybe the "early" designs and definitions and descriptions are NOT "fake" and it really IS possible for those early "demonstrator" units to do what they at least APPEAR (if the "slight of hand" involved in dropping already annealed cases into them or dropping un-annealed "cold" cases into a container of water that's not shown clearly or long enough for the viewer to see the cases in it aren't discolored unless you go back and watch/pause the video because you're "skeptical" of the product from the get-go as I was based on that copper coil thing) to do in SEVERAL "demonstration" videos that are very short in run-time, feature little or no "narration" and don't give the "big picture" OR the "promised" or at least implied technical information to be able to build a similar machine".....

YES... you are wrong !!

First of all you do not understand how induction annealing actually works and why it works with non-ferrous brass. I'm not going to go into the theory of it all, you can find that on the internet, and I just don't have time to explain it to you. Until you see the GinaErick annealer in use, first hand, there would be no convincing you it actually works. (banging my head on a cement wall)

I published the instructions for the GinaErick (parts list and all) because it is a really good induction annealer that does a good, consistent job of annealing case brass. I'm not trying to sell any thing to anybody. 100's of these units have been built so far, some in other countries around the world. They work, they do the job.

Since you already saw http://forum.accurateshooter.com/threads/induction-brass-annealer-redux.3908353/ What did you not understand ?

Gina
 
Last edited:
“I could be completely wrong with my entire take on the situation and maybe the "early" designs and definitions and descriptions are NOT "fake" and it really IS possible for thoseearly "demonstrator" units to do what they atleast APPEAR (if the "slight of hand" involved...”

The physics involved are well known and certainly not fake news. Google zero voltage switching (ZVS) circuits for more info. This is a pretty good intro.
I’ve built one and they work well.
 
MEYETGOBANG's misunderstanding is in assuming the induction annealers are DC devices, actually they are actually very high frequency AC devices.

Perhaps a more simple explanation of the induction effects is a transformer. In a normal transformer ac voltage is applied to one set of windings and the alternating flux is transferred to the other winding which generates a voltage proportional to the ratio of the number of turns in the two windings. The current is also proportional.

In the induction annealer, the primary is the multiple turns in the induction coil, and the secondary is the ONE turn of brass in the neck of the cartridge case. This means that the current in the brass case is VERY high, and causes the case to heat up. At these very high frequencies there are other "skin effects" that cause heating as well.

So basically it's a transformer with a single turn secondary.
 
I,too, am a retired analog IC Design engineer. So, I started designing my own annealer. After frying a few power MOS transistors, I found building stuff wasn't so much fun anymore, even with a professional lab in my garage from when I consulted.
So, I became an early adopter of the ANNIE!

I have had it almost since Fluxeon started building them. I've had plenty of time to experiment with different coils and wire types and settled for the water cooled non flux concentrater. I and my bottles of 750 Tempelac found ideal times for each of my cases I shoot.

Then, I wanted a fixture to hold the cases in a consistent position. I saw all the solenoid dropping set-ups and decided to go the easy way.

I bought a piece of 1/2" white plastic sheet that was 6" X 12" on ebay and carefully cut half round slots on the two sides to clear and align to the rubber feet on my Annie. The Annie sits on the back of the 12" side so the coil sits over the front of the assembly. I also bought some 0.2" dia glass rods (yup! on ebay) and drilled a 3/8" inch deep 0.2" dia or so hole under and concentric with the coil. Then, I measured carefully and made a glass rod just long enough so when I drop a case over it, the center of the neck is right in the middle of the coil. The one sticking out of the coil is the one for 6BRX cases and the short one laying on the plastic is for 284 WIN cases. The longer piece is a spare ready to be cut for 7X57 or 30-06 or maybe K31 cases. I measure them carefully and scribe a line with a small model file and snap the piece off. Then I fire smooth the end with a propane torch and I'm ready to go. Only problem in dropping cases on pointed down is that 6BR and 6brx are not heavy enough to stay down! I have to hold the primer end down while it anneals as
the inductive force wants to center the case in the field and that doesn't agree with the part of the case I want to anneal!

My pump is a $2 ebay aquarium pump and today after annealing 100 6BRX cases, the 1 quart of water in the reservoir barely got warm to the touch.View attachment 1031283

OMG, That’s a very simple solution @normmatzen. The solenoid case droppers on the souped-up models are way cool but this knocks it out of the park for simplicity. Does it make any difference if the cases wobble a little when you are annealing something a bit larger? Besides the 5 mm stirring rod you are using, I found glass tubes in many other sizes on EBay. If it matters at all, I may buy a few rods or tubes in 5, 6, 7, and 8 mm OD each, and then drill a shallow 7mm and a deeper 5 mm hole one side of the nylon board, then flip and drill 8mm and deeper 6 mm on the other side. That way I can mount all 4 tube sizes on one board using just the two half-circle cutouts you mentioned. Just have to be careful about the sharp ends on those tubes. Then the cases will center up good for me from .224” up to .338” calibers, and still only one nylon board needed. A 4” cleaning jag box will make a nice holder for the glass tubes. Pieces cut from nylon cutting boards make great non-marring vise jaw pads too by the way. I like the “hook it to the water line” answer from another post in this thread - my station will be right next to my utility sink in my garage so that’s easy for me. I wonder if the fan on Annie would blow some extra air from underneath if you cut out the middle of the nylon board, between the half circles? Annie’s probably not getting very hot anyway. I just need to throw a dress over her to keep her dry when I’m using the sink for other purposes. Thanks to you and @maconusmile for the great ideas.
 
Last edited:
What I have found is that this coil (water cooled, no core) with the cases hung on the top of a glass rod, the cases center themselves in the magnetic field. The only problem is that the 6BR based cases are not heavy enough to stay down so I hold them down with my finger for the couple seconds it takes to anneal them. Still, I don't believe that is as important as it appears as the way inductive heating works, an induced current is generated in the case neck from the work coil with the case being a shorted secondary turn.
It works out fine in the end!
 
For those that have recently bought an Annie from Fluxeon, did you have to pay California sales tax even if you didn’t live there? I’ve not yet contacted them directly, but when I tried to place an order via their web site, CA sales tax was added.
 
The start is edge triggered from contact open to closed and can be held in for as long as you want. It resets when the contact opens up. Even if held in for 10 seconds the annie will only cycle once.

My annie setup isn't as refined as the one posted above but has worked great for probably 8-10k cases. I have mine setup with 3 switches: one for the 12vdc fan, one for the motor that spins the case while being annealed and another switch that disables the micro switch. When I slide the shuttle with the case all the way forward it hits the micro switch that starts the annie. Once the annie is done I pull it back and the case falls into a pan and then slide it forward just a little and insert another case and start over. For setup I disable the trigger and slide the case forward onto the spinner and then add shims under the annie if using taller cases. Simple but effective.

I have the parts to build a hopper fed automated version but haven't got around to it yet. Maybe this winter.

View attachment 994527
View attachment 994528
Dakota Mike, what is the black electrical tape on the corner of the Annie for? Also, did you build your feeder yet?
 
What I have found is that this coil (water cooled, no core) with the cases hung on the top of a glass rod, the cases center themselves in the magnetic field. The only problem is that the 6BR based cases are not heavy enough to stay down so I hold them down with my finger for the couple seconds it takes to anneal them. Still, I don't believe that is as important as it appears as the way inductive heating works, an induced current is generated in the case neck from the work coil with the case being a shorted secondary turn.
It works out fine in the end!
@normmatzen, Your cooling water looks pink, what additive(s) are in it (antifreeze)? My Annie is going to sit beside a sink and I was thinking about just tapping into my cold water line and running the warm water back to the sink drain. In case any water conservationists are listening, we have plenty of water in Houston... We have hard water so occasionally I might need to run some white vinegar through the line to clean a little scale out.
 
@normmatzen, Your cooling water looks pink, what additive(s) are in it (antifreeze)? My Annie is going to sit beside a sink and I was thinking about just tapping into my cold water line and running the warm water back to the sink drain. In case any water conservationists are listening, we have plenty of water in Houston... We have hard water so occasionally I might need to run some white vinegar through the line to clean a little scale out.

maconusmile did the cold water line supply in post #28 of this thread. The pink is the anti fungal additive that is supplied with the Annie water cooled pump.
 
6shots,

I added some anti-bacterial chemical I use in a big whole house humidifier. This particular bottle was pink.
I don't know if the chemical is really necessary, but nothing grows in it!
 
F5E75C2B-81B6-46D2-B889-0CCAC74C332F.jpeg This thread is amazing! Finished my unit this last month and ran it through a 100 piece session. Works amazingly fast and consistent. Load, press button and repeat. Button will eventually be replaced with prox sensor. Not sure if I will ever add a case feeder as it would interfere with the tv hanging above.
 
blisle78;
Congrats on a nice compact unit. I am sure you will be happy with it.
I agree on the case feeder, it goes so quickly, a case feeder is not necessary.
 

Upgrades & Donations

This Forum's expenses are primarily paid by member contributions. You can upgrade your Forum membership in seconds. Gold and Silver members get unlimited FREE classifieds for one year. Gold members can upload custom avatars.


Click Upgrade Membership Button ABOVE to get Gold or Silver Status.

You can also donate any amount, large or small, with the button below. Include your Forum Name in the PayPal Notes field.


To DONATE by CHECK, or make a recurring donation, CLICK HERE to learn how.

Forum statistics

Threads
165,582
Messages
2,198,732
Members
78,989
Latest member
Yellowhammer
Back
Top