I finally crossed the finish line - the annealing assembly is up and running flawlessly. All bugs are dead by now.
The inspiration of this project came from the Shooters Forum (Gina and Eric in particular), Nicola Tesla and Annie Oakley for obvious reasons. Pure chance helped me find the perfect enclosure for this project on the top of a very dirty store shelf. The enclosure had built-in an 8 inch slow speed fan and a transparent side panel, which gave me the idea to install the induction coil inside the enclosure. I also provided a wall plate cable organizer, which shoots the annealed brass outside of the enclosure. [https://www.lowes.com/pd/Eaton-1-Gang-White-Recessed-Cable-Access-Recessed-Wall-Plate/3125961]
I ordered parts, more or less, from the list Gina had published - actually the contractor, A/V meter, 12 VDC power supply, the push buttons and a 120 VAC fan. Lack of space made me decide that all controls will be handled by a Programmable Logic Controller (SG2-20CR-12D). This gave me ample opportunity to add more functions and to be more precise with timing (annealing and cycle time) . I implemented three modes of operations - Test, Single Timed Shot and Cycling. The Test mode, with a combination of an electronic stop watch, Tempilaq 750 and the moving up and down of the motorized trap gate plate helped enormously to determine the annealing recipe and it saves a lot of brass. On the top of it, I added a "traffic control" - green, yellow and red (annealing) pilot lights to alleviate the otherwise boring process.
I decided to provide cooling from outside the enclosure - similar to the chilling units for a central A/C installed outside of a house. I call this "cooling on the rocks". Instead of crowding the enclosure with a tank with built-in pump, radiator and fans, I'm using an outside pickling jar with a pump and ice cubes.
The cooling of the electronics is very effective with both fans mounted in series. I experience no overheating of the capacitors.
My Power Supply is a 750 watts Mean Well 750-48. It refused to be housed in the little enclosure, so I did some remodeling. I liked the current limiting feature, especially when the coil has shorts. On the front I provided 1/4 inch piece of cooper tubing to reach the voltage-adjusting potentiometer.
I can anneal 6 mm Norma BR and 260 Remington, for now. I plan to add some more calibers (my shooting buddies immediately declared that "we" have an annealing machine). They are ready to "cover" my cost at the rate of 2 cents a pop. Since changing the annealing time requires a laptop (the only negative), I'm changing the caliber-specific recipe with adjusting the voltage and the immersion of the cartridge into the coil. I kept my annealing time for the above calibers at 4.83 seconds - 6 mm BR - 44.3 volts/17.5 amps, 260 Rem 54.3 volts/14.8 amps (the Amps are at the end of the annealing). The current is 8 to 9 amps in idle mode.
Also, I experimented with different size coils. I concluded that the magic 1/4 inch under the shoulder dark spot could not be achieved with a very short annealing time (small diameter coils, short annealing timing etc). In my opinion, it appears that some time is required for heat transfer from the neck to the shoulder. So I stuck with Erik's coil.
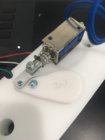
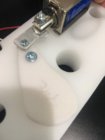
I found that GrocMax's ide


 a for the trap gate (tennis racket style ) is marvelous: It allows the use of any solenoid regardless of its travel distance. I also admired the craftsmanship of the members of this Forum. Personally, I had only some handyman tools.
Many many years ago, I worked on a similar project for a 150 kilowatts electrical motor-hi frequency generator for quenching iron parts. Now I closed the circle with the new technologies.
I would like to express some thoughts about the annealing machine from New Zealand. Regardless of the cost, the feeding of the brass is very clumsy. All units, presented in this Forum are years ahead in terms of being user-friendly. In addition, the programmed annealing parameters sound to me like a bureaucratic solution - one size fits all - no variance is allowed for different thickness or cartridge alloy or wildcat cartridges.
The inspiration of this project came from the Shooters Forum (Gina and Eric in particular), Nicola Tesla and Annie Oakley for obvious reasons. Pure chance helped me find the perfect enclosure for this project on the top of a very dirty store shelf. The enclosure had built-in an 8 inch slow speed fan and a transparent side panel, which gave me the idea to install the induction coil inside the enclosure. I also provided a wall plate cable organizer, which shoots the annealed brass outside of the enclosure. [https://www.lowes.com/pd/Eaton-1-Gang-White-Recessed-Cable-Access-Recessed-Wall-Plate/3125961]
I ordered parts, more or less, from the list Gina had published - actually the contractor, A/V meter, 12 VDC power supply, the push buttons and a 120 VAC fan. Lack of space made me decide that all controls will be handled by a Programmable Logic Controller (SG2-20CR-12D). This gave me ample opportunity to add more functions and to be more precise with timing (annealing and cycle time) . I implemented three modes of operations - Test, Single Timed Shot and Cycling. The Test mode, with a combination of an electronic stop watch, Tempilaq 750 and the moving up and down of the motorized trap gate plate helped enormously to determine the annealing recipe and it saves a lot of brass. On the top of it, I added a "traffic control" - green, yellow and red (annealing) pilot lights to alleviate the otherwise boring process.
I decided to provide cooling from outside the enclosure - similar to the chilling units for a central A/C installed outside of a house. I call this "cooling on the rocks". Instead of crowding the enclosure with a tank with built-in pump, radiator and fans, I'm using an outside pickling jar with a pump and ice cubes.
The cooling of the electronics is very effective with both fans mounted in series. I experience no overheating of the capacitors.
My Power Supply is a 750 watts Mean Well 750-48. It refused to be housed in the little enclosure, so I did some remodeling. I liked the current limiting feature, especially when the coil has shorts. On the front I provided 1/4 inch piece of cooper tubing to reach the voltage-adjusting potentiometer.
I can anneal 6 mm Norma BR and 260 Remington, for now. I plan to add some more calibers (my shooting buddies immediately declared that "we" have an annealing machine). They are ready to "cover" my cost at the rate of 2 cents a pop. Since changing the annealing time requires a laptop (the only negative), I'm changing the caliber-specific recipe with adjusting the voltage and the immersion of the cartridge into the coil. I kept my annealing time for the above calibers at 4.83 seconds - 6 mm BR - 44.3 volts/17.5 amps, 260 Rem 54.3 volts/14.8 amps (the Amps are at the end of the annealing). The current is 8 to 9 amps in idle mode.
Also, I experimented with different size coils. I concluded that the magic 1/4 inch under the shoulder dark spot could not be achieved with a very short annealing time (small diameter coils, short annealing timing etc). In my opinion, it appears that some time is required for heat transfer from the neck to the shoulder. So I stuck with Erik's coil.
I found that GrocMax's ide


 a for the trap gate (tennis racket style ) is marvelous: It allows the use of any solenoid regardless of its travel distance. I also admired the craftsmanship of the members of this Forum. Personally, I had only some handyman tools.
 Many many years ago, I worked on a similar project for a 150 kilowatts electrical motor-hi frequency generator for quenching iron parts. Now I closed the circle with the new technologies.
I would like to express some thoughts about the annealing machine from New Zealand. Regardless of the cost, the feeding of the brass is very clumsy. All units, presented in this Forum are years ahead in terms of being user-friendly. In addition, the programmed annealing parameters sound to me like a bureaucratic solution - one size fits all - no variance is allowed for different thickness or cartridge alloy or wildcat cartridges.


