• This Forum is for adults 18 years of age or over. By continuing to use this Forum you are confirming that you are 18 or older. No content shall be viewed by any person under 18 in California.

Induction brass annealer redux

If you are using a USB to serial connector from the laptop to your board you might consider a $8 bluetooth to serial wireless board.

God Idea, Thanks.
For now I am using just USB connector to the laptop. The cable is folded permanently in a small compartment.
 
A bit more on my auto feeding annealing machine. Like Oliver I have improvised with my cooling system, utilising a plastic peaches jar with screw top. It is about 500ml volume, and when used with the cooling radiator and fan is more than adequate for the job. I ran 100 cases through last evening doing them as fast as I could manage with my auto feeder dropping a case every six seconds - annealing time was 5.6secs - so it was rapid fire. At the end of the run the coil was warm and became cold to the touch in less than five minutes. Before installing the radiator and fan I was able to complete only 40 cases before heating became a problem. I have a small imersion pump sitting in the bottom of the peach bottle and the return trickles into the top of the bottle. All seems to work well.


I have included a couple of photos of the build. I don't think the fan blowing on the induction heater is necessary, but it draws very little power so I will leave it there. It looks a lot tidier after the shelves have been returned and a buch of cable ties applied.


One point with the auto feeder. The machine needs to lean back about 10 degrees so the cases stay on the rack at the case picker. Any less and they tend to work their way forward as the drum rotates and they can fall out. If your box is vertical the angle can be achieved by just putting legs on the front of the box.


I have the 40v power supply with it's mains feed on the top shelf to keep it away from any possible exposure to water should the cooling system ever spring a leak. I am in Australia and here we run on 240v, which is lethal if contacted so no chances taken there.


I have utilised the 'tennis racket' trapdoor as mentioned by others - I have been looking for a name for it. The solenoid arrived without any way of fitting anything to the shaft to attach anything. So I have cut a thread on to it and put on a couple of very small nuts and a spring washer. The rod to the trapdoor is actually a piece of repurposed wire coat hanger - I would be lost without coat hangers as they solve many problems. The trapdoor hole is 14mm, which gives only 1mm clearance around a large rifle case (243, 22-250, 6.5 Creedmor). I have attached a second piece of plywood on top of the trapdoor to ensure the cases land in the correct place and particularly that they stand up completely vertical every time they are dropped. The hole in the top piece is 19mm and goes right through. Then the hole in the bottom piece of plywood is bevelled from 19mm back to 13mm to direct the case to the trapdoor. Hope that makes sense. It also works a treat on small rifle cases - 222REM and 223. As I said in an earlier post, the shelf is fixed and I lift the heater a couple of mm to accomodate large rifle cases.


The auto feeder uses a 25RPM 12V motor, and a 12V speed controller, both from EBAY. The speed controller includes the on/off button, adjusting knob and display. The 'case picker' is a piece of pine wood made with a 54mm diameter hole saw from both ends and is attached to the drive shaft of the motor with a 'aluminium universal hub' from the local model/hobby/electronics shop. 600.jpg

C:\Users\Bruce\AppData\Local\Temp\msohtmlclip1\01\clip_image002.jpg


I used nails through the screw holes to secure it as the screws supplied were not suitable for this job. The hole for the drive shaft was too small so I had to drill that out to accept the drive shaft. The recess in the 'drum' to pick up the case was drilled (15mm) before hole sawing the piece and then refined by chisel. Be careful here as too deep and it will almost double feed and jam. The setting of the feed rails above the case picker is a trail and error process. My first attempt had probably 40 screw holes from different angle settings. Too wide or too narrow and the cases jam and won't drop into the pickup slot. There is a tongue at the bottom of the last ramp to push the case forward and direct it into the funnel. Two screws in the ramp turn the case, with the second screw stopping it from over rotating. I have a proximity sensor with an 8mm range (EBAY again). It is a three wire switch using the third wire to activate the timer and start the annealing process, and then activating the trapdoor. After much trial and error I eventually cut a hole in the funnel and inserted the sensor through it so the cases dropping past were all within the required 8mm. The density of the plastic funnel seemed to reduce it's sensing range to about 3mm which resulted in a lot of missed drops.
 

Attachments

  • 598.jpg
    598.jpg
    405.3 KB · Views: 355
  • 599.jpg
    599.jpg
    409.4 KB · Views: 354
  • 601.jpg
    601.jpg
    348.3 KB · Views: 366
  • 602.jpg
    602.jpg
    154.3 KB · Views: 328
Where there is a will, there is away (coat hangers :cool: 
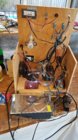
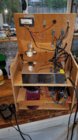
). Thank you for sharing Brucey Boy, I'm sure other builders will use some of your ideas.
Thanks again
Gina
 
I might have lots of questions as our electronics knowledge is not huge. Also, do any of you all have plans or such for a brass feeder?
Hi. I'm working on a 50-case feed that uses a solenoid door like the 'done' door. One timer trigger signals both doors at the same time, the longer drop from the feeder/turner path supplies a brass just after the cooked one exits. The feeder can be added or removed as required with 2 wing nuts. So far there's no jamming with 8x57. I'll post pics when I get them. Here's drawings. The stand has marks where the block and feeder go. The chute hangs from the block over the funnel. The 8mm chute only works with similar lengths, so there's the curvy one that feed the listed ones.
 

Attachments

  • 1 stand.JPG
    1 stand.JPG
    24.9 KB · Views: 123
  • 1 8mmchute.JPG
    1 8mmchute.JPG
    32.9 KB · Views: 119
  • 1 chute.JPG
    1 chute.JPG
    44.7 KB · Views: 124
  • 1 feed block.JPG
    1 feed block.JPG
    39.8 KB · Views: 119
  • 1 feeder.JPG
    1 feeder.JPG
    31 KB · Views: 104
Last edited:
BTW, unless I am very mistaken, new builders should be careful following the schematics in post 2 and 446 regarding the wiring colours for the voltmeter/ammeter shunt. Current purchases of such meters like

https://www.ebay.com/p/100v-100a-DC-Digital-Voltmeter-Ammeter-Amp-Volt-Meter-Current-Shunt-Motor-Solar/601732084?iid=400979479584&_trkparms=aid=555018&algo=PL.SIM&ao=2&asc=52569&meid=34876adea70c4c248da9079ed2dc55f3&pid=100011&rk%3

or

https://www.ebay.com/p/100v-100a-DC...-Shunt-Motor-Solar/601732084?iid=232782664218

have a different wiring colour layout. Thick black to the low side of the shunt, thick RED to the other side of the shunt which is in turn connected to the low side of the load (induction board) and yellow to positive side of the 48V supply.

(Personally I would also drive the Sestos timer from 12VDC i.e. use the B3S-2R-24 version, use a 12VDC coil voltage relay to switch the 48V supply to the induction board and, rather than connecting the "annealing LED" to the 48V supply connect it to the Sestos so that it runs off 12V and lights when 12V is supplied to the relay switching 48V. While the duty cycle is certainly not 100% a lot of power needs to be dissipated by the resistor if running off 48V.)
 
Last edited:
Looks cool 8mm.

I envy you guys who own or have access to CNC routing or milling machines. I would like two simple shelves in 3mm or 1/8th" aluminium sheet for the builds I am doing (80x100mm, filleted corners, 4 holes). Design - as basic as it gets. Sourcing someone to route the aluminium at a sensible price - very hard. Hard to justify buying a machine though, let alone the g-code, feed rate and clamping learning curve.
 
I'm intrigued by the case detector the EZ Annealer uses.

Having the case detector sit above the coil has some advantages in that the coil can be placed very close to the shelf. In my implementation an IR switch sits on the shelf. The OPB819Z is about 8mm thick and so limits further how deep a case can be in the coil (shelf thickness plus the thickness of the OPB819Z versus case length).

But it must be quite a good detector as the case would only pass through it for a tiny fraction of a second. I wonder what they have used.
It most likely employs the concept of an inductive proximity sensor. Inductive proximity sensors oscillates at a high frequency, if the metal is nonferrous the frequency will increase and vice versa. I'll stick with the IR sensors, that why I know the case didn't get jammed entering the coil (at least with the build I have). Of course if I had to buy my own annealing machine it would be the EZ Annealer, seems to be a well made unit and they aren't afraid to show you what is inside the unit.

This talks about making your own;
http://www.theorycircuit.com/arduino-metal-detector/
 
No its not logic level only, I drive a solid state relay directly off a digital out. You can run servos directly off the PWM pins as well as fan controls, Temp sensors can connect directly to the analog in. Timers, I2C, Serial etc are built in. You would need a relay if you use a solenoid since they draw a lot of power it seems so I used a servo instead.

I posted this one somewhere in this long thread a while back. I used a servo and photo resistor driver since I had them but your could connect directly with a little more code. They are less than $5 each. If you haven't written any "C" it can be more than a little daunting but the physical setup is easy.

This is just an FYI, As Gina said, build it however you want !

For my solenoid I use an IRF520 MOSFET board, you can pick them up for a few bucks, just search on Amazon for;
IRF520 MOSFET Driver Module for Arduino
Still need to put a flyback diode across the coil.
 
Looks cool 8mm.

I envy you guys who own or have access to CNC routing or milling machines. I would like two simple shelves in 3mm or 1/8th" aluminium sheet for the builds I am doing (80x100mm, filleted corners, 4 holes). Design - as basic as it gets. Sourcing someone to route the aluminium at a sensible price - very hard. Hard to justify buying a machine though, let alone the g-code, feed rate and clamping learning curve.

I drew the parts on CAD, but the chutes and paddles and stuff are hand bent steel strap or hack sawn shapes. Only the feed and exit blocks were milled - because it was easy practice. They could be hack sawed, too. If you have a vise or big vicegrips the straps are easy to bend to fit the drawings. Then epoxy to a mounting sheet cut with a grinder and cutoff discs. When I get pics you'll see all hand work.
 
While I am not going to do an auto feeder for my builds, I'm intrigued by the design used by EZ-Anneal and others here before them. So a case falls into the slot in the feeder disc and rotates around until it gets to the drop chute. A case can fall into the slot in either orientation - head or mouth first. How does the feeder ensure that the case drops head first? Is there a wire or similar straddling the drop chute mouth such that if the case mouth leads it rides over the wire until the head spills over the edge while gravity pulls the head down and under it in the case where the head leads?
 
For my solenoid I use an IRF520 MOSFET board, you can pick them up for a few bucks, just search on Amazon for;
IRF520 MOSFET Driver Module for Arduino
Still need to put a flyback diode across the coil.

These switch 12V to the fans (one per fan at a frequency above the audible range). Each 4mm wide. There are slots for two more which can be used to switch supply to a solenoid or relay switching 48V to an induction board etc. ;)

Did you guys place your diode close to the solenoid coil or merely across the wires at the other end? Not sure it makes a massive difference in this application.
 

Attachments

  • IMG_3247.jpg
    IMG_3247.jpg
    361 KB · Views: 88
While I am not going to do an auto feeder for my builds, I'm intrigued by the design used by EZ-Anneal and others here before them. So a case falls into the slot in the feeder disc and rotates around until it gets to the drop chute. A case can fall into the slot in either orientation - head or mouth first. How does the feeder ensure that the case drops head first? Is there a wire or similar straddling the drop chute mouth such that if the case mouth leads it rides over the wire until the head spills over the edge while gravity pulls the head down and under it in the case where the head leads?

Couple of simple ways to do it-

Horizontal (slight angle, 30 degrees?) feeder disc and drop chute ala Dillon etc.
Method #1 with case length slot in disc-
Heavy end always falls first if you make the drop slot about 1/2-2/3 the length of a case.
Method #2 with round slot- slot depth is about 1/4 case length, as disc swings around to top side cases oriented neck down fall out.

More vertical angle radially slotted feeder disc (45 to 60 degrees) and drop chute ala bullet feeder-
Only works with bottleneck cases, but as the disc swings the case towards the top, an adjustable rod kicks out cases oriented base up, any case oriented neck up the rod misses.
 
BTW, unless I am very mistaken, new builders should be careful following the schematics in post 2 and 446 regarding the wiring colours for the voltmeter/ammeter shunt. Current purchases of such meters like

https://www.ebay.com/p/100v-100a-DC-Digital-Voltmeter-Ammeter-Amp-Volt-Meter-Current-Shunt-Motor-Solar/601732084?iid=400979479584&_trkparms=aid=555018&algo=PL.SIM&ao=2&asc=52569&meid=34876adea70c4c248da9079ed2dc55f3&pid=100011&rk%3

or

https://www.ebay.com/p/100v-100a-DC...-Shunt-Motor-Solar/601732084?iid=232782664218

have a different wiring colour layout. Thick black to the low side of the shunt, thick RED to the other side of the shunt which is in turn connected to the low side of the load (induction board) and yellow to positive side of the 48V supply.

Well that explains that. No wonder I’m on my 3rd unit. No where could I find how the Ebay ones should be wired. Thanks for posting. It may hopefully save someone else from cocking it up like I did.
 
Thanks GrocMax. Given the EZ Anneal uses the same drop slot for all cases I guess one solves for the smallest case and it should work for the largest? (Looks like they use method #2 for 9mm and they have a sprung rod to help knock those oriented mouth down out.**) My PCB can easily drive a feeder like this. Connect the spare "switch 1" to the feeder DC motor and 12V is supplied for as long as there isn't a case in the coil. When a case is detected in the coil the feeder stops rotating. Merely a case ('scuse the pun) of making the feeder disc slots such that the next case doesn't come faster than a case can drop into the IR switch which at low RPM isn't a challenge.

** I also find it interesting that they can anneal short pistol cases. I guess that's why they use a pyrex tube. It can be completely inside the induction coil, not affect the electrical field and not be affected by heat. They can then have the tube act like the shelf hole to stabilise the case and leave it sitting upright. The trap door can then be flush with the bottom of the coil. Quite nice. I agree with ottsm though and prefer to be able to detect if a case is stuck in the coil.
 
Looks like EZ Anneal uses a combo of both methods for pistol, judging by the cases listed for the other feed plate kits I assume they use the gravity drop method, as case compatibility is based on length. Either way their case feeder unit is priced right.

Tube inside coil doesn't need to be glass, just needs to be non-conductive and somewhat heat resistant. Teflon or other high temp plastic works.
 
If anyone wants a fan for their project and is not going to attempt to drive it via PWM of its supply, I have two I will sell at a discount. They are these:

https://www.mouser.com/ProductDetai...S9kROxCw%2bL9LWrxEvjkuQxDsWz1gHa9do8kKX5mxw==

120mm x 120mm x 25mm, 108.2 CFM, 40.5 dBA.

Great, powerful and relatively quiet (given CFM) fans. Just can't be PWM driven. Cost me $13.12. Will sell for $10. One unused. The other just used for a little testing - long enough to realise my purchase mistake (less than 15 minutes of total use).
 
Anyone wanting help with Arduino code I've attached a copy of my latest code. Still has some commented out sections relating to a servo that I since replaced with a rotary solenoid. This uses a 4x20 LCD with a rotary knob for user control and input. The rotary knob with push button has 3 built in LED's that can be programmed for visual indication as well. Next revision I want to make a menu selection screen so what is shown while running can be customized. Currently I have two displays that can be selected on startup that flip flop back in forth depending on if I am adjusting the time up vs down. I have a flow meter and two thermistors as well as the standard amps and volts input. Also have fan RPM and PWM control on one fan. All the I/O is used up without going to a MEGA controller. With this program you can adjust the setpoint while annealing and also abort by pressing the button, this is useful if you start seeing things glow red and your not sure what the time needed to be to start with (the abort time is displayed so you can use that as the time needed). Peek amps are captured as well and the last time setpoint is saved when shutdown.

This is overkill for the task but its more about experimenting and having some fun along the way.


Code:
/**********************************
 * Annealing Circuit              *
 * By SMO 07/25/2018              *
 **********************************/

#include <Button.h> //note that this is a different version than the standard button help, it can be found at https://github.com/slavianp/improc/tree/master/Arduino/src/Library
#include <TicksPerSecond.h> // this can be found at https://github.com/slavianp/improc/tree/master/Arduino/src/Library
#include <RotaryEncoderAcelleration.h> // this can be found at https://github.com/slavianp/improc/tree/master/Arduino/src/Library
#include <Metro.h>
#include <elapsedMillis.h>
#include <LiquidCrystal_I2C.h>
//#include <Servo.h>
#include <EEPROM.h>
#include <PinChangeInterrupt.h>
#include <PID_v1.h>
#include <PWM.h>

// Assign I/O pins (Traffic Cop)
#define Encoder_A_Pin 2
#define Encoder_B_Pin 3
#define Encoder_Button_Pin 4
#define Encoder_LED_BLU_Pin 11
#define Encoder_LED_GRN_Pin 12
#define Encoder_LED_RED_Pin 13  // Note that LED is also on pin 13, avoid using as input except UNO board with buffer to LED
#define Case_Sensor_Pin 5
#define Relay_Output_Pin 6
#define Solenoid_Pin 7
//#define Drop_Servo_Pin 7
#define Flow_Sensor_Pin 8
#define Fan_PWM_Pin 9 // analogwrite pins on ATmega328p can only be on 3,5,6,9,10&11
#define Fan_RPM_Pin 10


#define Analog_Amps_Pin A0
#define Analog_Volt_Pin A1
#define Analog_Temp1_Pin A2
#define Analog_Temp2_Pin A3

// Thermistor Values
#define Thermistor_Nom     10000 //Resistance at 25 DegC
#define Thermistor_Temp    25    //Nominal temperature in DegC
#define Thermistor_Beta    3435  //Beta coefficient for thermistor
#define Thermistor_Res     10000 //Value of resistor in series with thermistor

// Initialize I/O values
boolean Relay_State = LOW;
boolean Pushbutton_State = LOW;
boolean Case_Sensor_State = LOW;
boolean Solenoid_State = LOW;
float Analog_Pot_Val = 0;
float Analog_Volt_Val = 0;
float Analog_Amps_Val = 0;
float Max_Amps_Val = 0;
float Analog_Temp1_Val = 0;
float Temp1_Steinhart_Val = 0;
float Analog_Temp2_Val = 0;
float Temp2_Steinhart_Val = 0;

// Initialize other values
int Seq_Step_Num = 1;
int Timer_Setpt = 0;
int Timer_Display = 0;
int Load_Delay_Setpt = 0500; //Delay time in mSEC, gives time for a brass to get into position for annealing
int Drop_Delay_Setpt = 0010; //Delay time in mSEC, gives time for the servo to get into drop position
int Case_Delay_Setpt = 0500; //Delay time in mSEC, gives time for brass to drop and clear the servo
int Home_Delay_Setpt = 0010; //Delay time in mSEC, gives time for the servo to get into home position
int Drop_Pos_Setpt = 90; //in degrees
int Home_Pos_Setpt = 0; //in degrees
volatile long Flow_Total = 0;
volatile long Flow_Interlock_Total = 0;
int Flow_Interlock_Val = 0;
float Flow_Rate = 0;
volatile boolean Button_Toggle_State = 0;
float Joules_Total = 0;
volatile long Fan_RPM_Total = 0;
int Fan_RPM_Rate = 0;
boolean Encoder_Inc = LOW;

// Set Memory location for last time setpoint, setpoint will be saved when power is down
int eeAddress = 0;
float eeData = 0;

// Setup PID for Fan Control
double PID_SP=1000, PID_PV, PID_OP, PID_Kp=2, PID_Ki=0.1, PID_Kd=.5; //Setpoint is multiplied by 10, example 950=95.0 degF
PID FanPID(&PID_PV, &PID_OP, &PID_SP, PID_Kp, PID_Ki, PID_Kd, REVERSE);

// Sequence Descriptions
char *Seq_Step_Desc[] = {
// 12345678901234567892  20 characters max
  "Step 0; not used    ",
  "Step 1; press start ",
  "Step 2; load case   ",
  "Step 3; load delay  ",
  "Step 4; start anneal",
  "Step 5; time anneal ",
  "Step 6; stop anneal ",
  "Step 7; drop pos    ",
  "Step 8; drop delay  ",
  "Step 9; case clear? ",
  "Step10; clear delay ",
  "Step11; home pos    ",
  "Step12; home delay  ",
  "Step13; Return      ",
  "Step14; Check Flow  ",
  "Step15; HIGH AMPS   "
};

// Set the LCD address and 20x4 display also define extra characters
LiquidCrystal_I2C lcd(0x20, 20, 4);
char Print_Buffer[40] = "";
#if defined(ARDUINO) && ARDUINO >= 100
#define printByte(args)  write(args);
#else
#define printByte(args)  print(args,BYTE);
#endif
uint8_t Up_Arrow[8] = {0x04, 0x0E, 0x15, 0x04, 0x04, 0x04, 0x04, 0x00}; //Define Up Arrow for LCD
uint8_t Dn_Arrow[8] = {0x00, 0x04, 0x04, 0x04, 0x04, 0x15, 0x0E, 0x04}; //Define Down Arrow for LCD

//Configure Metro Objects
Metro LCD_Print_Data = Metro(10);
Metro Analog_Inputs_Read = Metro(10);
Metro Flow_Calculation = Metro(10000);
Metro Flow_Interlock = Metro(1000);
Metro Joules_Calculation = Metro(100);
Metro Fan_RPM_Calculation = Metro(6000);

//Configure Timers
elapsedMillis Timer_Actual;
elapsedMillis Button_Debounce;

//Configure Servos
//Servo Drop_Servo;

//Configure Encoder
RotaryEncoderAcelleration Encoder_Knob;

void UpdateEncoder(){
  Encoder_Knob.update();
}

/***************************
 * Setup Program Begin     *
 ***************************/
void setup() {
  //Assign pin modes
  pinMode(Relay_Output_Pin, OUTPUT);
  pinMode(Solenoid_Pin, OUTPUT);
  pinMode(Fan_PWM_Pin, OUTPUT);
  pinMode(Fan_RPM_Pin, INPUT_PULLUP);
  pinMode(Case_Sensor_Pin, INPUT_PULLUP);
  pinMode(Flow_Sensor_Pin, INPUT_PULLUP);
  pinMode(Encoder_Button_Pin, INPUT);
  pinMode(Encoder_LED_BLU_Pin, OUTPUT);
  pinMode(Encoder_LED_GRN_Pin, OUTPUT);
  pinMode(Encoder_LED_RED_Pin, OUTPUT);

  //Get last setpoint before power down to set initial encoder setpoint
  EEPROM.get(eeAddress, eeData);

  //Initialize Encoder
  Encoder_Knob.initialize(Encoder_A_Pin, Encoder_B_Pin);
  Encoder_Knob.setMinMax(50, 2000);
  Encoder_Knob.setPosition(eeData); //Initialize Encoder Position with saved data
  attachInterrupt(0, UpdateEncoder, CHANGE);
 
  //Initialize LCD
  lcd.begin();
  lcd.backlight();
  lcd.createChar(0, Up_Arrow);
  lcd.createChar(1, Dn_Arrow);

  //Set initial postion for Drop Servo
  /*
  Drop_Servo.attach(Drop_Servo_Pin);
  Drop_Servo.write(Drop_Pos_Setpt);
  delay(Drop_Delay_Setpt);
  Drop_Servo.write(Home_Pos_Setpt);
  delay(Drop_Delay_Setpt);
  */

  //Setup PID
  FanPID.SetOutputLimits(100, 255);
  FanPID.SetMode(AUTOMATIC);

  //Setup PWM frequency
  InitTimersSafe(); //Initialize all timers except for 0, to save time keeping functions
  SetPinFrequencySafe(Fan_PWM_Pin, 25000); //Set frequency to 25khz
 
  //Set the flow meter pin change interrupt
  attachPinChangeInterrupt(digitalPinToPinChangeInterrupt(Flow_Sensor_Pin), Flow_Rising, RISING);

  //Sense positive transition of button interrupt
  attachPinChangeInterrupt(digitalPinToPinChangeInterrupt(Encoder_Button_Pin), Push_Button_Toggle, RISING);

  //Set the fan RPM pin change interrupt
  attachPinChangeInterrupt(digitalPinToPinChangeInterrupt(Fan_RPM_Pin), Fan_RPM_Rising, RISING);
}


/***************************
 * Main Program Loop Begin *
 ***************************/
void loop() {
  //Write Digital Outputs
  digitalWrite(Relay_Output_Pin, Relay_State);
  digitalWrite(Solenoid_Pin, Solenoid_State);

  // Read Digital Inputs
  // Pushbutton_State = !digitalRead(Pushbutton_Pin);  //this button is normally closed
  Pushbutton_State = digitalRead(Encoder_Button_Pin);  //this button is normally open
  Case_Sensor_State = digitalRead(Case_Sensor_Pin); //This sensor is normally open

  // Read Analog & Do PID's
  if(Analog_Inputs_Read.check() == 1){
    //To smooth analog signals use a single Pole Digital Filter [out=wt*out+(1-wt)*new]
    Analog_Amps_Val = 0.50 * Analog_Amps_Val + 0.50 * ((analogRead(Analog_Amps_Pin) / 1023.0 * 5000.0 - 5000.0/2.0)/100.0);
    Analog_Volt_Val = 0.75 * Analog_Volt_Val + 0.25 * (analogRead(Analog_Volt_Pin) * 0.079101); // span is 80 volts or 80/1023=0.078201 adjust as needed for accuracy
    Analog_Temp1_Val = 0.95 * Analog_Temp1_Val + 0.05 * (10000.0 / ((1023.0 / analogRead(Analog_Temp1_Pin)) - 1));
    Temp1_Steinhart_Val = Analog_Temp1_Val / Thermistor_Nom;
    Temp1_Steinhart_Val = log(Temp1_Steinhart_Val);
    Temp1_Steinhart_Val /= Thermistor_Beta;
    Temp1_Steinhart_Val += 1.0 / (Thermistor_Temp + 273.15);
    Temp1_Steinhart_Val = 1.0 / Temp1_Steinhart_Val;
    Temp1_Steinhart_Val -= 273.15;
    Temp1_Steinhart_Val = Temp1_Steinhart_Val * 1.8 + 32.0;
    PID_PV = Temp1_Steinhart_Val * 10.0;
    FanPID.Compute();
    pwmWrite(Fan_PWM_Pin, PID_OP);
    Analog_Temp2_Val = 0.95 * Analog_Temp2_Val + 0.05 * (10000.0 / ((1023.0 / analogRead(Analog_Temp2_Pin)) - 1));
    Temp2_Steinhart_Val = Analog_Temp2_Val / Thermistor_Nom;
    Temp2_Steinhart_Val = log(Temp2_Steinhart_Val);
    Temp2_Steinhart_Val /= Thermistor_Beta;
    Temp2_Steinhart_Val += 1.0 / (Thermistor_Temp + 273.15);
    Temp2_Steinhart_Val = 1.0 / Temp2_Steinhart_Val;
    Temp2_Steinhart_Val -= 273.15;
    Temp2_Steinhart_Val = Temp2_Steinhart_Val * 1.8 + 32.0;
  }

  // Calculate Flow Rate
  if(Flow_Calculation.check() == 1){
    Flow_Rate = (Flow_Total / 10.0) * 0.68913; //Flow meter; 1380 pulses/Liter or 5224 pulses/gal, gph = pps * 3600/5224 or .68913
    Flow_Total = 0;
  }
 
  // Calculate Flow Interlock
  if(Flow_Interlock.check() == 1){
    Flow_Interlock_Val = Flow_Interlock_Total;
    Flow_Interlock_Total = 0;
  }

  // Calculate Fan RPM's
  if(Fan_RPM_Calculation.check() == 1){
    Fan_RPM_Rate = Fan_RPM_Total * 10 / 2;
    Fan_RPM_Total = 0;
  }
 
  // Read Encoder
  long Encoder_Val = Encoder_Knob.getPosition();
  if(Seq_Step_Num == 1){
    Encoder_Inc = Encoder_Knob.isIncrementing();
  }

  // Calculate Timer Setpoint
  Timer_Setpt = float(Encoder_Val) * 10.0;

  // Calculate Joules (not accurate because of analog reading can only occur so fast)
  if(Joules_Calculation.check() == 1 & Seq_Step_Num == 5){
    Joules_Total = Joules_Total + Analog_Amps_Val * Analog_Volt_Val * 0.100;
  }

  // Set Debounce timer to max value to avoid rollover of value
  if(Button_Debounce >= 10000){
    Button_Debounce = 10000;
  }

  // Begin Sequence Logic
  switch(Seq_Step_Num){
    // Step 1 Wait for pushbutton toggle ON
    case(1):
      //Encoder LED's are reverse logic, Zero is ON
      digitalWrite(Encoder_LED_BLU_Pin, 1);
      digitalWrite(Encoder_LED_GRN_Pin, 1);
      digitalWrite(Encoder_LED_RED_Pin, 1);
      if(Button_Toggle_State == HIGH){
        //Encoder LED's are reverse logic, Zero is ON
        digitalWrite(Encoder_LED_BLU_Pin, 1);
        digitalWrite(Encoder_LED_GRN_Pin, 0);
        digitalWrite(Encoder_LED_RED_Pin, 1);
        Seq_Step_Num++;
        break;
      }
      break;
    
    // Step 2 Wait for Case, also store setpoint if changed
    case(2):
      //Only store new setpoint if it has changed
      if(eeData != Timer_Setpt){
        eeData = Timer_Setpt / 10.0;
        EEPROM.put(eeAddress, eeData);
      }
      if(Case_Sensor_State == LOW){
        Timer_Actual = 0;
        Seq_Step_Num++;
        break;
      }
      if(Button_Toggle_State == LOW){
        Seq_Step_Num = 1;
        break;
      }
      break;
 
    // Step 3 Wait for Load Case Delay
    case(3):
      if(Case_Sensor_State == LOW & Timer_Actual >= Load_Delay_Setpt){
        Seq_Step_Num++;
        break;
      }
      if(Case_Sensor_State == HIGH){
        Seq_Step_Num = 2;
        break;
      }
      break;

    // Step 4 Initialize annealing timer and Energize Relay
    case(4):
      Timer_Actual = 0;
      Max_Amps_Val = Analog_Amps_Val;
      Relay_State = HIGH;
      Joules_Total = 0;
      Joules_Calculation.reset();
      //Encoder LED's are reverse logic, Zero is ON
      digitalWrite(Encoder_LED_BLU_Pin, 1);
      digitalWrite(Encoder_LED_GRN_Pin, 1);
      digitalWrite(Encoder_LED_RED_Pin, 0);
      Seq_Step_Num++;
      break;

    // Step 5 Wait for Timer at Setpoint
    case(5):
      Timer_Display = Timer_Actual;
      Max_Amps_Val = Analog_Amps_Val;
      if(Timer_Actual >= Timer_Setpt || Button_Toggle_State == LOW){
        Timer_Display = Timer_Actual;
        Seq_Step_Num++;
        break;
      }
      // if the amps go high then goto step 15
      if(Analog_Amps_Val > 14.0){
        Seq_Step_Num = 15;
        break;
      }
      // if low flow then goto step 14
      if(Flow_Interlock_Val <= 4){
        Seq_Step_Num = 14;
        break;
      }   
      break;

    // Step 6 Denergize Relay
    case(6):
      Relay_State = LOW;
      //Encoder LED's are reverse logic, Zero is ON
      digitalWrite(Encoder_LED_BLU_Pin, 0);
      digitalWrite(Encoder_LED_GRN_Pin, 1);
      digitalWrite(Encoder_LED_RED_Pin, 1);
      Seq_Step_Num++;
      break;

    // Step 7 Set Drop Servo to drop position & Reset Timer
    case(7):
      Timer_Actual = 0;
      //Drop_Servo.write(Drop_Pos_Setpt);
      Solenoid_State = HIGH;
      Seq_Step_Num++;
      break;

    // Step 8 Wait for drop position
    case(8):
      if(Timer_Actual >= Drop_Delay_Setpt){
        Seq_Step_Num++;
        break;
      }
      break;

    // Step 9 Check for case clear & Reset Timer
    case(9):
      Timer_Actual = 0;
      if(Case_Sensor_State == HIGH){
        Seq_Step_Num++;
        break;
      }
      break;

    // Step 10 Wait for case to clear
    case(10):
      if(Timer_Actual >= Case_Delay_Setpt){
        Seq_Step_Num++;
        break;
      }
      break;
    
    // Step 11 Set Servo to Home Position & Reset Timer
    case(11):
      Timer_Actual = 0;
      //Drop_Servo.write(Home_Pos_Setpt);
      Solenoid_State = LOW;
      Seq_Step_Num++;
      break;

    // Step 12 Wait for servo home
    case(12):
      if(Timer_Actual >= Home_Delay_Setpt){
        Seq_Step_Num++;
        break;
      }
      break;

    // Step 13 Return to Step 1
    case(13):
      if(Button_Toggle_State == HIGH){
        digitalWrite(Encoder_LED_BLU_Pin, 1);
        digitalWrite(Encoder_LED_GRN_Pin, 0);
        digitalWrite(Encoder_LED_RED_Pin, 1);
        Seq_Step_Num = 2;
        break;
      }
      else{
        Seq_Step_Num = 1;
        break;
      }
      break;

    // Step 14 Check for flow
    case(14):
      Relay_State = LOW;
      //Encoder LED's are reverse logic, Zero is ON
      digitalWrite(Encoder_LED_BLU_Pin, 0);
      digitalWrite(Encoder_LED_GRN_Pin, 1);
      digitalWrite(Encoder_LED_RED_Pin, 1);
      if(Button_Toggle_State == LOW){
        Seq_Step_Num = 7;
        break;
      }
      break;

    // Step 15 HIGH AMPS
    case(15):
      Relay_State = LOW;
      //Encoder LED's are reverse logic, Zero is ON
      digitalWrite(Encoder_LED_BLU_Pin, 0);
      digitalWrite(Encoder_LED_GRN_Pin, 1);
      digitalWrite(Encoder_LED_RED_Pin, 1);
      if(Button_Toggle_State == LOW){
        Seq_Step_Num = 7;
        break;
      }
      break;
  }
 
  // Write to LCD Display except for last 150mSec of timer to prevent overshoot from writing to I2C, didn't want the complexity of a timer interrupt
  if(LCD_Print_Data.check() == 1 && (Timer_Actual <= Timer_Setpt - 150 || Seq_Step_Num != 5)){
    //1st LCD Row
    lcd.home();
    lcd.print("Set;");
    lcd.setCursor(4,0);
    dtostrf(float(Timer_Setpt)/1000, 5, 2, Print_Buffer);
    lcd.print(Print_Buffer);
    lcd.print(" Act ");
    dtostrf(float(Timer_Display)/1000, 6, 3, Print_Buffer);
    lcd.print(Print_Buffer);

    //2nd LCD Row
    lcd.setCursor(0,1);
    dtostrf(Analog_Volt_Val, 4, 1, Print_Buffer);
    lcd.print(Print_Buffer);
    lcd.print("V");
    lcd.setCursor(6,1);
    if(Encoder_Inc){
      dtostrf(Fan_RPM_Rate, 4, 0, Print_Buffer);
      lcd.print(Print_Buffer);
      lcd.print("RPM");
    }
    else{
      dtostrf(Joules_Total, 5, 0, Print_Buffer);
      lcd.print(Print_Buffer);
      lcd.print("J "); 
    }
    lcd.setCursor(13,1);
    if(Seq_Step_Num == 5){
      dtostrf(Analog_Amps_Val, 5, 1, Print_Buffer);
      lcd.print(Print_Buffer);
      lcd.print(" A");
    }
    else{
      dtostrf(Max_Amps_Val, 5, 1, Print_Buffer);
      lcd.print(Print_Buffer);
      lcd.printByte(0); //Print Up Arrow
      lcd.print("A");
    }

    //3rd LCD Row
    lcd.setCursor(0,2);
    if(Encoder_Inc){
      lcd.print("T1;");
      dtostrf(Temp1_Steinhart_Val, 5, 1, Print_Buffer);
      lcd.print(Print_Buffer);
      lcd.print("F  ");
      lcd.setCursor(11,2);
      lcd.print("T2;");
      dtostrf(Temp2_Steinhart_Val, 5, 1, Print_Buffer);
      lcd.print(Print_Buffer);
      lcd.print("F");
    }
    else{
      lcd.print("F; ");
      dtostrf(Flow_Rate, 4, 1, Print_Buffer);
      lcd.print(Print_Buffer);
      lcd.print(" gph  ");
      lcd.setCursor(13,2);
      if(Case_Sensor_State == LOW){
        lcd.print("Case; Y");
      }
      else{
        lcd.print("Case; N");
      }
    }

    //4th LCD Row
    lcd.setCursor(0,3);
    lcd.print(Seq_Step_Desc[Seq_Step_Num]);
  }
}

/***************************
 * Flow Meter Interrupt    *
 ***************************/
 void Flow_Rising(void){
  Flow_Total++;
  Flow_Interlock_Total++;
 }

/***************************
 * Fan RPM Interrupt       *
 ***************************/
 void Fan_RPM_Rising(void){
  Fan_RPM_Total++;
 }

/*********************************
 * Positive Transition Sense     *
 *********************************/
void Push_Button_Toggle(void){
  if(Button_Debounce >= 1000){
    if(Button_Toggle_State == HIGH && Button_Debounce >= 100){
      Button_Toggle_State = LOW;
    }
    else{
      Button_Toggle_State = HIGH;
    }
    Button_Debounce = 0;
  }
}
 
Anyone wanting help with Arduino code I've attached a copy of my latest code. Still has some commented out sections relating to a servo that I since replaced with a rotary solenoid. This uses a 4x20 LCD with a rotary knob for user control and input. The rotary knob with push button has 3 built in LED's that can be programmed for visual indication as well. Next revision I want to make a menu selection screen so what is shown while running can be customized. Currently I have two displays that can be selected on startup that flip flop back in forth depending on if I am adjusting the time up vs down. I have a flow meter and two thermistors as well as the standard amps and volts input. Also have fan RPM and PWM control on one fan. All the I/O is used up without going to a MEGA controller. With this program you can adjust the setpoint while annealing and also abort by pressing the button, this is useful if you start seeing things glow red and your not sure what the time needed to be to start with (the abort time is displayed so you can use that as the time needed). Peek amps are captured as well and the last time setpoint is saved when shutdown.

This is overkill for the task but its more about experimenting and having some fun along the way.

Sweet code, thank you for your hard work. would love to see a few more pics please. Very envious of your coding skills :)
 
Last edited:

Upgrades & Donations

This Forum's expenses are primarily paid by member contributions. You can upgrade your Forum membership in seconds. Gold and Silver members get unlimited FREE classifieds for one year. Gold members can upload custom avatars.


Click Upgrade Membership Button ABOVE to get Gold or Silver Status.

You can also donate any amount, large or small, with the button below. Include your Forum Name in the PayPal Notes field.


To DONATE by CHECK, or make a recurring donation, CLICK HERE to learn how.

Forum statistics

Threads
164,746
Messages
2,183,422
Members
78,493
Latest member
Tyson84
Back
Top