Follow along with the video below to see how to install our site as a web app on your home screen.
Note: This feature may not be available in some browsers.
This Forum is for adults 18 years of age or over. By continuing to use this Forum you are confirming that you are 18 or older. No content shall be viewed by any person under 18 in California.
Using a piece of 1" aluminum round, I threaded it 1/4-28, screwed a cap screw through it and tightened the aluminum round stock to the action and coated the round stock with release agent. The action and lug is a very tight fit into the stock (too tight, actually). But this provided a nice guide to put the action and aluminum 'mandrel' into the stock. A thin, high strength epoxy is loaded into the area I'd opened up around the periphery of the original pillar. It's displaced around the 'mandrel' and fills the cavity around itself and pushes into the enlarged space....you can see the round stock below the edge of the stock.
By the end of next week, it should be bedded and ready for final finish work.
Last pillar bedding job I did I bedded the action and pillars all in one go and then rebated the top of the pillars and did not re fill the rebate with anything. We are all agreeing that both the stock and bedding will shrink so regardless if we have steel to steel or a steel, devcon, action sandwich it's likely the action will be bearing harder on the pillars than anywhere else at some point.
Yes the stock material will shrink and move but if your checking your action screws with a torque wrench regularly your always getting consistent tension between the action and the stock without the point loading from the pillars.
At some point I'll commit to doing a glue in but until then I feel like the above gets around some issues
I've gone mostly to leaving the pillars short, where the head of the screw is still 1/16-1/8th in below the stock surface when done. Looks good and I don't have to worry about the slight angle of the stock this way. fwiw. Just another way.
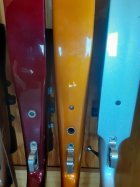
The two on the right are what I'm referring to and the one on the left uses an eschetchen. Probably spelled wrong. The one in the middle is a drop port. Not crazy about how it turned out but not bad either
If you're using a suitable bedding material such a resin-based compound and for the sake of discussion, let's say the thickness between the action and the highpoint of the piller is less than 50-thousandths, then you're not going to get any real or measurable compression of the bedding material. Consult your specs on Steelbed, Marine-Tex Gray, etc. and you'll see that. You're only applying 50-100max in-lbs with your guard screws vertically and horizontally, resultant recoil forces are even less.
If you're using a suitable bedding material such a resin-based compound and for the sake of discussion, let's say the thickness between the action and the highpoint of the piller is less than 50-thousandths, then you're not going to get any real or measurable compression of the bedding material. Consult your specs on Steelbed, Marine-Tex Gray, etc. and you'll see that. You're only applying 50-100max in-lbs with your guard screws vertically and horizontally, resultant recoil forces are even less.
The compression force will be ~1000 psi or more and its true you aren't going to compress the bedding material but I don't think that is what is being discussed. I thought the discussion was about the epoxy shrinking over time.
The compression force will be ~1000 psi or more and its true you aren't going to compress the bedding material but I don't think that is what is being discussed. I thought the discussion was about the epoxy shrinking over time.
My point was in response to question of bedding over the actual pillar surface and the often-heard response of how important the actual metal-to-metal contact was; as to the question of shrinkage and if so how much, that would require researching each brand of media being used.
If some epoxy resins are heated to expedite the cure, it can cause some of them to expand and then if suddenly cooled, to shrink. Also material that requires two or more parts to be mixed, can develop air bubbles that sometimes are almost too small to be noticed - if there's a lenghty cure time, those air bubbles normally will rise to the surface of the material and release, thereby reducing the volume (albeit an extremely small percentage) of the liquid form. If that were the case I would think that the shrinkage would be apparent to whomever did the bedding and/or the shooter if he removed the action from the stock.
The other thing that may be a factor is "wear" as most of the putty-type bedding material is rather course and gritty, it is rather easy for the material to wear away at the heavier contact points where stock and action move against each other - but again that would be during disassembly.
While over the 40-years or so that I've been bedding I'm not aware of - nor seen - any indication of receding or shrinking of bedding material - AFTER FULL CURE - that I've used which has included Acraglas, Pro-Bed, variants of DevCon, Steel Bed, Marine-Tex, Apoxie Sculpt, and various thickened fiberglass and epoxy resins. I add that most of the materials above actually have a much longer time (7-14 days) to achieve a 100% total cure than what's stated or admitted by their manufacturers. I have seem thin edge areas, especially sharp ones, break down in to loose powder over time, but not any of the major bearing surfaces, 'hard' contact points or long runs curved or flat. I will admit that I tend to spend more time building, modifying, and customizing stocks, than shooting and repetively disassembling them as those of you who shoot thousands of rounds, so my experiences may not be the same. However, I certainly want to improve my methods and my craft, so I'm open minded to this issue.
Sorry to have initially commented 'off-center' so to speak,
Finished up the bedding and am happy with the results. There was one final insult to the Kodiak and that was taking the blind rear action screw and making it a through hole. Doing this tweak on a Kodiak or Panda is very worthwhile as you gain at least three extra threads for purchase and eliminate the possibility of the action screw feeling tight when in fact it's bottomed out in the receiver.
A .211 pin gage is a nice fit inside the original threads:
A little center drill action establishes a good starting point:
A #8 makes a nice .199 hole for the tap:
All done except for a quick deburring. You can see the original threads and how much additional purchase this mod gets you:
Barrelled action tightened into the bedding, indicator at '0':
Front action screw cracked loose shows .001 movement. With the front screw tightened, cracking the rear screw loose shows no movement on the indicator:
I was pretty happy with amount of movement as I used these .500" head diameter 82 degree screws into mating 82 degree recesses in the pillars for a lot of contact area. With this much contact on an angled interface, the indicator will at times show some 'fake out' movement that isn't really there due to the fact that the screws don't 'fall away' instantly from contacting the pillar like a flat-to-flat interface does.
I too am annoyed by the holes not going all the way through. Not just on Kelblys but others as well. I get it, I think...it looks nice but it's not a game changer cosmetically and to me, form follows function, especially on something like this where I think the upside far outweighs the down. I've seen several stripped threads in that hole, particularly on the aluminum actions. Just my 2 cents is all. Nice work again Al!
If the bedding crushes over top of the pillars Im in big trouble since I have been doing it that way for almost a decade for a reason. I did used to do it with pillars touching and those rifles shot well too but I changed after noticing what Al is talking about.
Out of the box, the front screw on a Panda/Kodiak/Atlas, etc. is all the way through. It's just the middle and rear on the Panda/Kodiaks that is blind. I do use some sealer on the front screw threads to prevent any solvent leakage even with a really good bore guide.
There's .125" of Pro Bed over both pillars. The top O.D. of both pillars is reduced a bit so the bedding also flows around the pillar and locks on to it.
If the bedding crushes over top of the pillars Im in big trouble since I have been doing it that way for almost a decade for a reason. Try, test, measure, results, ext. View attachment 1488700
This Forum's expenses are primarily paid by member contributions. You can upgrade your Forum membership in seconds. Gold and Silver members get unlimited FREE classifieds for one year. Gold members can upload custom avatars.


") -Al
-Al


") to the Kodiak and that was taking the blind rear action screw and making it a through hole. Doing this tweak on a Kodiak or Panda is very worthwhile as you gain at least three extra threads for purchase and eliminate the possibility of the action screw feeling tight when in fact it's bottomed out in the receiver.
to the Kodiak and that was taking the blind rear action screw and making it a through hole. Doing this tweak on a Kodiak or Panda is very worthwhile as you gain at least three extra threads for purchase and eliminate the possibility of the action screw feeling tight when in fact it's bottomed out in the receiver.


