• This Forum is for adults 18 years of age or over. By continuing to use this Forum you are confirming that you are 18 or older. No content shall be viewed by any person under 18 in California.

Does anyone shoot ELR with a 284?

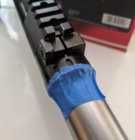
More about the Barloc:

Some people saw Barloc equipped rifles have a POI shift after hitting their barrel but it was an improper installation causing that. Some people were using shouldered barrels that were not cut to the right dimension. That allowed the Barloc tensioner to bottom out before creating enough tension between the coned surfaces. You could do the same thing with a barrel nut Barloc but not if you followed the instructions.

I have come up with a trick to make the tricky part of install easy:

You are supposed to tighten the barrel shoulder or barrel nut enough to open the slot in the tensioner as wide as the barrel nut wrench. What I do is remove the socket head capscrew from the tensioner, screw it in from the other side, put a washer inside the slot and use the capscrew to push against the washer and spread the tensioner as wide as the barrel nut wrench. After that I can screw everything together finger tight, remove the capscrew and washer then put back the capscrew in the right side and tension as normal.

That method leaves a gap between the sides of the tensioner so all of the tensioner force is securing the barrel, not just bottoming out. Being able to do it finger tight makes it a lot easier to control headspace and be more consistent.

Since I could not do the precision work I wanted to do to square my receiver face to my receiver threads, the Barloc became a key component of the build. It's expensive but I didn't have to buy an action wrench so that makes it more reasonable. It's not just a fancy recoil lug/barrel nut.
 
I decided the best order of operations was to bed my recoil lug first and work on my bore sighting while that is setting up.

I'm about to mix up my Devcon 10110 and bed this thing.

Hopefully I'll be able to use my G3 reticle to tell how much slope to add during my scope rail bedding. I'll use my setscrew and caliper to dial it in, confirm the bore sighting again and then bed the rail.
 
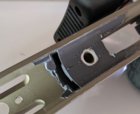
Here are a couple pictures of the cut on the scope rail for the Nucleus style recoil lug:IMG_20191116_122656~2.jpg IMG_20191116_122705~2.jpg

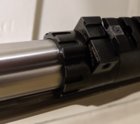
Here is a full length shot from before bedding:IMG_20191116_123835~2.jpg

I'll take some pictures of the folder mod and bedding later.
 
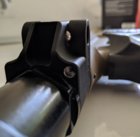
For more Barloc info, note the gap in the tensioner, this ensures that the torque applied to the tensioner screw creates force between the barrel nut and recoil lug, not just clamping the two sides together.

The main cut I had to make in the rail is the recoil lug slot but also I had to make a cut to clear the tensioner at the front.

I think the first slot of the rail is probably useable but some rings may need to be clearanced for the tensioner. I think my six screw rings would need a cut. With that slot cut out, the strength might not be ideal, I probably wouldn't rely on that slot to return to zero if I was mounting and dismounting rings often.

Luckily my eye relief works out to put my front ring in the second slot.
 
Oh, sweet release:

I was able to get my action out and clear out most of the masking tape.

I might Dremel out some of the excess bedding compound but only for cleanup, it's not creating any issues.

I am pretty happy for my first bedding job.

It is pretty much a "skim coat", very thin between the receiver bottom and the aluminum chassis. It's thin to the point of translucent where the V-block bedding contacts the receiver. The area I bedded was the recoil lug and front of the receiver extending an arbitrary amount past the magazine well opening on both sides.

My motivation for this is that the chassis was designed for the standard Axis recoil lug and it had essentially a big chamfer behind the lug. It had at most 50% contact with the lug and only near the edges. It seemed like a recipe for a bent recoil lug and mine is only 0.187" so I wanted full contact for less bending moment.

The only area that went bad is the area surrounding the front action screw. Bedding got in to the hole, forming threads. I unscrewed my front action screw and installed a Forrester bedding guide screw (no head) which was actually just threaded in to the epoxy threads and then pounded out the action which ripped a small section of bedding out.

I'm not worried about that since I can tell by the thin translucent layer that the bedding is not changing the way the action sits in the chassis, it just increases the contact surface beside the small bit that tore out. It's about a 1/2" circle, not big.

The release is pretty clean. I used painter tape around the edge of the recoil lug, under the Barloc tensioner and barrel nut, inside the magazine well and masking the sides of the chassis to make cleanup easier. Before it dried, I used a cotton swab with rubbing alcohol to remove some excess bedding compound that had flowed in to the magazine well and wiped the sides with a plain paper towel to remove the excess there.

On top of the masking tape and on the receiver I used generic dollar store black shoe polish as a release agent. It worked better than I expected. I spread it on pretty thin with a paper towel and buffed it a bit with a clean section of the same towel. I was hoping that I wouldn't have too many voids in the bedding, poor adhesion or poor surface quality. I didn't get any of those issues. The bedding mirrors the stamped lettering under the action and it looks very smooth on the recoil lug area.

It seems like exactly what I wanted but I will reserve final judgement until I see how it shoots.
 
Here is a picture of the bedding:
IMG_20191118_135511~2.jpg
I think it looks really good except for the pull out around the screw hole.

You can see near the sides where the bedding is super thin in the V-block contact area.

I like the nice corner between the recoil lug cut and the receiver. It was a big chamfer before. Hopefully this will keep the recoil lug from bending.

Here is a picture of my folder mod:
IMG_20191118_135341~2.jpg
It's pretty simple, just a setscrew that takes up the slack when the folder is latched.

I'm going to keep it tight for a while so the setscrew makes a seat for itself, then I will use thread locker to hold it in position. I don't want to use thread locker and have it loosen up, that is why I'm waiting.

I did some bore sighting work. I know how much I can angle the rail and still leave 2 mils from bottoming out. I'm going to need some longer base mounting screws to make it work.

I want to leave 2 mils because I don't want to cut it closer and then not be able to get to a 100 yard zero.

Oh, it looks like that slope is going to give me about 23 mils of drop with the knob. The reticle is marked at 10 mils but if I turn down the magnification to about 12x, I can do up to around a 13 mil hold. Looking at JBM, it looks like I can dial that to a little over 2,000 yards and hold to about 2,500.

The screws are putting me at a standstill. Unless I can find them locally, I will be waiting for Brownells before I can bed the scope rail.

I'll see what I can do for a forend and rear bag rider this week.
 
Last edited:
Oh, I should mention my 1/4-20 setscrew in the rear (unused on an Axis) worked as intended. Instead of trial and error, I used the reticle of my scope to see how much slope (in mils) I needed to add to get zero at my desired setting, then I converted that to inches of slope. With that number and my calipers, I was able to dial in the slope, lightly tighten the mounting screws, then replace the scope and confirm my desired bore sight.

That process required only two iterations to dial it in.

Hopefully my rail bedding will create a nice solid mounting for my scope and turn out as well as the recoil lug bedding.

I think I will need to improve my masking and cleanup to get it right and pretty.
 
Something I wasn't expecting happened, the lost replacement package from Glades Armory arrived today.

Glades sent me three packages in order 1-2-3. I received them in order 1-3-2. Packages 1 and 2 included both bolt sleeves and bolt handles, package 3 was just a bolt handle (from a new batch) and the bolt handle in package 2 was from the same batch as #1 but reworked (I believe).

After testing all permutations, bolt sleeve #2 with bolt handle #3 is a winner. The bolt handle can drop with the bolt assembly screw fully tightened. No other combo would drop when fully tightened.

I have to thank Glades for working with me on this. They did everything I could reasonably expect and in a timely manner, the delay was just USPS dropping the ball.

Evidently I am one of the first to try the Glades Armory Axis bolt sleeve with the Glades Armory Axis bolt handle. The bolt sleeve was a little off in the first batch and the batch of bolt handles that #1 and #2 (reworked) came from was also off but not enough for the problem to show up with a factory Savage bolt sleeve.

They seem to have a handle on the issue now (no pun intended).

I think the new batches are probably good to go but in a previous attempt to make bolt handle #3 work with bolt sleeve #1, I peened the interior surface of bolt handle #3 in an attempt to increase the stack without using two " ( " shaped shims between the bolt sleeve and the interior of the bolt handle.

I think my final combo would have worked out of the box with no peening but I didn't try it so I can't be 100% sure.

Any way, thank you Glades Armory. I wish the process was smoother but USPS is to blame for that.
 
One more note, I think the new bolt sleeve has given me more clearance for the wave washer under the bolt head baffle and has reduced the bolt lift quite a bit.

Opening the action seems a lot smoother. Closing, it seems to bind a little if you put any side force on the bolt handle. I'm going to have to look for that bind to try to reduce it but that's minor compared to a heavy bolt lift.

Oh, there is nothing that leads me to believe the bind is related to the Glades parts, I think it's just a part of the Axis in long action form with too much slop between the bolt sleeve and receiver bore and not much of the bolt in the receiver when it is pulled all the way back...
 
Last edited:
I'm trying to get parts to build up an entire spare bolt.

I have spares for the trigger and even the barrel (kind of) so I should be able to quickly deal with anything that might break.

Savage is being a bit of a pain in the ass on this, evidently the firing pin, the firing pin spring, the cocking piece and the bolt assembly screw are "restricted" and can only be ordered by an FFL.

I have to ask a friend for a favor to get that stuff.

I'm also trying to order a couple SSS extractor upgrade kits so I can make sure everything is dialed in to cycle, extract and eject.
 
I got my longer screws for the scope base, scuffed the bottom of the base, masked everything with painter's tape, applied shoe polish in release areas, mixed my Devcon steel epoxy and angle bedded my scope rail this morning.

It has been cold so I warmed everything with a heat gun to try to kick off the Devcon.

I just looked at it, removed the painter's tape and with it most of the remaining excess epoxy (a fairly thin layer that I squeegeed out on to the tape but could not remove completely before the epoxy set up a little).

It is looking good, I just have to wait until tomorrow night to see if it will release.

I decided to enclose the recoil lug tab completely and apply enough bedding to refill the entire notch in the first Picatinny rail lug. Right now because of the masking tape thickness, the epoxy is standing a little proud at the seams and the filled in notch but I'll scrape it flush with a razor blade after it has finished curing.

That just leaves the extended forend (with bedding) and a bag rider for the stock as the only things I need to do to the rifle beside a clean up cut with the ring reamer (to ensure everything is lined up and stress free).

I'll take pictures after I try to release it and clean up the edges.
 
Oh, I should add a few things about the angle bedding and the Devcon 10110.

I drilled and tapped the unused (on an Axis) scope base rear mounting hole and installed a 1/4-20 setscrew. This allowed me to adjust the angle with some precision.

At the front of my rail, the recoil lug tab, scope rail notch and the front scope rail screw constrained the scope rail pretty well and theoretically kept it from tipping left or right. At the rear, the rear most scope rail mounting screw held the rail down against the setscrew which held it up. I alternately loosened and lightly tightened those screws to get the front of the rail flush with the front edge of the receiver, hit the measurement I was looking for at the rear and maintain a stress free bedding condition.

I applied a fairly thin layer of epoxy under the front end of the rail, knowing most of it would get squeezed out. I left some space around the screw holes trying to minimize the amount of epoxy squeezing in to the threads.

Under the rear of the rail, I applied a thicker layer but left a pretty big gap around the screw holes. Since I knew there would be a wider gap at the side, I decided to use my popsicle stick to push epoxy in to the gap to fill the area under the rail so I wasn't too concerned about not applying enough epoxy before placing the rail.

All four mounting screws and the setscrew were given a heavy coating of shoe polish on the threads and heads. It worked for my front action screw when bedding my chassis so I did it again.

Initially I put in all four mounting screws but did not tighten the middle two until the angle of the rail was set, then they were turned to a light finger tight to preserve the stress free condition of the bedding.

Then I packed more epoxy in to the slot for the recoil lug tab and under the rear of the scope rail (from the sides).

After working to smooth out and radius the bedding between the rear of the action and the back side of the rail, I used a heat gun to warm the rail, receiver and epoxy so it would begin to kick off.

I must say the Devcon 10110 steel epoxy putty is great to work with.

When I bedded the front of the action, it was pretty easy to control where the bedding went. Most of the bedding tutorials and videos I looked at warned of voids and air bubbles. So far I have had no trouble at all with voids and air bubbles. Bedding the scope rail is more visible after the fact so I took steps with masking to control the excess and create clean lines. As I said before, it's looking good.

I was not sure how difficult bedding would be because I've never done it before. With the Devcon 10110, no problems so far. Reading reviews of other bedding materials, I think I chose exactly the right product.

My method for setting the scope rail angle was to bore sight, and since I have an FFP scope, count how much angle I needed with the reticle hashes, then convert that angle to inches at the length of my receiver, add to the baseline rear rail height, adjust it to that level with the setscrew, then retest bore sighting. It only took two iterations of that process, then I used the rail height measurement I settled on to set the height while I was bedding. It was very easy and I think I have about 50 MOA total slope (20 MOA from the rail, another ~30 from the angle bedding).

I don't think I could have done this any better. Initially I was thinking about using feeler gauges and bedding the front before bedding the rear instead of bedding both at the same time. I am really glad I used a setscrew instead.

There is only one bad thing about the setscrew. The end is tapered and the bedding surrounds it. If I or someone else forgets about that and tries to release the rail bedding by loosening the base screws and tightening the setscrew, it might pop the bedding off of the scope rail. I will probably leave it but the right thing to do would be to loosen the setscrew, drill out the bottom of the hole and run a 1/4-20 tap all the way through from the top.
 
Perfect release again.

I got impatient and decided to hit the rail and receiver with my heat gun this morning.

After about a minute of heat, I was surprised when the base screws cracked loose so easily.

There are some epoxy threads at the front of the rail. I'll have to drill that out, no big deal.

At the back, it looks like I didn't manage to push the epoxy in all the way to the screws but the perimeter is solid. I may address that later.

For now, I have put the rail back on and will let it cure for a few days before I clean up the edges.

I think my scope rail bedding is going to work out just as well as my chassis bedding (but cleaner since it is visible).
 
I went to order my magazines and grip at the MDT Black Friday sale. Their website is pretty broken but I got an order in through email.

I might add on a couple other things. I have to look at the other items on my Black Friday shopping list.
 
I got confident enough in the epoxy strength to pop off my scope rail again and clean up the edges of the bedding.

Here is the final(?) result:

IMG_20191129_223514~2.jpg

IMG_20191129_223603~2.jpg

You can see how I built up the notch that I cut out of the first rail lug.

I don't intend on using it with my initial scope mounting but it is nice to have it there.

I think I achieved the objective of stress free bedding. It came off easily and the bedding surfaces mirror the recoil lug and receiver very well beside one small void on top of the recoil lug and two larger voids surrounding the rear rail mounting screws. When I put it back on it had a snug fit and seemed to have even contact with no springing of the rail as I tightened the mounting screws (with firmer pressure than during the bedding process but not fully torqued).

When I'm ready to do the scope ring reamer clean up cut, I will Loktite and torque the mounting screws so the rail won't be able to bend or twist at all.

I think this bedding is one of the best things I have done. It positively locates the recoil lug when I replace a barrel so I don't have to re-do the chassis bedding because of a barrel swap. It is a fully bedded recoil lug for the scope rail so my mounting screws are not dealing with recoil forces. It creates a more consistent and hopefully stable contact between the scope rail and receiver. Lastly, it gives me the slope to use all the elevation in my scope which should let me dial to 2,000 yards and hold over to 2,500 theoretically.

It's like the rug that brings the room together, hopefully making my X-Caliber barrel, partially bedded chassis, lightened Accu-trigger and budget FFP scope work together.
 
My forend project is next. Initially I was thinking about cutting my extrusion to make it fit around my chassis but since my shop access is much less than ideal, I'm thinking about filing my chassis to fit. It's about 0.090" on each side. Taking that out of the extrusion would leave a very thin piece of aluminum and probably require a milling machine. The chassis has a bunch of meat there and I have no need to preserve it for a future project.

I have been thinking about finishing it also. Printed vinyl wraps are becoming a thing for guns. I like the two-tone with the chassis FDE but I'm thinking about going for a camo in a desert color to wrap the chassis and bare forend.

The Cerakote on my chassis is not doing too well. Several edges are worn and showing bare aluminum. A wrap will cover that up and I have wanted to try one for a while.

If it sucks I can always take it off and paint it.

I was also thinking of covering my stainless barrel in heat shrink tubing. I might try stove paint but not until I take the barrel out of the action for some reason. The heat shrink would be easy to do and easy to remove.

Any way, I have a nice vixen file and I'll need it.
 
Mossy Oak had 15% off so I bought 4 square feet of wrap vinyl and some 3M primer. With shipping it was still under $30, not bad.

I bet it will slide well in my rest.
 
I got 4' of 1.5" polyolefin heat shrink tubing from eBay. It was a little under $8.

We will see if it was brilliant or dumb when it arrives.
 

Upgrades & Donations

This Forum's expenses are primarily paid by member contributions. You can upgrade your Forum membership in seconds. Gold and Silver members get unlimited FREE classifieds for one year. Gold members can upload custom avatars.


Click Upgrade Membership Button ABOVE to get Gold or Silver Status.

You can also donate any amount, large or small, with the button below. Include your Forum Name in the PayPal Notes field.


To DONATE by CHECK, or make a recurring donation, CLICK HERE to learn how.

Forum statistics

Threads
165,794
Messages
2,203,239
Members
79,110
Latest member
miles813
Back
Top