Follow along with the video below to see how to install our site as a web app on your home screen.
Note: This feature may not be available in some browsers.
This Forum is for adults 18 years of age or over. By continuing to use this Forum you are confirming that you are 18 or older. No content shall be viewed by any person under 18 in California.
I have seen pics of an aftermarket milling machine quill digital readout attached to a tailstock for precise depth control, but I've really no reason to spend the money on one as the graduations on my tailstock dial are accurate.
Dave I use a JGS reamer holder in the tail stock.when I get close to final depth i lock off the carriage and use it as a stop for the tailstock to butt up against.then I just use the graduations on the tailstock hand wheel to obtain final head space dimension.i used to use a travel indicator.
I started out using a Jet 12X36 lathe. I don't think it had a graduated handwheel. As a newbie I wouldn't have trusted it. I moved on to a Nardini 10X30. Fantastic lathe. It had a graduated handwheel but I was comfortable using the travel indicator. I modified a tailstock off a 6" Emco to mount on the tool post on my Haas. I had moved on by this time. It has a graduated hand wheel. No travel indicator in sight.
For decades I used a 2" travel indicator on a magnetic base for both the tenon length and reamer travel. The only slack I had to get out were in the threads in the tailstock. Bump the reamer a couple of times to seat it in the chamber and set the dial to zero. Then go to the number. I could see where there could be slack in the mount using a caliper.
This was his exact exact recommendation and didn’t like the caliper setup as I described to him.
We didn’t get real detailed on the tool post setup. I assumed the way he spoke, the compound is how you would feed because the comment was about the graduations on it being more accurate than the tailstock.
Dave I use a JGS reamer holder in the tail stock.when I get close to final depth i lock off the carriage and use it as a stop for the tailstock to butt up against.then I just use the graduations on the tailstock hand wheel to obtain final head space dimension.i used to use a travel indicator.
Wouldn't the reamer inserted into the chamber be a simpler, more trust worthy stop? Fewer moving parts.
Insert reamer, move tailstock forward, Lock tailstock, runup the hand wheel, bump the reamer a couple of times watching the number on the handwheel, zero handwheel, slightly back reamer off, turn on lathe, go to your number.
This was his exact exact recommendation and didn’t like the caliper setup as I described to him.
We didn’t get real detailed on the tool post setup. I assumed the way he spoke, the compound is how you would feed because the comment was about the graduations on it being more accurate than the tailstock.
Threads are threads. Even in my wildest moments of paranoia, how far could the tread pitch be off in .030". We think in zeros but reality its in thousandths.
Just having a conversation here.
Don't you have to clean the chamber regardless for each measurement? If you get within .040" it should require one measurement and a final cut with the reamer. If you have to worry your way in your process may need improving.
As far as cleaning I have air inline with the coolant. I shut the oil off and step on a foot valve for the air. I hold a cup over the tenon to catch the oil. Blow out with hand held nozzle, wipe clean with a patch on a chamber swab and take a measurement.
I do about the same in two steps. I measure once or twice with a 6" scale to get within .080". Pull the reamer and flush the chamber with oil, then blow the oil back to the tank with a blow gun and give it a shot of solvent. Blow with gun once more and measure, then ream aiming for .010 left.
Reclean at .010, make final adjustment, ream to depth, final clean and verify.
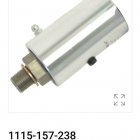
These digital travel indicators from Shars work very well for the tailstock. I milled a flat spot on top of the casting and made the clamp for the quill. There is 0 slop and I routinely reamed to +/- .0005 on my headspace guage with it.
One of the guys here locks down the carriage and puts a mag base indicator on it. The indicator touches off against a plate on the tailstock quill. That's a pretty smart idea because you can move your tailstock out the way and bring it back and the datum point of the indicator on the cartridge doesn't change. Similar to using the carriage as a bump stop but takes any potential for chips in the wrong place or backlash being a problem.
Ordered this pump, the 1/4 HP version. Just wanted more than 1/8 HP. Need to find a suitable tank. The shipping weight is 27 lbs. I did come across a 14 gauge 5 gal rectangular tank. How hard is it to cut 14 gauge with a reciprocating saw? That might be my best option.
Concerning cutting the chamber, I use a JGS floating reamer holder. I run the reamer in, pulling out every .050-.100" to clear chips. Bruce Thom was in the shop today and suggested that if I were to slot the reamer screw I might not have to pull out so frequently.
I keep running in the reamer until I am about .4 to .5" out, clear the oil, and borescope the chamber to make sure there isn't any chatter and check with the headspace gauge. I hook the flush back up.
I then run the tail stock back to the carriage and cut until I am within about .020. I clear the oil again, install the headspace gauge, measure protrusion, and then screw on the action with the bolt. I snug it good then measure the gap between the receiver and barrel shoulder. I add .001 to that for BR rifles, .002 for hunting rifles, and .003 for rifles with a sandwiched lug.
I hook the flush back up, turn it on, leave the lathe off, and carefully run the reamer in a couple time and make sure I have my tailstock dial zeroed. The I back off the reamer, turn on the lathe, and make my final cut. I usually nail my desired headspace.
That's about 10psi max, in case you didn't know.
You find the total head in feet from the chart, subtract the height from the pump to the barrel and divide by 2.31 to find the PSI with water. Multiply that number by the specific gravity of the fluid you're pumping for a final answer. (Roughly .8 for oil)
Useless centrifugal pump fact.... They generally draw fewer amps and require less horsepower the with the discharge valve closed. This is because they aren't moving any fluid, therefore are doing no work. The only power requirement is internal friction loss, which is converted to heat.
Wouldn't the reamer inserted into the chamber be a simpler, more trust worthy stop? Fewer moving parts.
Insert reamer, move tailstock forward, Lock tailstock, runup the hand wheel, bump the reamer a couple of times watching the number on the handwheel, zero handwheel, slightly back reamer off, turn on lathe, go to your number.
It's just a method that I've got used to now.i record my number on hand wheel back off slightly, unlock tailstock slide back.slide back up to carriage turn hand wheel to pre recorded number then ream.it works really well and I've had no problems yet.eveything comes out good.
That's about 10psi max, in case you didn't know.
You find the total head in feet from the chart, subtract the height from the pump to the barrel and divide by 2.31 to find the PSI with water. Multiply that number by the specific gravity of the fluid you're pumping for a final answer. (Roughly .8 for oil)
Useless centrifugal pump fact.... They generally draw fewer amps and require less horsepower the with the discharge valve closed. This is because they aren't moving any fluid, therefore are doing no work. The only power requirement is internal friction loss, which is converted to heat.
One of the guys here locks down the carriage and puts a mag base indicator on it. The indicator touches off against a plate on the tailstock quill. That's a pretty smart idea because you can move your tailstock out the way and bring it back and the datum point of the indicator on the cartridge doesn't change. Similar to using the carriage as a bump stop but takes any potential for chips in the wrong place or backlash being a problem.
I have a similar setup. Here it is for a non-chambering project, but all the pieces are there. You can rough-in the dimensions with the carriage, then lock it down.
What’s the rough cost on your setup…not looking down to the penny but within +/- $50?
Interesting you said the last little bit of the chamber because that’s when this system appears like a pain to me…I bet I check mine 3-4 times the last .020-030 and it seems like it would be a pain to shutoff and clean out the chamber of oil for a measurement. I am certain it speeds everything up leading to that, especially based upon the videos you and others have posted.
1. AMT 1/4 HP Immersion Coolant Pump
2. 5 Gal, 14 Gauge steel reservoir
3. GreTan BTS
4. 4.9" hole saw
5. Bread pan
6. Hose, fittings, magnets
The advantages of the immersion style coolant pumps include not needing filtration (magnets and settling are enough); they are heavy duty pumps designed for continuous use, they are rated to pump light oils, the plumbing is a little simpler, and they allow a little smaller footprint.
The disadvantages include they are expensive vs HP compared to carbonator pumps, they are heavy which means you need a sturdy reservoir, and they may still need some sort of flow control valving.
I'll know more once I get mine setup and start using it.
This Forum's expenses are primarily paid by member contributions. You can upgrade your Forum membership in seconds. Gold and Silver members get unlimited FREE classifieds for one year. Gold members can upload custom avatars.
This site uses cookies to help personalise content, tailor your experience and to keep you logged in if you register.
By continuing to use this site, you are consenting to our use of cookies.