scasa
Silver $$ Contributor
A while back somebody posted a pic of a benchrest stock for an Anschutz pistol and I thought it looked pretty cool and that I should have one. However an Anschutz will never be in my budget . I do have tools and a good imagination so well see what I come up with.
The parameters are
dual locking lugs
left bolt
left port
right hand eject
walnut stock
3 lever trigger
That ought to keep me busy for a while
Normally I would make the receivers first but in this case since I have to make the triggers I made them first. It's an oddball configuration the sear is actually in front of the bolt lugs on the firing pin body itself. It works like a rem 3 lever trigger but it's backwards. I made a prototype out of aluminum to get the parts layout and hole locations.
Once I was sure it would work I milled a block of aluminum big enough to make two triggers . I have a piece of aluminum I put in the mill vise and make a skim cut on the top just to true it up then I glue the trigger housing to that, mill one side flip it over and mill the other side . Then drill and ream all the holes
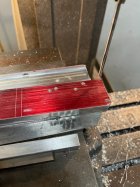
Once that's done cut out the middle and drill and tap the holes for the adjustment screws, sear engagement, overtravel and pull weight. I made a little ledge for the cover to sit on which is attached with 4 #2-56 flat head screws. For the internals I cut out some 5/32 O1 steel, glued two pieces together with the aluminum pattern glued to that and milled them out

Here they are all together. The sear on the top will get trimmed off and the trigger will get final finished once it's in a stock and has a trigger guard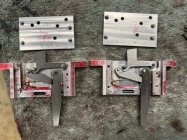
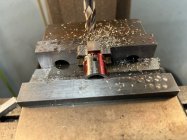
The last part to make was the brass piece for the end of the pull weight spring , keeps the spring straight and lined up with the hole. All the parts need the final polish. Once there installed I'll get everything cleaned up
The parameters are
dual locking lugs
left bolt
left port
right hand eject
walnut stock
3 lever trigger
That ought to keep me busy for a while
Normally I would make the receivers first but in this case since I have to make the triggers I made them first. It's an oddball configuration the sear is actually in front of the bolt lugs on the firing pin body itself. It works like a rem 3 lever trigger but it's backwards. I made a prototype out of aluminum to get the parts layout and hole locations.

Once I was sure it would work I milled a block of aluminum big enough to make two triggers . I have a piece of aluminum I put in the mill vise and make a skim cut on the top just to true it up then I glue the trigger housing to that, mill one side flip it over and mill the other side . Then drill and ream all the holes

Once that's done cut out the middle and drill and tap the holes for the adjustment screws, sear engagement, overtravel and pull weight. I made a little ledge for the cover to sit on which is attached with 4 #2-56 flat head screws. For the internals I cut out some 5/32 O1 steel, glued two pieces together with the aluminum pattern glued to that and milled them out

Here they are all together. The sear on the top will get trimmed off and the trigger will get final finished once it's in a stock and has a trigger guard

The last part to make was the brass piece for the end of the pull weight spring , keeps the spring straight and lined up with the hole. All the parts need the final polish. Once there installed I'll get everything cleaned up


