Follow along with the video below to see how to install our site as a web app on your home screen.
Note: This feature may not be available in some browsers.
This Forum is for adults 18 years of age or over. By continuing to use this Forum you are confirming that you are 18 or older. No content shall be viewed by any person under 18 in California.
Posting this for the DIY folks.
I'll be doing a step by step process for you folks that want to finish your own stocks.
Hopefully @Forum Boss will make this a STICKY for easy future reference.
Please refrain from posting comments as I have a lot of typing to do.
For this demonstration I'll be doing a Borden fiberglass BR stock.
Stock is raw out of the mold.
I start by blocking the surface with 80grit sand paper on a HARD block this will expose the low spots that need filling.
These are the dark un sanded areas, you can also see the seam from the mould process. after blocking surface thoroughly you'll need to come back and sand any remaining low spots or mould seams for filler to adhere. when spreading fillers I find it better to get a good amount of filler on and not try to spread it smooth that's what the block and sandpaper is for.
I'll use 36grit for my heavy carving/shaping be sure to leave filler a little proud.
Next I switch to 80grit and finish blocking the 1st coat of filler. Here I'm moulding the butt with filler, this stock will have a painted butt, no plate.this shot shows 1st coat of filler sanded in 80grit ready for second coat of filler.
Here's shots of stock after second coat of filler with some fine tuning left around trigger guard opening, bolt handle, and tang. you can see my sanding block on the floor, the corner of forend still needs a touch more filler. When spreading fillers lead with 1 edge of spreader where you don't need as much and drag the other edge where you need more, pulling at an angle so to speak.
Start your blocking with 80grit as it's the last grit we finished with, also second coat of filler can be pulled tighter but leave yourself some working room. It's also beneficial to spread farther than the spot your filling so when you finished everything will be at surface.ok now that the easy stuff is completed, it's time for trigger guard opening and bolt handle opening. l used 3M green automotive masking tape to cover trigger guard to fill the opening and spread over the top. Tape is your friend when spreading up to lines and around bedding.
Here you can see where I put on a healthy coat of filler. I pulled trigger guard out of filler just as it was setting up and removed tape. Now just block to surface.
Bolt handed openings are a royal pain, but this is the easiest way I can come up with.I backed up the opening with heavy tape and filled opening completely, then using a round rasp I start carving after opening up a bit, I set the action and mark from inside and switch over to my sanding stick and rolled up sand paper. as you can see there is a few different colors of filler these are tricky! clearance is key, plus gap to handle should be even.experience tells me to stop here and prime with high build 2k urethane primer, I can fine tune before final prime. I cut the channel for the cocking piece a lil bit larger than necessary to allow for primer and paint.
After all filling is done I blow stock and clean with waterborne cleaner, never use solvents on fiberglass or plastics. Low humidity can cause a spark from static generated from friction.
Now I mask the bedding butt your tape to the high side of stock and use razor blades and exacto knife to cut openings. you can see a few pinholes behind bolt handle opening, no worries I'll catch these with finish putty and a single edge razor blade "BEFORE" blocking so it all sands easily to a even surface for final prime.
Its good to let your primer set for 24 hours or more depending on conditions.
I'll be adding to this thread on Monday that's when I'll block and fine tune for final prime.
Edit: Not counting forum time, 3 cocktails and figuring out who I'm hunting with tomorrow it took 8 hours start to finish today.
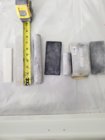
Various blocks and plastic sticks I use. Fillers I'm posting this in real time so I can try not to leave things out.
I've marked all pinholes that need filling with a pencilusing a single edge razor blade pull finish putty tightly into pinholes.
Now to start blocking, I spray a guide coat after pinholes are filled using
150gr paper on the longest stick possible that comfortably fits the area being sanded go to work, keeping sticks flat and don't roll the edges. We want "crisp" lines. here I'm pointing at the fiberglass starting to show. "STOP!" Continuing to sand will just make the glass higher and the primer lower.
Here's a pic showing I need to sand a lil more, by reading the guide coat it's still low and i haven't reached the fiberglass yet.now that the flats are blocked with sticks I'll switch to my durablocks aka illusioning blocks. High density foam rubber for working the rolls
Now for the details, like that damn bolt handle slot. I'll use the remnants of an arrow shaft I cut down to make a drop tube.
Look behind slot you can see pinholes are filled and blocked to surface
Here's where a Remington action is better than a custom.
The rear tang, I always get these divots in the corners of a square tang stock, whereas the Remington will sit over in the rear.
Painter's preference of course!! Ok, now I've got it blocked out lines are crisp and sharp I have 1 more detail to sand.
The radius to the butt.
Sometimes a block won't work and you have to hand sand
Ok, divots are filled, masking over bedding is peeled. I prefer to remask to keep material millage to a minimum.
Using a single edge razor blade shave the heavy edge before masking for final prime.
Before making bedding back up I need to address all the lines that are unsanded, for this I'll use a bit of red scotch brite.
I'll also coast over primer with 180 grit paper to soften the sanding scratch almost forgot, trigger guard opening.
Yup still fits! now I'll clean with waterborne cleaner mask bedding and final prime.Now I'm ready for final prime.
I'll be spraying a custom black with blue glitter on this stock.
My choice of primer for this project is made by Glasurit, it's an adhesion promoter, a filler, and can also be mixed as a sealer.
It will stick to any properly prepped surface from plastic to metal.
Oh yeah, it's also black.....
And expensive as hell !!!!
About 4 hours today, 1.5 hours taking pictures and posting as I go.
I don't want to leave things out and left up to imagination.
Average stocks take me roughly 20 hours start to finish
This Forum's expenses are primarily paid by member contributions. You can upgrade your Forum membership in seconds. Gold and Silver members get unlimited FREE classifieds for one year. Gold members can upload custom avatars.


 after blocking surface thoroughly you'll need to come back and sand any remaining low spots or mould seams for filler to adhere.
  when spreading fillers I find it better to get a good amount of filler on and not try to spread it smooth that's what the block and sandpaper is for.
 Here I'm moulding the butt with filler, this stock will have a painted butt, no plate.
 this shot shows 1st coat of filler sanded in 80grit ready for second coat of filler.