scasa
Silver $$ Contributor
joshb has a pretty good thread going on stock making and I didn't want to clutter up his thread with mine as this is going to take a while.
I made my first stock in junior high shop class and it was terrible, I've come a long ways since then and learned a few tricks along the way to make life a little easier. I just wanted to share what I've learned and maybe help somebody else out.
Inletting has always been a pain , I made a jig at one point where I could use a router and inlet for the action and barrel. It had a lot of adjustments on it and it worked pretty good with minimal trimming when finished but it took a while and if you didn't measure right the results weren't very good. The new and improved method works really good and I haven't messed up a stock yet. Most of the stocks I make are for .22's and 1 1/2 wide stock works for them I use poplar 1x8 for most of them cause I paint them . Poplar is fairly hard but not too hard to work with .
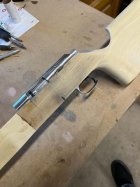
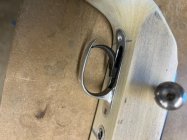
First step is to figure where the centerline of the action and barrel is and the diameter of the action you need the top of the action to be inside the wood. once the centerline is figured out I cut a 1/8 inch half round groove in both halves in the inside. this is for the alignment rod (1/8 inch piano wire) .
Once I get it glued together I take the piano wire out and I have a hole from one end to the other, this is a guide for the paddle bits. I have an assortment of extra long bits I've made up . Where the point is I round them off so they don't cut ,they just follow the hole through the stock .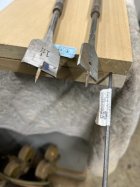
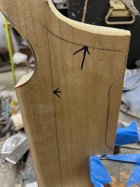
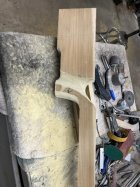
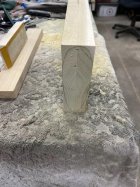
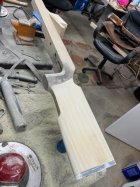
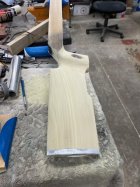
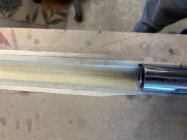
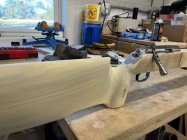
 For this stock I made the barrel hole the same diameter as the barrel and the action hole a little bigger than the action to allow for bedding. The barrel sits level clamped in the stock and the action is floating by about 3/32 of an inch. I make a drill guide screwed to the butt end to help keep everything lined up and I trim up the butt end so the drill shank will clear and some clearance for the bit to get started , so you kind of have to have an idea what the end result is going to look like .Once that's all figured out clamp it down fire up the drill and make the action hole to the required depth clean out the hole and drill the barrel hole. It probably took me 15 min to drill this one. Once the holes are drilled cut off the top on the table saw just slightly proud of the center of the holes
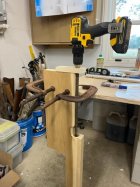
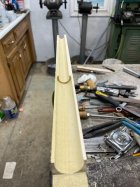
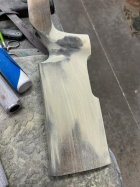
There it is the hard part done. I'll inlet for the trigger and pillars in the mill
I made my first stock in junior high shop class and it was terrible, I've come a long ways since then and learned a few tricks along the way to make life a little easier. I just wanted to share what I've learned and maybe help somebody else out.
Inletting has always been a pain , I made a jig at one point where I could use a router and inlet for the action and barrel. It had a lot of adjustments on it and it worked pretty good with minimal trimming when finished but it took a while and if you didn't measure right the results weren't very good. The new and improved method works really good and I haven't messed up a stock yet. Most of the stocks I make are for .22's and 1 1/2 wide stock works for them I use poplar 1x8 for most of them cause I paint them . Poplar is fairly hard but not too hard to work with .
First step is to figure where the centerline of the action and barrel is and the diameter of the action you need the top of the action to be inside the wood. once the centerline is figured out I cut a 1/8 inch half round groove in both halves in the inside. this is for the alignment rod (1/8 inch piano wire) .

Once I get it glued together I take the piano wire out and I have a hole from one end to the other, this is a guide for the paddle bits. I have an assortment of extra long bits I've made up . Where the point is I round them off so they don't cut ,they just follow the hole through the stock .

 For this stock I made the barrel hole the same diameter as the barrel and the action hole a little bigger than the action to allow for bedding. The barrel sits level clamped in the stock and the action is floating by about 3/32 of an inch. I make a drill guide screwed to the butt end to help keep everything lined up and I trim up the butt end so the drill shank will clear and some clearance for the bit to get started , so you kind of have to have an idea what the end result is going to look like .Once that's all figured out clamp it down fire up the drill and make the action hole to the required depth clean out the hole and drill the barrel hole. It probably took me 15 min to drill this one. Once the holes are drilled cut off the top on the table saw just slightly proud of the center of the holes

There it is the hard part done. I'll inlet for the trigger and pillars in the mill


