Install the app
How to install the app on iOS
Follow along with the video below to see how to install our site as a web app on your home screen.
Note: This feature may not be available in some browsers.
You are using an out of date browser. It may not display this or other websites correctly.
You should upgrade or use an alternative browser.
You should upgrade or use an alternative browser.
A “quick bedding” tutorial
- Thread starter Dusty Stevens
- Start date
Dusty Stevens
Shiner
Bedding sticking to the screws is not the point. The point is you can fill the cavity without bedding running out of the hole. Theres a million ways to skin a cat i was just showing a little tip that may help in a situation sometime. Flat bottom actions are usually not a problemI guess the guys in Cali are screwed, then! They'll probably have to order straws online! I always applied grease to the screws to prevent them from sticking. I like the straws better.
Thanks D
J
Apologies for being ignorantYes you have to remove them before you lift the action out. The action wont come loose.
Ok I have a couple questions
1- are there no pillars in the stock ?
2- how does the bedding compound not adhere to the straw?
3- how close of a fit are the straws to the action screw holes?
try different restaurants for various sizes
J
Dusty Stevens
Shiner
The straw is pushed out by the guide screws and is not in there for curing.Thanks D
Apologies for being ignorant
J
this job did not get a full bedding job so there are no pillars. If i were to put pillars in i would do a front and back locating bed job then drill for pillars then do the full bed job after gluing the pillars in and machining them down past flush.
The straws are an exact fit- i used like a .283 drill. Not the point here though it only keeps the liquid from running down into the holes as you spread it. Think of a standpipe in a pond or something
Am I ok to do this on wifes hs precision with aluminum bedding block?The straw is pushed out by the guide screws and is not in there for curing.
this job did not get a full bedding job so there are no pillars. If i were to put pillars in i would do a front and back locating bed job then drill for pillars then do the full bed job after gluing the pillars in and machining them down past flush.
The straws are an exact fit- i used like a .283 drill. Not the point here though it only keeps the liquid from running down into the holes as you spread it. Think of a standpipe in a pond or something
Dusty Stevens
Shiner
Yes its encouraged. Youll see it only hits 2 spots on each side. Very necessaryAm I ok to do this on wifes hs precision with aluminum bedding block?
Dusty Stevens
Shiner
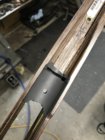
Ok so we let it dry for 10hrs or so at 75deg F. We remove the guide screws and hit the action a bit with a heat gun. Just enough its warmer than room temp like 100-110deg. Dont pull like a caveman but pry the barrel up and youll hear it pop a bit. If it doesnt budge heat it longer. Youll see your release agent like in the action vent hole liquify and then its time. Hopefully when you lift it youll see this

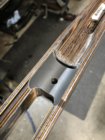
and hopefully the action looks like this. That line of epoxy comes off with a thumbnail. Do this while its still warm then wipe the metal down with carb cleaner while its warm.

get your dremel out and get the excess off. I usually do this on a mill but thats beyond this demo.

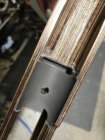
I take all the sharp edges down and the top edge. With the action in there you cant even tell its been bedded but the target will sure show it.
Hopefully this will give you first timers the confidence to do this for yourself.

and hopefully the action looks like this. That line of epoxy comes off with a thumbnail. Do this while its still warm then wipe the metal down with carb cleaner while its warm.

get your dremel out and get the excess off. I usually do this on a mill but thats beyond this demo.


I take all the sharp edges down and the top edge. With the action in there you cant even tell its been bedded but the target will sure show it.
Hopefully this will give you first timers the confidence to do this for yourself.
HTSmith
Silver $$ Contributor
Dusty, first Merry CHRISTmas and thanks for sharing so generously on this forum. It is a big help to rank amateurs like me. A couple more questions for you
- Is it worth bedding the rear tang?
- Is the marine tex thicker than JB Weld? The JB seems to run all over the place (but I always have some on hand)
Dusty Stevens
Shiner
Dusty, first Merry CHRISTmas and thanks for sharing so generously on this forum. It is a big help to rank amateurs like me. A couple more questions for you
Thanks much.
- Is it worth bedding the rear tang?
- Is the marine tex thicker than JB Weld? The JB seems to run all over the place (but I always have some on hand)
if youre doing a full bed job with pillars and all yes it needs to be done.
They both seem to be equally runny. If you mix the jb weld and let it sit about 10mins itll work better
INShooter
Gold $$ Contributor
I would like to commend Dusty for taking the time and making the effort to post such a fine tutorial. Great Job!
One thing I would like to add. Make sure that your recoil lug is NOT wider at the bottom than the top. Even a few thousands will cause a serious problem.
Don't ask why I suggest this.
One thing I would like to add. Make sure that your recoil lug is NOT wider at the bottom than the top. Even a few thousands will cause a serious problem.
Don't ask why I suggest this.
How did you get it out to reinstall trigger assembly?I would like to commend Dusty for taking the time and making the effort to post such a fine tutorial. Great Job!
One thing I would like to add. Make sure that your recoil lug is NOT wider at the bottom than the top. Even a few thousands will cause a serious problem.
Don't ask why I suggest this.
I did something similar a few weeks ago, my first bedding job, front only, in an MDT chassis.
I used Devcon. I really liked the way it worked. My only issue was the 2.5:1 mix ratio. I wanted to make sure I mixed enough so I did 5 popsicle stick scoops of resin and two scoops of hardener. That was probably enough for a full length bedding job if the epoxy layer wasn't too thick. It was probably 3x what I needed for my front only ~skim coat.
Beside that it was very easy to use, cleaned up well and released very well with dollar store shoe polish as a release agent.
There is still plenty left of my 1 lb kit which I paid about $40 for. I have a few more bedding type jobs in mind so I don't think the cost is too bad.
In my case, the receiver fit the V-block inlet of the chassis just fine but the recoil lug contact was kind of unsupported due to a big chamfer (Savage Axis inlet). Rather than do the headless bolts and gravity, I used the action screws to pull the action in tight to the V-blocks but then loosened the screws and barely snugged them to make sure I had contact but minimal stress.
The result was better than I could reasonably expect for my first and the process wasn't difficult.
My second bedding job was my scope rail. I masked this one much more because it is more visible than action bedding. The result was pretty good. There was more clean up due to the tape lines. I had to do some scraping to remove the equivalent of mold flash that the tape lines left behind. I would probably use less tape next time but I was a bit paranoid about getting epoxy where I didn't want it.
I think anyone who is a bit handy should be able to get a good result as long as they prepare the surfaces properly (clean where you want a bond, release agent where you want separation) and don't create a mechanical lock between the parts.
I don't know if my bedding will improve my accuracy or consistency but I doubt it will hurt.
Fast14riot
Gold $$ Contributor
One thing I'm curious about, has anyone used One Shot as a release agent? Makes sense to me, I have a can of it sitting on my shelf I dont use for sizing anymore and on an old military action there are a lot of little odd spots to get a paste wax into and a spray would be much easier.
Dusty Stevens
Shiner
Brownells makes a release spray. It works well. Id be scared of one shot even as an action releaseOne thing I'm curious about, has anyone used One Shot as a release agent? Makes sense to me, I have a can of it sitting on my shelf I dont use for sizing anymore and on an old military action there are a lot of little odd spots to get a paste wax into and a spray would be much easier.
natdscott
P100, HM, DR, experienced beginner.
Dusty, it would work fine I think.Brownells makes a release spray. It works well. Id be scared of one shot even as an action release
That being said, I always used NuFinish car wax. I was never happy with the surface finish of my bedding jobs though...aspiring to the likes of Sitman.
Anyhow, the last one I did, I used plain Minwax paste wax, pretty thin.
Worked spectacularly, and left a great finish. Well, as great as any matte RR Remington ever leaves.
MOTORSPORTS55
Silver $$ Contributor
Great post !!! Thanks Dusty
hoz53
Gold $$ Contributor
thanks DustyThis is what i call a quick bed job. This would be used on a hunting rifle with a very loose inlet and the customer doesnt know he wants a full bed job. This is the bare minimum you need to do on any stock really. They say some stocks are drop in but ive never seen one that was, so this is easy enough anybody can do it- hopefully it will give you the confidence to do it to your rifle if its not bedded.
First we scuff the front ring area to remove the finish. We also put some gouges in there to give the epoxy some “tooth” to hold onto. Also make plenty of room around the lug so when you look thru a screw hole underneath you can see the action slides back farther than it needs to and doesnt hit the lug on the stock. Wrap layers of tape around the barrel out toward the end of the forend to center the barrel and level the action (since there is room under the front ring now).
View attachment 1145994
I put a straw in the hole so the epoxy stays up top and wrap tape around my guide screws to center them in the holes. They will push the straw out as i sit the action in.
Next we put in the epoxy mix. Here we are using marine tex. It can be bought at any boating parts store or ordered online. Mix up plenty- its easier to clean up excess than mix a bit more if youre short. Spread it evenly and thick. I use plastic butter knives and popsicle sticks. I shape them on the end with a knife to make a sharp point. Also pack it into the recoil lug slot real good or itll have a bubble everytime.
View attachment 1145995
Prepping the action, we have plenty of release agent on there (i use johnsons paste floor wax. Kiwi neutral shoe polish is good too) buff it smooth but make sure its on there. It helps to heat the action up just a bit with a heat gun. I use electrical tape to cover the bottom and front of the lug for clearance. Now its ready to go in. Be sure you test fit everything before you mix epoxy or put on the release.
View attachment 1145996
Then we put the action in the bedding, pushing the straw out and let gravity do its job. I let the epoxy run out for maybe 15mins (as long as its not going crazy) before i do any cleanup. Here is where you check your work- if you have a spot its not running out you either didnt mix enough or there isnt enough clearance.
View attachment 1145997
View attachment 1145998
We’ll let that sit til tomorrow nite. If its in a garage or something where it will be cold ill put a desk lamp next to it with a regular incandescent light bulb to put some heat on it. Epoxy needs heat to cure. It makes its own heat during the reaction of curing but that cold steel will pull it out too fast and itll make it shrink too much, so give the steel heat so it doesnt rob from the epoxy. Clean up is done with the sharp point on your applicator then go to a q-tip then paper towel chunks. If you get epoxy on your fingers stop now and clean it off or youll have a permanent fingerprint on your stock somewhere i assure you. Once the excess is cleaned off i put wd-40 on the paper towel chunks and it cleans it up oh so easy. Look everywhere because you can recover from excess now- not so much when its dry. This quick bed job works the same on pretty much every bolt action and any stock material and should be considered the bare minimum on any rifle.
Similar threads
- Replies
- 18
- Views
- 7,171
Upgrades & Donations
This Forum's expenses are primarily paid by member contributions. You can upgrade your Forum membership in seconds. Gold and Silver members get unlimited FREE classifieds for one year. Gold members can upload custom avatars.

Click Upgrade Membership Button ABOVE to get Gold or Silver Status.
You can also donate any amount, large or small, with the button below. Include your Forum Name in the PayPal Notes field.
To DONATE by CHECK, or make a recurring donation, CLICK HERE to learn how.

Click Upgrade Membership Button ABOVE to get Gold or Silver Status.
You can also donate any amount, large or small, with the button below. Include your Forum Name in the PayPal Notes field.
To DONATE by CHECK, or make a recurring donation, CLICK HERE to learn how.


