Dusty Stevens
Shiner
This is what i call a quick bed job. This would be used on a hunting rifle with a very loose inlet and the customer doesnt know he wants a full bed job. This is the bare minimum you need to do on any stock really. They say some stocks are drop in but ive never seen one that was, so this is easy enough anybody can do it- hopefully it will give you the confidence to do it to your rifle if its not bedded.
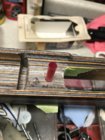
First we scuff the front ring area to remove the finish. We also put some gouges in there to give the epoxy some “tooth” to hold onto. Also make plenty of room around the lug so when you look thru a screw hole underneath you can see the action slides back farther than it needs to and doesnt hit the lug on the stock. Wrap layers of tape around the barrel out toward the end of the forend to center the barrel and level the action (since there is room under the front ring now).

I put a straw in the hole so the epoxy stays up top and wrap tape around my guide screws to center them in the holes. They will push the straw out as i sit the action in.
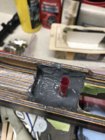
Next we put in the epoxy mix. Here we are using marine tex. It can be bought at any boating parts store or ordered online. Mix up plenty- its easier to clean up excess than mix a bit more if youre short. Spread it evenly and thick. I use plastic butter knives and popsicle sticks. I shape them on the end with a knife to make a sharp point. Also pack it into the recoil lug slot real good or itll have a bubble everytime.

Prepping the action, we have plenty of release agent on there (i use johnsons paste floor wax. Kiwi neutral shoe polish is good too) buff it smooth but make sure its on there. It helps to heat the action up just a bit with a heat gun. I use electrical tape to cover the bottom and front of the lug for clearance. Now its ready to go in. Be sure you test fit everything before you mix epoxy or put on the release.

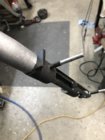
Then we put the action in the bedding, pushing the straw out and let gravity do its job. I let the epoxy run out for maybe 15mins (as long as its not going crazy) before i do any cleanup. Here is where you check your work- if you have a spot its not running out you either didnt mix enough or there isnt enough clearance.


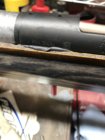
We’ll let that sit til tomorrow nite. If its in a garage or something where it will be cold ill put a desk lamp next to it with a regular incandescent light bulb to put some heat on it. Epoxy needs heat to cure. It makes its own heat during the reaction of curing but that cold steel will pull it out too fast and itll make it shrink too much, so give the steel heat so it doesnt rob from the epoxy. Clean up is done with the sharp point on your applicator then go to a q-tip then paper towel chunks. If you get epoxy on your fingers stop now and clean it off or youll have a permanent fingerprint on your stock somewhere i assure you. Once the excess is cleaned off i put wd-40 on the paper towel chunks and it cleans it up oh so easy. Look everywhere because you can recover from excess now- not so much when its dry. This quick bed job works the same on pretty much every bolt action and any stock material and should be considered the bare minimum on any rifle.
First we scuff the front ring area to remove the finish. We also put some gouges in there to give the epoxy some “tooth” to hold onto. Also make plenty of room around the lug so when you look thru a screw hole underneath you can see the action slides back farther than it needs to and doesnt hit the lug on the stock. Wrap layers of tape around the barrel out toward the end of the forend to center the barrel and level the action (since there is room under the front ring now).

I put a straw in the hole so the epoxy stays up top and wrap tape around my guide screws to center them in the holes. They will push the straw out as i sit the action in.
Next we put in the epoxy mix. Here we are using marine tex. It can be bought at any boating parts store or ordered online. Mix up plenty- its easier to clean up excess than mix a bit more if youre short. Spread it evenly and thick. I use plastic butter knives and popsicle sticks. I shape them on the end with a knife to make a sharp point. Also pack it into the recoil lug slot real good or itll have a bubble everytime.

Prepping the action, we have plenty of release agent on there (i use johnsons paste floor wax. Kiwi neutral shoe polish is good too) buff it smooth but make sure its on there. It helps to heat the action up just a bit with a heat gun. I use electrical tape to cover the bottom and front of the lug for clearance. Now its ready to go in. Be sure you test fit everything before you mix epoxy or put on the release.

Then we put the action in the bedding, pushing the straw out and let gravity do its job. I let the epoxy run out for maybe 15mins (as long as its not going crazy) before i do any cleanup. Here is where you check your work- if you have a spot its not running out you either didnt mix enough or there isnt enough clearance.


We’ll let that sit til tomorrow nite. If its in a garage or something where it will be cold ill put a desk lamp next to it with a regular incandescent light bulb to put some heat on it. Epoxy needs heat to cure. It makes its own heat during the reaction of curing but that cold steel will pull it out too fast and itll make it shrink too much, so give the steel heat so it doesnt rob from the epoxy. Clean up is done with the sharp point on your applicator then go to a q-tip then paper towel chunks. If you get epoxy on your fingers stop now and clean it off or youll have a permanent fingerprint on your stock somewhere i assure you. Once the excess is cleaned off i put wd-40 on the paper towel chunks and it cleans it up oh so easy. Look everywhere because you can recover from excess now- not so much when its dry. This quick bed job works the same on pretty much every bolt action and any stock material and should be considered the bare minimum on any rifle.


