• This Forum is for adults 18 years of age or over. By continuing to use this Forum you are confirming that you are 18 or older. No content shall be viewed by any person under 18 in California.

What I have Recently Learned About Chambering

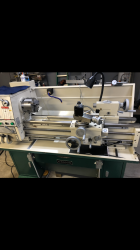
If you look in that book the formula for finding root-crest-major-minor diameter at what ever percentage of thread deapth.......what class of fit do you do your threading to?

I don't know the classes. I thread until the action or brake smoothly screws on.
 
Single phase 120 volt carbonator pump off of Ebay works great but you need to change the spring out in the internal by-pass. They'll put out 200 psig without modifying it. I bought a pack of springs at Ace Hardware that are smaller diameter wire and cut down length until it will by-pass at around 60 psig. I have a manifold with air line and check valves on both oil and air. I have a solid state relay in my PM-1340GT VFD panel that powers an outlet that is switched via the coolant switch on lathe. Flip off coolant, turn on air and that slug of coolant and air is very effective in blowing all cuttings off of reamer.

Do you ever have an issue over filling the chip pan on your 1340 GT?
 
The bolt on the right relieves pressure. If memory serves me correctly the manual ( pump manufacturer manual) states they recommend a return if it runs for long periods of time.
 

Attachments

  • FC7AA42D-1FA6-487E-A754-3AD41166F481.jpeg
    FC7AA42D-1FA6-487E-A754-3AD41166F481.jpeg
    353.3 KB · Views: 44
As far as bending barrels, dont keep tightening when dialing in. Go the other way. Keep it just snug enough to hold it. Then slowly tighten when it’s dialed in. That’s what I do anyways.
 
I have been making the tenon to the measurements and then cutting the recess according to the math. Then I check clearance with Plastigauge.

With the flat breech actions I usually leave the tenon long then screw on the action with the bolt and measure the gap with a feeler gauge. I then add the deeper gauge plus .008 or .008 and face the back of the breech to that measurement.

That said, the more I do this the more I find that matching to the measurements works very well.

Numbers never lie.

One day I'll figure out how to clock the barrel without having to do the whole tenon, and then set things back to get it clocked correctly.
 
Numbers never lie.

One day I'll figure out how to clock the barrel without having to do the whole tenon, and then set things back to get it clocked correctly.

I feel your pain. I did my own stuff at home on my 1340GT for about three years. I did a dozen or so barrels over that time--one for a CRF M-70 and the rest for my LR BR rifles-- and all of them shot well. I was just painfully slow.

In the last month at work I have done a dozen barrels, and like with everything we do, repetition over a short period of time usually leads the quickest learning curve. I am still too slow but way faster than I was.

(What takes me the most time is dialing in, and on that I won't compromise. So far, my work barrels are shooting very well and I think that is a big reason why they shoot well.)

Concerning timing barrels and brakes I should add:

9. When timing a barrel or brake, do the math but aim to be 10 degrees or so shy of perfect. For the barrel, as long as it is close to either straight up or down it's good to go.

The brake has to be very close to perfect. Our brakes are titanium and have flats at the top and bottom. With the brake, once it's within 5-10 degrees I am done with the lathe. I will then torque it into place and check with levels. I will then sand the shoulder of the brake with 320 grit sandpaper to get it clocked the rest of the way.
 
I'll figure out how to clock the barrel without having to do the whole tenon
Divide 1 by TPI. Ex: 1/16=.0625"
.0625/360°=.00017636" per degree of rotation
Degrees it needs to turn. Ex: 25°
25 x .0001736=.00434" IE: remove .00434" from shoulder for 25° of rotation.

You will probably want to experiment and document the amount of thread crush/fit rotation the various tenons take to fully tighten from hand tight and account for that in your calculations. I like to sneak up close then tighten and loosen the joint several times to get the threads seated in before calculating the final cuts. You can't really fully tighten an action or a brake to full torque while setup in the lathe with the various spiders and chucks we use without moving your setup which is why some experience and notes will help on how much to leave for final tightening.
 
Last edited:
Divide 1 by TPI. Ex: 1/16=.0625"
.0625/360°=.00017636" per degree of rotation
Degrees it needs to turn. Ex: 25°
25 x .0001736=.00434" IE: remove .00434" from shoulder for 25° of rotation.

You will probably want to experiment and document the amount of thread crush/fit rotation the various tenons take to fully tighten from hand tight and account for that in your calculations. I like to sneak up close then tighten and loosen the joint several times to get the threads seated in before calculating the final cuts. You can't really fully tighten an action or a brake to full torque while setup in the lathe with the various spiders and chucks we use without moving your setup which is why some experience and notes will help on how much to leave for final tightening.

Whenever I do that math and cut to the exact amount I need, I wind up going to far. So I always take off 2-3 thousands from exact.
 
Divide 1 by TPI. Ex: 1/16=.0625"
.0625/360°=.00017636" per degree of rotation
Degrees it needs to turn. Ex: 25°
25 x .0001736=.00434" IE: remove .00434" from shoulder for 25° of rotation.

You will probably want to experiment and document the amount of thread crush/fit rotation the various tenons take to fully tighten from hand tight and account for that in your calculations. I like to sneak up close then tighten and loosen the joint several times to get the threads seated in before calculating the final cuts. You can't really fully tighten an action or a brake to full torque while setup in the lathe with the various spiders and chucks we use without moving your setup which is why some experience and notes will help on how much to leave for final tightening.

I know how to calculate it after I've shouldered it... I just want it to be right the first time. Probably not worth the challenge on a manual machine. I feel better fiddling around with it and making sure everything is perfect anyway :)

I do keep notes on my various actions how much crush they end up having
 
I think that would exceed my 3 gallon reservoir. I'm using 2 gallons of Ridgid Extreme stainless cutting oil mixed with 1 gal Type "F" ATF.
 
I cheat for timing using this table. If you can divide by 2 and 4, and with a little experience, you can get damn close on the first cut.

20220730_203926.jpg

With the flush system I built, it all goes into a removable tray that drains back into the sump. Rare earth magnets everywhere and a big filter. I like the collinder and cloth idea for chips which I may try. I have a funnel on the back of my lathe that gets covered when not used. My makeshift pan, which I will improve one of these days simply dumps right into the funnel. You need a larger return line than you think. A 90 degree pvc elbow and p trap type fitting allows me to store the pan elsewhere when not needed and I don't have to worry about dripping oil because I turn it up 180 degrees. My fluid shield is a 1.5" drain pipe cover that would go against the wall in your house. Fits almost perfect over my JGS floating holder.

Ball valve in-line can control PSI. Runs about 40 psi till the throat starts cutting then it jumps to about 80-90 psi.

Once you get use to whatever system you are using, you can do it without getting a drop of fluid on your lathe. I run about 3 gallons of fluid in my system.
20220204_133348.jpg20220730_203308.jpg20220730_203158.jpg20220730_202954.jpg20220730_203025.jpg
 
Mine is not very sophisticated but here it is. I’m at work so pics are subject to what’s in my phone. Switches for bts and flood. They are run on different pumps. The flood pump came with grey mills 10gal. tank. First filter is scotchbright pads. Had a friend bend me up some steel to slope the oil back towards the headstock. Put up some angle aluminum to stop said oil from going past headstock. Cut a hole that you can’t see in chip tray and it has a drain filter. It drains back into grey mills tank that is under tray. I have a good filter that is on the line that mounts to muzzle.
 

Attachments

  • 983AC22C-602E-4A16-B385-C50D20F70568.png
    983AC22C-602E-4A16-B385-C50D20F70568.png
    1.8 MB · Views: 85
  • F0F1FFA4-FF9C-463B-98EB-D00F1D48A825.png
    F0F1FFA4-FF9C-463B-98EB-D00F1D48A825.png
    3.2 MB · Views: 78
  • 51194989-7E35-45EB-B21D-43A177B9D787.png
    51194989-7E35-45EB-B21D-43A177B9D787.png
    2.6 MB · Views: 81
Probably not worth the challenge on a manual machine.
Not possible on a manual lathe. I don't know what additional capabilities a CNC lathe might have- but unless there's some mechanism whereby the contact of the insert to the tenon is precisely timed to the spindle rotation it can't happen there either.

This is above my pay grade, but far as I know the only way to time threads as used in shouldered prefits (or the "clocking the muzzle" application to which you're referring) is by thread milling.
Short barrels are a pain.

Simple double-spider rig in a 4-jaw is what I use for shorties.


Only thing I can add to the flush system topic is type of filter I use, haven't seen it mentioned before.
AO Smith water filtration setup, with 20 micron filter.


Magnets, of course- but they don't do a thing for stainless chips. Layer of the "universal" type plastic air filter stuff cut to fit in the drain pan


Upgrades & Donations

This Forum's expenses are primarily paid by member contributions. You can upgrade your Forum membership in seconds. Gold and Silver members get unlimited FREE classifieds for one year. Gold members can upload custom avatars.


Click Upgrade Membership Button ABOVE to get Gold or Silver Status.

You can also donate any amount, large or small, with the button below. Include your Forum Name in the PayPal Notes field.


To DONATE by CHECK, or make a recurring donation, CLICK HERE to learn how.

Forum statistics

Threads
165,605
Messages
2,199,558
Members
79,013
Latest member
LXson
Back
Top