• This Forum is for adults 18 years of age or over. By continuing to use this Forum you are confirming that you are 18 or older. No content shall be viewed by any person under 18 in California.

Shot Marker (Review)

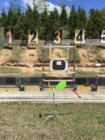
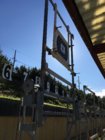
I mounted mine at the top of the frame, fully expecting a stray bullet to eventually find its way to the hub. I mounted the hub behind a small VR500 gong in order to protect it, should this happen.

Unless I can't see it, I sure would put some air between the plate and the hub. A supersonic bullet hitting that steel plate is going to transfer a good amount of energy to the hub.
Howzabout turning the hub sideways, 90 degrees from what you show, to present a much thinner profile.
 
Last edited:
Unless I can't see it, I sure would put some air between the plate and the hub. A supersonic bullet hitting that steel plate is going to transfer a good amount of energy to the hub.
Howzabout turning the hub sideways, 90 degrees from what you show, to present a much thinner profile.

Thanks for the tip! I didn’t think of that.
 
Oh, no - - another frame for the ShotMarker!

Well, yes. This one may not be better, or worse than the others, but it has a few differences that perhaps may be helpful to anyone who is about to build such a frame.

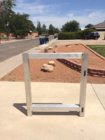
I wanted a frame small enough to fit in a small/medium size SUV, or in a large car trunk. I also wanted it to be stand alone, and as easy as possible to setup & take down quickly.

The frame and part of the base are made out of one-full-inch thick solid Oak board, 11-1/4” wide by four feet long, which I cut into four pieces 2-5/8” wide. I used this wood because Menard’s had them on sale for $10 a board, and I bought several for future projects, not knowing at the time that I would use one board to make a ShorMarker frame. The rest of the base is made out of of a stud 2” x 4”.

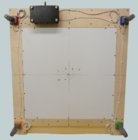
The target backer is Coroplast, and I designed the frame so the backer is 24” x 32”, which means I can get six backers out of a 4’ x 8’ sheet. The Coroplast lower edge fits into a groove on the frame, and the top edge and sides are held with Ø1/4” dowels. I made the holes on the Coroplast with a paper puncher. This makes for very easy backer installation and removal.

I used wire clips from Amazon to secure the wires, and the clips allow for easy insertion and removal of the wires. The wires are semi-permanently attached to the frame with the clips, and it is very easy and fast to connect them to the Sensor Hub and to each Sensor when setting things up a the range.

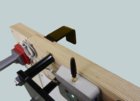
Once at the range: (1) set the base on the ground, (2) insert the frame into the base sockets, (3) tighten the two thumb screws to secure the frame to the sockets so the frame does not wiggle, (4) attach the Sensor Hub riser to the frame (two Ø1/4” dowel pins), (5) attach the Hub to the riser (two screws set at the proper height), (6) connect the four color-coded wires, and (7) attach the Coroplast backer. Ready to go.

Disassembled for transportation >
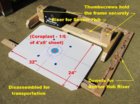
ShotMarker FrameV2 sm01 lbl IMG_3456.jpg

Assembly begins . . .
ShotMarker FrameV2 sm02 lbl IMG_3459.jpg

Wires connected . . .
ShotMarker FrameV2 sm03 lbl IMG_3460.jpg

Ready to go!
ShotMarker FrameV2 sm04 lbl IMG_3461.jpg

I'll be glad to answer any questions; and yes, I have used it three times so far, and takes about three minutes to setup.

Alex
 
I'm surprised more people aren't using the extension cable for the antenna that comes with the pack. Leave the sensor hub down low, behind the thickest part of the frame and run the extension cable up high.
 
Alex, nice job.
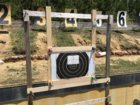
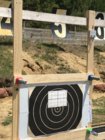
I guess I will show my target frame, but I agree with SGK, I think I will move the hub down low.IMG_5810.JPG IMG_5809.JPG IMG_5811.JPG IMG_5860.JPG I made the frame to fit in my Jeep SUV, Hang it on the club carriers, put the hoz bottom member on and clap it to the carrier wood frame and done. Center of X is at the center of a competition frame would be to hit the dirt in rear at the same place.
I used select 1" x 4" by 6' wood and the size of the target is 2'x 3'. I am still looking for a better wire harness but I wish the system had bluetooth sensors....maybe in the future.
 
This may have been covered in the seven pages of comments but.....It is my understanding when using these targets in a match that you cannot set the individual targets for different calibers, i.e., .223 and .30. Its one or the other.

Can anyone confirm this?
 
At what point do you guys change your backing? Mine is starting to get shot up doing load development.
 

Attachments

  • IMG_0028.jpg
    IMG_0028.jpg
    468.8 KB · Views: 79
This may have been covered in the seven pages of comments but.....It is my understanding when using these targets in a match that you cannot set the individual targets for different calibers, i.e., .223 and .30. Its one or the other.

Can anyone confirm this?

Have you asked Adam? He responds very quickly to emails
 
This may have been covered in the seven pages of comments but.....It is my understanding when using these targets in a match that you cannot set the individual targets for different calibers, i.e., .223 and .30. Its one or the other.

Can anyone confirm this?
You can set it for different calibers. Easy Peasy
 
I shot my just put together 308 Win F-TR rifle at our club's mid-range practice last Friday using the shot marker to kinda sight in (was only zeroed at 200 previously and was pretty darned close at 600 using JBM Calc to get it into the ballpark--- EASILY well on the paper--- before firing the first shot) using the Shot Marker display system and it was REALLY good/easy/accurate to use. I like the way it displays everything and I also like the way you can save and then display later BOTH the string's data AND be able to see the group for later analysis. (in this case I shot 15 shots for practice after 9 shots zeroing and monkeying around---which 9 shots I deleted at the range, so couldn't look at them later). Funny thing was, it amazed me how much that 155 grain Sierra TMK slowed down in 600 yards.(Lost over 1000 fps!!) Was pretty interesting/handy to have velocities way out there at 600 as my LabRadar won't show me that!

Only trouble is, I guess I'm gonna have to buy one now to use myself when shooting at places other than the club range!!
Then I can borrow it from you! LOL:D
Monte
 
A fellow member that has been shooting on our Shotmarkers in club matches ordered one for himself and he was told 8 - 12 weeks for delivery.

Adam sold over 1000 units in the 1st year. I bet he may sell more than that this year.

If you or anyone is in the market I would get your orders In asap.
I'm glad we got in early.
George
 
I received my ShotMarker a few days ago, now to build a frame. I'll be putting together a frame that can be free standing as well as being able to hang it on one of my clubs 600 yard frames in the pits. Pumped to get the frame done.
 
I was given 2 eight foot sticks of 3.5" x 3.5" x .125" wall aluminum tubing which was promptly welded up for my ShotMarker frame. 36" x 36" opening. I'll put a pair of detachable feet on it for stand alone practice and hangers for the target hangers in the pits at my club.

SHOTMARKER FRAME.JPG
 

Upgrades & Donations

This Forum's expenses are primarily paid by member contributions. You can upgrade your Forum membership in seconds. Gold and Silver members get unlimited FREE classifieds for one year. Gold members can upload custom avatars.


Click Upgrade Membership Button ABOVE to get Gold or Silver Status.

You can also donate any amount, large or small, with the button below. Include your Forum Name in the PayPal Notes field.


To DONATE by CHECK, or make a recurring donation, CLICK HERE to learn how.

Forum statistics

Threads
165,938
Messages
2,206,420
Members
79,220
Latest member
Sccrcut8
Back
Top