• This Forum is for adults 18 years of age or over. By continuing to use this Forum you are confirming that you are 18 or older. No content shall be viewed by any person under 18 in California.

Scope installation guide?

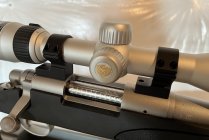
Researched a few hours and just received these Talley mounts - shown lightly attached to check fit. Impressive! If these perform as well as they look gonna’ be one happy camper. Could anyone kindly refer me to a top-to-bottom scope install guide - want to get these surgically installed. Any feedback appreciated. Thanks -

mounts.jpeg
 
I've found that most installation videos or articles are just trying to sell you tools you don't need. There are 3 main things to address when installing a scope:

1. Mounting bases/rings with the proper amount of torque. Lightly oil all screws and use a calibrated inch-pound screwdriver. This tool is actually not needed if you have a fair amount of mechanical experience and a good feel for tightening screws. The main thing is not to over-tighten things or you could cause damage to your scope, the mounts, or your receiver.

2. Lapping the scope rings. Some people swear by this, others don't really care. With good quality mounts it's less of a concern. Not lapping the rings can cause slight ring marks on the scope, which are unsightly if you ever decide to sell the scope or move it around so the ring marks show. This process requires special tools and lapping compound. You can place your scope into the bottom halves of the rings and see if it appears to be aligned. If everything seems pretty straight you probably don't need to worry about lapping, but it certainly won't hurt.

3. Probably the most debated subject...leveling the scope. For shooting inside 500 yards, and for anyone not using a bubble level attached to the scope, this is not nearly as critical as some will have you believe. You can just eyeball it most of the time and be fine. Personally I will level the rifle in a gun vise (you have to pick a surface to level, such as the bolt rails, the scope bases, or my favorite is the top of the stock). I will take 2 small blocks of equal size, place one on each side of the barrel so it's touching the stock, and put a small carpenter's level across the 2 blocks. This levels the stock and presumably the entire rifle. Before starting this process get the front to back position figured out (eye relief) and mark the scope with tape or something. Get the rifle leveled, then use a plumb line of some kind to get the scope reticle aligned with the rifle. You can use a door jamb (check for plumb first), an actual plumb bob, or a laser level. Anything you know to be a reliable vertical line (horizontal lines work too if that's more convenient). Look through the scope, align your reticle, and carefully tighten the rings to avoid moving the scope. If installing a scope level you can do it at the same time. Torque the screws to spec and you're done.
 
Thanks for your lengthy reply - couple of thoughts ...

Can't see lapping happening ... sounds too exotic and with what you described not necessary for my application

Thinking these mounts will go on and may rarely if ever come off so you're saying oil on the receiver screws and not a tiny dab of blue Loctite? (and of course no Loctite on the rings)

No mating surface preparation like with an alcohol based lens cleaning cloth or similar?

Nothing goes into the rings like a tissue paper thin piece of rubberized material to help prevent slippage? (probably not, just wondering because I have seen rings that included a bit of rubberized surface on the interior of the clamps)

Appreciate your comments on getting the reticle vertical, a question I have is getting eye-to-scope distance correct. Thought I've read to determine forward/rearward position shoulder the rifle with eyes closed and then open and check the sight picture and adjust and try again. Something like that sounds right?
On the eye to scope distance have your scope on its highest power and put your head on the stock at a point that you think is natural and correct, then pull the scope back to your eye until you get a clear full sight picture in your lens.
I like some type of anti seize on the receiver screws like “choke tube lube”, instead of locktite.
 
I've found that most installation videos or articles are just trying to sell you tools you don't need. There are 3 main things to address when installing a scope:

1. Mounting bases/rings with the proper amount of torque. Lightly oil all screws and use a calibrated inch-pound screwdriver. This tool is actually not needed if you have a fair amount of mechanical experience and a good feel for tightening screws. The main thing is not to over-tighten things or you could cause damage to your scope, the mounts, or your receiver.

2. Lapping the scope rings. Some people swear by this, others don't really care. With good quality mounts it's less of a concern. Not lapping the rings can cause slight ring marks on the scope, which are unsightly if you ever decide to sell the scope or move it around so the ring marks show. This process requires special tools and lapping compound. You can place your scope into the bottom halves of the rings and see if it appears to be aligned. If everything seems pretty straight you probably don't need to worry about lapping, but it certainly won't hurt.

3. Probably the most debated subject...leveling the scope. For shooting inside 500 yards, and for anyone not using a bubble level attached to the scope, this is not nearly as critical as some will have you believe. You can just eyeball it most of the time and be fine. Personally I will level the rifle in a gun vise (you have to pick a surface to level, such as the bolt rails, the scope bases, or my favorite is the top of the stock). I will take 2 small blocks of equal size, place one on each side of the barrel so it's touching the stock, and put a small carpenter's level across the 2 blocks. This levels the stock and presumably the entire rifle. Before starting this process get the front to back position figured out (eye relief) and mark the scope with tape or something. Get the rifle leveled, then use a plumb line of some kind to get the scope reticle aligned with the rifle. You can use a door jamb (check for plumb first), an actual plumb bob, or a laser level. Anything you know to be a reliable vertical line (horizontal lines work too if that's more convenient). Look through the scope, align your reticle, and carefully tighten the rings to avoid moving the scope. If installing a scope level you can do it at the same time. Torque the screws to spec and you're done.
Some will tell you the plumb bob method is not true to form. But gravity don't lie and pulls the string straight towards the earth. It is critical to level the rifle before attempting to use the plumb bob method. I normally check it at 100 yds. with the scope on max. magnification.
 
I level my horizontal crosshair to the horizon. I level the scope tube level to match. Your gun doesn't have to be level to the scope, but you must always level the crosshairs for the turret corrections to track accurately.

I firmly believe in blue loctite on all screws. Base screws get 40 inlbs torque, ring screws 20 inlbs. You were sort of on to something asking about shims or spacers. You would need to get over sized rings, say 30mm rings for a 1" scope tube and buy hard plastic spacers from Amazon, or Larue Tactical, and mount the scope in the spacers, in the rings. Search "Burris Signature Rings & Inserts" for the grand idea. Definitely not rubber inserts! LOL. Ring insert mounting provides a substantially greater grip on the scope tube and prevents scope tube marring. They also act as a self lapper to lesson scope bend.

You can bed the bases to the gun receiver with JB Weld and proper prep work. I've not done this yet, but I see it's merits on a magnum rifle.

Eye relief is best obtained with scope on mid-max power and in the shooting position you are most likely to use.

Reticle focus is the diopter ring on the eye piece. Find a bright colored or white wall and but glance at the crosshairs. Adjust the diopter ring until the cross hairs are crisp upon first glance. Look away and adjust the ring a bit at a time, glancing each time. You do not want to look at the crosshairs while dialing the ring. Your eyes will auto correct to the changing settings.
 
Thanks for your lengthy reply - couple of thoughts ...

Can't see lapping happening ... sounds too exotic and with what you described not necessary for my application

Thinking these mounts will go on and may rarely if ever come off so you're saying oil on the receiver screws and not a tiny dab of blue Loctite? (and of course no Loctite on the rings)

No mating surface preparation like with an alcohol based lens cleaning cloth or similar?

Nothing goes into the rings like a tissue paper thin piece of rubberized material to help prevent slippage? (probably not, just wondering because I have seen rings that included a bit of rubberized surface on the interior of the clamps)

Appreciate your comments on getting the reticle vertical, a question I have is getting eye-to-scope distance correct. Thought I've read to determine forward/rearward position shoulder the rifle with eyes closed and then open and check the sight picture and adjust and try again. Something like that sounds right?
Loctite is fine. Usually when you see recommended torque values for the different screws they are assuming you have some kind of lubricant on the threads. If everything is clean and dry then the torque vs. holding power will change.

I've never used anything between the rings and scope tube. And I've never had issues with scopes slipping. If you are concerned about it, or if you have problems with it, I have heard that a small amount of powdered rosin (like you'd use in a barrel vise) works very well. You can get it at Midway or other gunsmith suppliers.

Eye relief is really up to your personal preferences. Gargoyle's recommendation is a good one. Depending on the gun I will sometimes set the eye relief to be ideal on the lowest power so it's optimized for a quick shot in the timber. For longer shots I usually have more time, and exact eye relief is not as critical.
 
Thanks for replies -

After researching mounts for a few hours looks like I could be researching installation for days ... lots of different angles. Interesting to see reports of best practices across the spectrum without much consensus.

Have seen indications that some type of thread treatment could make it less likely for receiver screws to corrode / seize and reportedly can help removal of screws later?

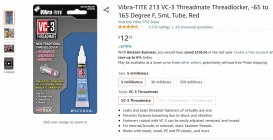
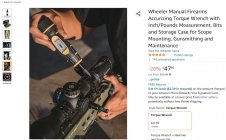
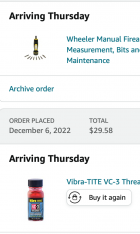
Thoughts on these? ...

threadlock.jpg
torquescrewdriver.jpg
 
The Vibra-TITE 213 VC-3 Threadmate is just great. Start with the 30ml size you will use it more than you think. Works on small to medium screws and bolts in every material and finish I've tried. Best for fasteners that will likely to be removed and/or reused.
 
Researched a few hours and just received these Talley mounts - shown lightly attached to check fit. Impressive! If these perform as well as they look gonna’ be one happy camper. Could anyone kindly refer me to a top-to-bottom scope install guide - want to get these surgically installed. Any feedback appreciated. Thanks -

View attachment 1389419
Well you asked for a guide & the most detailed & "surgical" installation guide I've ever found is in Tony Boyer's book on Rifle Accuracy. There are 26 pages on scopes & mounting them! Of course he is down into extreme details for bench rest rifles, but like most things concerning rifles, I always learn something from the extreme accuracy shooters! One thing I thought that was very interesting was how he mechanically centers the scope reticle & then mounts the scope with that setting so that the setting starts as close as possible to the rifle's desired impact zero. Tricky...

Just FYI...
 
One thing I thought that was very interesting was how he mechanically centers the scope reticle & then mounts the scope with that setting so that the setting starts as close as possible to the rifle's desired impact zero. Tricky...

Just FYI...
That is what Burris recommends for scope mounting in the signature rings. The rings are also different MOA thicknesses. Basically bore sight the scope with as much elevation as one needs. Or if the goal is to optically centered in the scope for a scope like the OP is mounting.

Dial turrets far left to stop. Count back to far right stop. Divide by two. Same with elevation. Place inside rings and boresight with the inserts.
 
That is a sharp looking scope. I don't mean to demean your scope, but I always give the low end to middle road scope a few love taps with a rubber mallet to make it settle in. Too many times I've had to chase the bull till the scope had enough recoil to get the internals to settle in. Even Trijicon recommended this with the ACOGS if mounting new out of the box. Edited to add: I love tap my high end scopes too. Ever since 2005 when Trijicon recommended it for their robust ACOGS.
 
That is what Burris recommends for scope mounting in the signature rings. The rings are also different MOA thicknesses. Basically bore sight the scope with as much elevation as one needs. Or if the goal is to optically centered in the scope for a scope like the OP is mounting.

Dial turrets far left to stop. Count back to far right stop. Divide by two. Same with elevation. Place inside rings and boresight with the inserts.
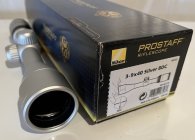
Several years ago purchased this new-in-box Remington 700 in stainless along with the Nikon Prostaff PR31 3 x 9 x 40 in silver. The R 700 came with a no-name scope already mounted but after purchase of the Prostaff installation was offered at no charge so we said sure and went to lunch, returned and it was installed. Can't remember if there was an attempt at bore or laser sighting but removed turret caps to see that both adjustment knobs have “zero” in exactly rear / centered position.

Six years later still hadn’t put a round through it until a few days ago - at about 110 yards put a grand total of two. Points of impact differed 1 3/8”, however 14” left and 7” high. Although I appreciated the installation it was probably a kludgy mount with less than preferable hardware (reticle wasn't vertical either) and sales staff said they understood there was some odd problem (which I’ve now forgotten) but that it was confirmed safe to operate.

That lead me to begin reading about scope mounting and scope centering, thinking 14" left is too far for a correctly mounted scope.

Without getting into the debate of mechanical centering versus optical centering, which certainly look to me like two different things, I'm going to say it seems desirable to have a scope as internally centered as reasonable, into the approximate mid-range of adjustability, anyway, that lead to reading up on the Talley versus Burris options. I saw that Burris offers adjustability in the rings but my reasoning was that the Talley's were made so well they might be very close as-is and the reduction in complexity with one-piece mounts was preferable for my application.

So I guess I'll find out if the Talley option was the way to go but isn't 14" left and 7" high too far out and indicates a failed mount?
 
Last edited:
Several years ago purchased this new-in-box Remington 700 in stainless along with a Nikon Prostaff PR31 3 x 9 x 40 in silver. The R 700 came with a no-name scope already mounted but after purchase of the Prostaff, installation was offered at no charge so we said sure and went to lunch, returned and it was mounted. Can't remember if there was an attempt at bore or laser sighting but removed turret caps to see that both adjustment knobs have “zero” in exactly rear / centered position.

Six years later still hadn’t put a round through it until a few days ago - at about 110 yards put a grand total of two. Points of impact differed 1 3/8”, however 14” left and 7” high. Although I appreciated the store mounting the scope it was probably a kludgy mount with less than preferable hardware (reticle wasn't vertical either) and sales staff said they understood there was some odd problem with the mount (which I’ve now forgotten) but that it was confirmed safe to operate.

That lead me to begin reading about scope mounting and scope centering, thinking 14" left is too far for a correctly mounted scope.

Without getting into the debate of mechanical centering versus optical centering, which certainly look to me like two different things, I'm going to say it seems desirable to have a scope as internally centered as reasonable, into the approximate mid-range of adjustability. Anyway, that lead to reading up on the Talley versus Burris options. I saw that Burris offers adjustability in the rings but my reasoning was that the Talley's were made so well they might be very close as-is and the reduction in complexity with one-piece mounts was preferable for my application.

So I guess I'll find out if the Talley option was the way to go but isn't 14" left and 7" high too far out and indicates a failed mount?
Oh heck yeah. Talley make some fine mounts. I got into the weeds a bit on the Burris mounts, but for what you are mounting and the style of shooting, you will be golden. Zero once, set & forget. Use the BDC reticle!

If I can use inserts I will, but I will still mount metal to metal on a quality rings/mounts maker. I use Larue Mounts for 30-34mm scopes on the AR15/10 rigs. Warne Maxima rings/mounts too. I must admit I have Warne Maxima's (metal to metal) on my ELR 1 mile rig. I will be switching to the Burris sig set I have to give some more elevation, but I managed some 1/4 MOA groups with the rig at 1 mile.
 
That is what Burris recommends for scope mounting in the signature rings. The rings are also different MOA thicknesses. Basically bore sight the scope with as much elevation as one needs. Or if the goal is to optically centered in the scope for a scope like the OP is mounting.

Dial turrets far left to stop. Count back to far right stop. Divide by two. Same with elevation. Place inside rings and boresight with the inserts.
Boyer takes it one step further. After he has the scope, rings & mount set-up to shoot, he zeros rifle dead-on at 100yds. Using a boresighter that fits in the end of the barrel he then records where the reticle is relative to the boresighter's grid. Then he removes the scope & optically centers it. Now he puts the scope, rings & mount back on adjusting each so that the scope reticle matches the recorded boresighter coordinates.
 

Upgrades & Donations

This Forum's expenses are primarily paid by member contributions. You can upgrade your Forum membership in seconds. Gold and Silver members get unlimited FREE classifieds for one year. Gold members can upload custom avatars.


Click Upgrade Membership Button ABOVE to get Gold or Silver Status.

You can also donate any amount, large or small, with the button below. Include your Forum Name in the PayPal Notes field.


To DONATE by CHECK, or make a recurring donation, CLICK HERE to learn how.

Forum statistics

Threads
165,559
Messages
2,198,262
Members
78,961
Latest member
Nicklm
Back
Top