TommyD11730
Silver $$ Contributor
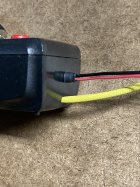
I recently purchased a Dandy Trickler Controller and I think it's good enough to post a review. It's sold by Accurate Shooter member itchyTF so feel free to contact him for more details.
In a nutshell what his controller does is convert the Dandy Tricker from a push button manual control to an automatic trickler.
Like a lot of reloaders I was searching to do better than my chargemaster could muster. So I sold it and purchased a FX120i scale. Now I had a accurate scale, but I needed a way to deliver the powder. In my case I 3D printed some parts and mounted a Lee Powder measure to the top of the scale. It would do the bulk of the drop and I could use the Dandy to manually trickle up to the grain my desired charge. I used it for about 6 months while I waited for one of the various big dollar vapor ware powder dispensers to become available.
Thats when I saw itchyTF's controller and took a chance on it. So now for a fraction of the cost I have a "semi-Auto" if you will dispenser. All I do is throw the 1st charge onto the scale and itchyTF's does the rest.
Ill try and imbed a short video of it dropping Varget, and one of itchyTF's videos.
I think it's pretty neat!