Follow along with the video below to see how to install our site as a web app on your home screen.
Note: This feature may not be available in some browsers.
This Forum is for adults 18 years of age or over. By continuing to use this Forum you are confirming that you are 18 or older. No content shall be viewed by any person under 18 in California.
I should let you know that I have been a fultime machinist in job shops for over 20 years.
I have learned to eliminate problem very well.
Now reaming a chamber is different then most of the things I see and has its own problems one is a reamer forming the finish profile (taper angle flat to flat and taper).
my first inclination was to do it exactly like TRA suggested and that is exactly the way that caused the marks. So i did a chamber testing a method that rustystud suggested and completely eliminated the marks.
I don't have a flush system and I am very careful I guess I should have responded that carefuly removing reamer with lathe moving helped.
Now I don't think the marks were any real problem but just cosmetic and maybe only .00005 deep if that it dosn't take much
Butch,
I know this can happen but if the final cut is fed in very slowly the chip is so fine it's unlikely to scratch anything. More like fuzz than chip. As I mentioned, cases with minimal taper are worse because, if you get a scratch earlier in the job, it may not come out before you are finished. By the way, I do like to let the tool "dwell" at the end of the cut and don't pull until cutting is finished. WH
I just did one removing with spindle going no marks in the neck and freebore although i did get to agresive earlier and hit bottom to hard and caused the reamer to jump now the chamber has the appearance of flutes so back in the lathe it goes hopefuly it will clean up quick sense it is threaded for a nut job I can do that although I don't want to take much more off.
Hmm maybe that is why I got a little carried away with the threads
To get rid of the "fluting" you will probably have to set the barrel back a little more than the length of the neck; say a half inch or so. Then, wrap the reamer in cloth (just one layer should do), oil it up and feed it in, cutting through the cloth. Do not hold the reamer driver in your hand but support it on the tool post. Do support the reamer on the center.
An alternative to the cloth wrap is to fill the flutes with plasticine (modelling clay) or heavy axle grease. I have used both methods to fix a chattered chamber. I used to work in a city where the local college had a hobby gunsmithing course and I got a fair amount of practice. So as not to leave the wrong impression, I have to add that I've chattered a couple of my own as well! Good luck. WH
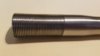
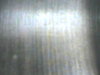
The top two pics are neck and throat area to show no line's in it
I was getting some chatter but I stopped that right away with wax paper the marks in the chamber came from going in to fast for the second to last cut and hit sholder to hard and it jumped just enough to do that and the last cut didn't clean it up like I thought.
I thought about doing that to see because they are very faint although they look like canyons in the pics.
I just got it back in the lathe and I'll put a indicator on it in a minute.
When I got done and checked I was in a hurry and only checked neck throat and base of chamber and it was good
To get rid of the "fluting" you will probably have to set the barrel back a little more than the length of the neck; say a half inch or so. Then, wrap the reamer in cloth (just one layer should do), oil it up and feed it in, cutting through the cloth. Do not hold the reamer driver in your hand but support it on the tool post. Do support the reamer on the center.
An alternative to the cloth wrap is to fill the flutes with plasticine (modelling clay) or heavy axle grease. I have used both methods to fix a chattered chamber. I used to work in a city where the local college had a hobby gunsmithing course and I got a fair amount of practice. So as not to leave the wrong impression, I have to add that I've chattered a couple of my own as well! Good luck. WH
Oh I put a indicator on it and got less then .001 movement.
That would drive me nuts knowing that.
Some of that is because I was indicating the new throat area
Yes I have tried the grease and it works OK but, if the chatter is really bad, I don't think it would do. If a person applies the grease when the chatter first starts, it works well. I used Quaker State axle grease though I'm sure the brand doesn't matter! I've also used the modelling clay and it is as effective. If the chatter is bad, I resort to the cloth and hope there is enough left to ream that it will clean up. Clymer reamers often had a real tendency to chatter and you had to watch. WH
Yes I have tried the grease and it works OK but, if the chatter is really bad, I don't think it would do. If a person applies the grease when the chatter first starts, it works well. I used Quaker State axle grease though I'm sure the brand doesn't matter! I've also used the modelling clay and it is as effective. If the chatter is bad, I resort to the cloth and hope there is enough left to ream that it will clean up. Clymer reamers often had a real tendency to chatter and you had to watch. WH
The lead on this is centered it was dialed in to .0002 and looks the same for 360*
If I took a pic every 30* it would look the same in every pic.
The chamber is tight no slop.
Not sure if that is normal for a 6.5x47l
You cant tell in those pictures if the throat is centered. Its very common for the bottoms of grooves to look like the cut is on an angle or have a radius look to the cut. Thats from the groove not cut to the same depth across it's width. Ratchet is when the groove is deeper on one side than the other, the cut from the reamer will look angled. So long as all 4 have the same angle all is well.
There is a famous youtube video that recommends stopping the lathe before pulling the reamer out. Lots of good advice from this youtuber but some bad advice too. He has made the Remington tenon dimension process (6th grade math) so complicated that I can't follow him, and i did my Master's Thesis solving a system of partial differential equations with variable boundary conditions.
One of the keys to use of the internet is learning to recognize bad advice when you see it.
Once you get partial differential equations with variable boundary conditions to relate to barrel chambering then every barrel you chamber will be a record setter.
This Forum's expenses are primarily paid by member contributions. You can upgrade your Forum membership in seconds. Gold and Silver members get unlimited FREE classifieds for one year. Gold members can upload custom avatars.