• This Forum is for adults 18 years of age or over. By continuing to use this Forum you are confirming that you are 18 or older. No content shall be viewed by any person under 18 in California.

Over Annealing ?

One other point in the Master thesis PDF file was the HV (Vickers scale hardness) is different (softer) close to the mouth of the neck, the middle of the neck, and closer to the neck/shoulder junction (harder)!!! And it makes sense!!! The mouth of the neck will heat up faster and cool faster!!! It is a heat sink!!!! Near the shoulder/neck junction, it is a heat store that requires more time to heat and cool!!!!

FOR THOSE THAT CAN MEASURE THE HARDNESS OF THE NECK, YOU SHOULD SEE THIS!!! However, the TRUE Vickers Scale hardness testing is sinking a very sharp, pyramid diamond into the brass with a certain force (pressure) and measuring the distance from the opposing corners of indentation or the depth of travel of the point!!! Both methods are directly related geometrically!!! This is destructive testing!!! Meaning, the sharp point will lead to slitting of the case neck!!!! Those using Vicker Scale hardness testers, check to see if you are leaving a pointed imprint!!! If they are, mark those cases and be aware of the possibility of neck splitting!!! If they don't leave an impression, please explain to the rest of us how they work!!!!!
That's a good point about the Vickers testing (no pun intended :)).

The Webster Harness Tester I've been using has a small rounded pointy nib used to indent into the brass. This tool is not intended to produce the kind of accuracy of Vickers testers, but I find it can be used much like a comparator and give me a good enough idea for the hardness of the brass as compared to other virgin brass. Like, I compare the reading from my annealed brass to the reading I get from virgin Lapua brass. And I'm a little surprised at how consistent a reading I can get, given the nature of the tool.
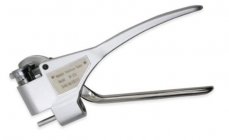
Webster Harness Tester.jpg
 
That's a good point about the Vickers testing (no pun intended :)).

The Webster Harness Tester I've been using has a small rounded pointy nib used to indent into the brass. This tool is not intended to produce the kind of accuracy of Vickers testers, but I find it can be used much like a comparator and give me a good enough idea for the hardness of the brass as compared to other virgin brass. Like, I compare the reading from my annealed brass to the reading I get from virgin Lapua brass. And I'm a little surprised at how consistent a reading I can get, given the nature of the tool.
View attachment 1666545

Thank you Straightshooter1!!! A rounded indent can be formed out, much like a dented neck!!! It doesn't pierce into the brass neck wall like the sharp diamond point!!! I take it, it is a different scale!!!! Some Hardness scale are not directly related to each other!!! Can the Webster scale be converted to the Vickers??????

If you know that the Virgin Lapau brass is soft enough, you can compare it to the Annealed (stress relieved) cases!!! Relative measurements are just as good as actual measurements!!! In this case, it is not destructive, which make this hardness testing a better method!!!!

One question!!! Is the Webster tester like a spring loaded staple gun, a pressure grip, or a set stop on the pressure on the squeeze?????????
 
Last edited:
Well stated!!! However, there is one thing going on that very few know about!!! Heating brass (70/30) at, or beyond 500C (932°F) causes unwanted twin grain growth!!! Too much twin grain growth can lead to micro fracture in the grain and boundary structure leading to a split!!!!!

ARE WE TRULY ANNEALING OR ARE JUST STRESS RELIEVING??????

Stress relieving brass is the process of heating below the nominal temperature which softens the brass and reduces cracking without changing the grain size and associated boundaries!!! Stress Relieving is basically a Recovery process of the cold hardening of thebrass!! Annealing require holding the heat at 300C (572°F) to 400C (752°F) for a certain time limit (15 seconds in most of my research)!!! ANNEALING is the recovery of the grain, recrystallization, and new grain growth!!! Complete grain growth takes more than 24 hours, and the HV (Vickers Scale) hardness will increase some!!! At 370C (698°F), the grain size is around 8 microns (Sizing only)!! At 400C (752°F), grain size averages at 10 micron and is really soft (great for making wildcats)!!!!

Go to the Norma web page and they show and tell why different parts of the case have different grain structures and sizes!!! This explains why I used water/antifreeze bath in my homemade broiler type furnace (propane/oxygen) and removed the pan full of cases 15 to 20 seconds after the cleaned and shiny, soft lead turkey buck shot completely melts (in the middle of the pan on a post with a beer cap bowl)!!!! Lead melts at 327.5C (621.5°F)!!! All the cases are heated to the same temperature for the same amount of time, giving more uniform hardness after a few days rest!!! The pre-cleaned 223 cases looked like they came out of the LC arsenal except the head stamps were WCC 79!! And, the time in the furnace allowed for the brass Recovery and Recrystallization processes!!! The complete grain growth was in the rest time!!!! I no longer have that furnace because I had to renew a contract on the oxygen bottle!!!

I tried attaching a downloaded masters thesis of some research done at Norma, but the PDF is too big for the restriction limits of posts!!!
This is such great info !!!
I knew there was more to it but didn't know the finer specifics with brass itself.
I am much more familiar with the same concept of changing grain structure in Steel though as a welder.
Where --- overheating the HAF (Heat affected zone) on a weld will also be the point where cracks start due to this very thing happening.
This is something newbies with a garage hobby Harbor freight Welder
or guys who think all you have to do is just burn that filler metal in there and you got a good weld.
Not realizing the extra localized heat changes the grain structure
What you pointed out is very similar to hardening steel and then tempering after
Except with brass the affect is opposite, Same concept here though.
Where if we heat steel up to a high temp, it will harden it (Brass softens)
But a lower temp, we will then temper metal (Anneal it)
---------------------------------------------------
Within Annealing our own brass, shooting for a lower temp anneal I believe is the better idea
as opposed to just getting it red hot, especially considering there are different shades of red depending upon ambient light.
Or more to say it is best to --- get it just hot enough to achieve the desired goal.
---------------------------------------------------
I am going to experiment with how LITTLE of heat/time my necks will anneal
Since, I have noticed my necks anneal without even getting the temp up to dull red in a dark room
Dull red is a definite, foolproof method any person can use to visually identify it has been annealed,
However, annealing without having a visual infared signature is possible and may be a better method within preventing neck splits, by virtue of having a smaller grain structure in the HAF.
Within the whole scheme of things, 10 micron grain structure, is actually kind of large, being about the equivalent grit size of 1000 grit sandpaper and makes sense why neck integrity would be compromised.
As a comparison for those interested
, Tungsten Carbide grain size ranges 1-5 microns depending on the carbide (toguhness vs hardness
In knife making for instance many people understand grain structure better in that way
In knife steels, different alloys are added to prevent grain growth during the forging process.
Could this be one reason why some brass is tougher? Such as Lapua


1749040804963.png
 
Last edited:
Could this be one reason why some brass is tougher? Such as Lapua
Cartridge brass is alpha phase. It is very different than what most folks are familiar with in steels or irons. This is also why cartridge brass doesn't harden with quenching. Companies may source their brass according to their own specifications and add in a few other things like tin and other elements to achieve different goals. Even trace amounts of these other elements will alter the quality of the brass.

I'll draw a line at roughly 30% zinc and you will see the phase boundary that has a little "a" for alpha phase. These diagrams are a little difficult to wrap your head around, but what this shows you is that when the percent mix of copper to zinc changes, you can alter the crystal lattice structures and end up with other forms of brass with other kinds of grain structures. For example at 50-50 you get beta phase, and at 63% you get gamma phase. These other phases respond to heat treatment very differently than 70-30.

1749047043771.png
 
Cartridge brass is alpha phase. It is very different than what most folks are familiar with in steels or irons. This is also why cartridge brass doesn't harden with quenching. Companies may source their brass according to their own specifications and add in a few other things like tin and other elements to achieve different goals. Even trace amounts of these other elements will alter the quality of the brass.

I'll draw a line at roughly 30% zinc and you will see the phase boundary that has a little "a" for alpha phase. These diagrams are a little difficult to wrap your head around, but what this shows you is that when the percent mix of copper to zinc changes, you can alter the crystal lattice structures and end up with other forms of brass with other kinds of grain structures. For example at 50-50 you get beta phase, and at 63% you get gamma phase. These other phases respond to heat treatment very differently than 70-30.

View attachment 1666574
I don't know why this sort of thing purely fasciantes me
But it does
Pure Alchemy wizardry
 
This is such great info !!!
I knew there was more to it but didn't know the finer specifics with brass itself.
I am much more familiar with the same concept of changing grain structure in Steel though as a welder.
Where --- overheating the HAF (Heat affected zone) on a weld will also be the point where cracks start due to this very thing happening.
This is something newbies with a garage hobby Harbor freight Welder
or guys who think all you have to do is just burn that filler metal in there and you got a good weld.
Not realizing the extra localized heat changes the grain structure
What you pointed out is very similar to hardening steel and then tempering after
Except with brass the affect is opposite, Same concept here though.
Where if we heat steel up to a high temp, it will harden it (Brass softens)
But a lower temp, we will then temper metal (Anneal it)
---------------------------------------------------
Within Annealing our own brass, shooting for a lower temp anneal I believe is the better idea
as opposed to just getting it red hot, especially considering there are different shades of red depending upon ambient light.
Or more to say it is best to --- get it just hot enough to achieve the desired goal.
---------------------------------------------------
I am going to experiment with how LITTLE of heat/time my necks will anneal
Since, I have noticed my necks anneal without even getting the temp up to dull red in a dark room
Dull red is a definite, foolproof method any person can use to visually identify it has been annealed,
However, annealing without having a visual infared signature is possible and may be a better method within preventing neck splits, by virtue of having a smaller grain structure in the HAF.
Within the whole scheme of things, 10 micron grain structure, is actually kind of large, being about the equivalent grit size of 1000 grit sandpaper and makes sense why neck integrity would be compromised.
As a comparison for those interested
, Tungsten Carbide grain size ranges 1-5 microns depending on the carbide (toguhness vs hardness
In knife making for instance many people understand grain structure better in that way
In knife steels, different alloys are added to prevent grain growth during the forging process.
Could this be one reason why some brass is tougher? Such as Lapua


View attachment 1666564

You nailed!!! In my old furnace, when the lead melted, the necks were a very dull red, except the mouth was a little brighter red, but still dull!!! I think that around that 625°F is about as good as it gets!!! Anymore higher temperature tends to make the necks too soft!! And, with the water/antifreeze bath, I keep the hardness in the head of the case, which reduces the chances of expansion at the 200 mark!!!

I used the furnace for annealing 223 cases for 3 different, early series MINI-14s!!! When the interference fit was 3 thou, the bullets stay in place in the clips in fast recoil conditions!!! 2 thou fit, some bullets moved into the case!!!! My first attempt at annealing was with the propane torch, water bath method (Old BR process), heating till there was a dull orange glow on the neck and knocking them into the water!!! Those Annealed case required crimping to hold the bullets!!! Next round of annealing, after a couple times of reloading the cases, I went with the dull red and didn't need to crimp!!! I Annealed every 3 round of reloading the cases in the furnace after that!!! Yeah, over 10,000 reloads went through those minis!!!!! Bullets, primers, powder, brass were cheap then!!! I use to pick up 1000 bullets at Swift Bullets in the old shop in downtown Quinter, KS for $30 plus tax!!! They were punching out 55 grain bullets with spent, non Nickel plated, 22 long rimfire cases as bullet jackets using Corbin punch and die sets on an indexing (walking beam) power press!! THE GOOD OLD DAY!!!!
 
Last edited:
Cartridge brass is alpha phase. It is very different than what most folks are familiar with in steels or irons. This is also why cartridge brass doesn't harden with quenching. Companies may source their brass according to their own specifications and add in a few other things like tin and other elements to achieve different goals. Even trace amounts of these other elements will alter the quality of the brass.

I'll draw a line at roughly 30% zinc and you will see the phase boundary that has a little "a" for alpha phase. These diagrams are a little difficult to wrap your head around, but what this shows you is that when the percent mix of copper to zinc changes, you can alter the crystal lattice structures and end up with other forms of brass with other kinds of grain structures. For example at 50-50 you get beta phase, and at 63% you get gamma phase. These other phases respond to heat treatment very differently than 70-30.

View attachment 1666574

RegionRat: Here is a different Phase Diagram for Brass!!!! It is based on the atomic % and by weight %!!! It still works, but is easier to see!!!
The end point of the dashed curve touching the X-axis (%ZN) is right at 30%
For those that don't know or understand, In drawing a line straight up from the 30%ZN, it will intersect another curve!!!! Just like region rat posted and illustrated!!! At that intersection point, the brass is at a phase change between solid and a liquid (called the double point)!!! The double point for a 32.5% ZN Brass is 903C!!! For the 30%ZN, it is a little higher!!!!

However, the text states, the 70/30 brass will be an alpha phase unless the brass is Annealed at 900C!!! The homogenous alloy breaks down at that Annealed temperature!!!! And being that close to solid/liquid phase change, it still a very soft solid!!!!! I'm assuming that some Zinc is sweating out of the soft solid at that Annealed temperature!!!! This would lead to two crystalline forms in the solid!! A alpha phase (copper richer) and zinc and different types of grains in the lattice!!! It would no longer be a homogenous solid!!!!
 

Attachments

  • a768173e-c922-485c-8b23-1b9fd25daa5a.jpg
    a768173e-c922-485c-8b23-1b9fd25daa5a.jpg
    226.8 KB · Views: 21
Last edited:
Thank you Straightshooter1!!! A rounded indent can be formed out, much like a dented neck!!! It doesn't pierce into the brass neck wall like the sharp diamond point!!! I take it, it is a different scale!!!! Some Hardness scale are not directly related to each other!!! Can the Webster scale be converted to the Vickers??????
Yes, it's a different scale. The pamphlet that came with it has a small conversion chart for a couple different scales, to include Vickers. Here's what the scale for this Webster tool looks like:
Webster Hardness Tester.jpg
If you know that the Virgin Lapau brass is soft enough, you can compare it to the Annealed (stress relieved) cases!!! Relative measurements are just as good as actual measurements!!! In this case, it is not destructive, which make this hardness testing a better method!!!!

One question!!! Is the Webster tester like a spring loaded staple gun, a pressure grip, or a set stop on the pressure on the squeeze?????????
The tool can be calibrated to keep it measuring properly. AND, if one is testing different materials is has different nibs to use. I use the W-20 nib. This pic should answer your question and give you a good idea how it works:

Webster Hardness Tester diagram.jpg
You nailed!!! In my old furnace, when the lead melted, the necks were a very dull red, except the mouth was a little brighter red, but still dull!!! I think that around that 625°F is about as good as it gets!!! Anymore higher temperature tends to make the necks too soft!! And, with the water/antifreeze bath, I keep the hardness in the head of the case, which reduces the chances of expansion at the 200 mark!!!

I used the furnace for annealing 223 cases for 3 different, early series MINI-14s!!! When the interference fit was 3 thou, the bullets stay in place in the clips in fast recoil conditions!!! 2 thou fit, some bullets moved into the case!!!! My first attempt at annealing was with the propane torch, water bath method (Old BR process), heating till there was a dull orange glow on the neck and knocking them into the water!!! Those Annealed case required crimping to hold the bullets!!! Next round of annealing, after a couple times of reloading the cases, I went with the dull red and didn't need to crimp!!! I Annealed every 3 round of reloading the cases in the furnace after that!!! Yeah, over 10,000 reloads went through those minis!!!!! Bullets, primers, powder, brass were cheap then!!! I use to pick up 1000 bullets at Swift Bullets in the old shop in downtown Quinter, KS for $30 plus tax!!! They were punching out 55 grain bullets with spent, non Nickel plated, 22 long rimfire cases as bullet jackets using Corbin punch and die sets on an indexing (walking beam) power press!! THE GOOD OLD DAY!!!!
When I heated my necks to a red glow for just over a second the hardness got me to where I wanted to be. However, after sizing the hardness went well over my target. I had to get the necks softer than my target so that after sizing the hardness was at my target hardness. I had to increase the time the necks were red to almost 2 full seconds for that.

Though the neck down to the shoulder was red (in a darkened room, indicating over 1,000° F) there no annealing effect on the lower part of the case since that part of the case doesn't get hot enough for long enough. I plan on sectioning a case and measuring the hardness down the body of a case. When the case drops out of the flame, they cool off really fast, though I wouldn't want to grab hold of the bottom of the case with my hands at that point. ;)

BTW: Here's that conversion chart that came with my Webster Hardness tool:
Webster Hardness Conversion.jpg
 
Last edited:
Yes, it's a different scale. The pamphlet that came with it has a small conversion chart for a couple different scales, to include Vickers. Here's what the scale for this Webster tool looks like:
View attachment 1666640

The tool can be calibrated to keep it measuring properly. AND, if one is testing different materials is has different nibs to use. I use the W-20 nib. This pic should answer your question and give you a good idea how it works:

View attachment 1666642

When I heated my necks to a red glow for just over a second the hardness got me to where I wanted to be. However, after sizing the hardness went well over my target. I had to get the necks softer than my target so that after sizing the hardness was at my target hardness. I had to increase the time the necks were red to almost 2 full seconds for that.

Though the neck down to the shoulder was red (in a darkened room, indicating over 1,000° F) there no annealing effect on the lower part of the case since that part of the case doesn't get hot enough for long enough. I plan on sectioning a case and measuring the hardness down the body of a case. When the case drops out of the flame, they cool off really fast, though I wouldn't want to grab hole of the bottom of the case with my hands at that point. ;)

BTW: Here's that conversion chart that came with my Webster Hardness tool:
View attachment 1666666

Very interesting!!!

I have never Annealed without the water or water/antifreeze bath (used in the furnace)!! Like I stated earlier, the old time BR practice was using the water bath (water level at 1/4" - 3/8" below the body/shoulder junction)!! I don't like the head of the case and lower body seeing additional heat beyond the combustion heat in the chamber!!! I feel, that the head can undergo unwanted softening at the case head!!! I may be wrong, but why take the chance????????? IMO.

Here is a question I want to ask the BR and LR competitors in using the waterbath!

WHAT CAUSES CLICKERS????

The only cases I ever had problems with too much expansion at the 200 mark (causing heavy bolt drop) were extremely high pressure loads seeing what the rifle/reload max was!!! And as a hunter, I've had some loads that were a few tens higher in powder charge vs max in reloading manuals!!! And there was a node there (bottom end charge)!!! 700 BDL VS, 7-08 with the 160s was one of them!!! Primers were nearly flattened, but adding more powder flattened them even more!!! At a point, it was still holding the waterline, but extruder imprints started!!! Those cases were the ones I had excess diameter at 200 mark!!! Backed it down to the node min, and the flattening decreased, but still over max by the book!!! And, the 200 mark was fine running over book max for several reloads of those cases!!
 
Last edited:
RegionRat: Here is a different Phase Diagram for Brass!!!! It is based on the atomic % and not by weight %!!! It still works, but is easier to see!!!
The end point of the dashed curve touching the X-axis (%ZN) is right at 30%
For those that don't know or understand, In drawing a line straight up from the 30%ZN, it will intersect another curve!!!! Just like region rat posted and illustrated!!! At that intersection point, the brass is at a phase change between solid and a liquid (called the double point)!!! The double point for a 32.5% ZN Brass is 903C!!! For the 30%ZN, it is a little higher!!!!
This is an excellent picture of a giraffe
 
Cartridge brass is alpha phase. It is very different than what most folks are familiar with in steels or irons. This is also why cartridge brass doesn't harden with quenching. Companies may source their brass according to their own specifications and add in a few other things like tin and other elements to achieve different goals. Even trace amounts of these other elements will alter the quality of the brass.

I'll draw a line at roughly 30% zinc and you will see the phase boundary that has a little "a" for alpha phase. These diagrams are a little difficult to wrap your head around, but what this shows you is that when the percent mix of copper to zinc changes, you can alter the crystal lattice structures and end up with other forms of brass with other kinds of grain structures. For example at 50-50 you get beta phase, and at 63% you get gamma phase. These other phases respond to heat treatment very differently than 70-30.

View attachment 1666574
I believe these are called equilibrium charts. They represent the phases at temperature. The phases may change on cooling for more complex alloys? If your under about 37% Zn you will always 100% Alpha phase. For flash annealing there is only 1 temp range and time at temp that works. It's real simple.
 
Last edited:
Very interesting!!!

I have never Annealed without the water or water/antifreeze bath (used in the furnace)!! Like I stated earlier, the old time BR practice was using the water bath (water level at 1/4" - 3/8" below the body/shoulder junction)!! I don't like the head of the case and lower body seeing additional heat beyond the combustion heat in the chamber!!! I feel, that the head can undergo unwanted softening at the case head!!! I may be wrong, but why take the chance????????? IMO
Hmmmm??? So, you've got a trey of cases sitting in water/antifreeze that goes into a furnace that's been pre-heated to something like 650°F ( 343°C ) and you leave them in there for how long. . . quite a few minutes?

Certainly, the part of of your cases below the water line will not be affected. Likewise, the lower part of my case aren't either since the amount of time they're at on that part of the cases is way lower than 650°F for less than a couple seconds. :rolleyes:

If you haven't seen this PDF file on Deformation and Annealing of Cartridge Brass, you might like to take a read the attached and see what difference temperatures and amount of times does to cartridge brass.

Here is a question I want to ask the BR and LR competitors in using the waterbath!

WHAT CAUSES CLICKERS????

The only cases I ever had problems with too much expansion at the 200 mark (causing heavy bolt drop) were extremely high pressure loads seeing what the rifle/reload max was!!! And as a hunter, I've had some loads that were a few tens higher in powder charge vs max in reloading manuals!!! And there was a node there (bottom end charge)!!! 700 BDL VS, 7-08 with the 160s was one of them!!! Primers were nearly flattened, but adding more powder flattened them even more!!! At a point, it was still holding the waterline, but extruder imprints started!!! Those cases were the ones I had excess diameter at 200 mark!!! Backed it down to the node min, and the flattening decreased, but still over max by the book!!! And, the 200 mark was fine running over book max for several reloads of those cases!!
From my limited experience (am not a competitive shooter), I'd say it's simply a lack of enough clearance is parts of the chamber. I'd guess, different things can be a cause, like a particular reamer's cut for a chamber??? Note, I'm not a gunsmith. :rolleyes:;)
 

Attachments

Guys, and maybe gals, let me make this easy. Real easy.

If your shoulders are no longer bumping back at your old die setting or your seating force has gone up or become erratic while maintaining the same case neck prep, you need to anneal by whatever method you want.

If, after the annealing, your seating force and shoulder bump are restored and the case neck still holds a bullet when a dummy round is chambered/ejected a few times and man handled to simulate recoil in a magazine, you’re successful.

No charts, no tools, no arguments…. And it doesn’t matter what anyone else thinks about how you did it.
 
Very interesting!!!

I have never Annealed without the water or water/antifreeze bath (used in the furnace)!! Like I stated earlier, the old time BR practice was using the water bath (water level at 1/4" - 3/8" below the body/shoulder junction)!! I don't like the head of the case and lower body seeing additional heat beyond the combustion heat in the chamber!!! I feel, that the head can undergo unwanted softening at the case head!!! I may be wrong, but why take the chance????????? IMO.

Here is a question I want to ask the BR and LR competitors in using the waterbath!

WHAT CAUSES CLICKERS????

The only cases I ever had problems with too much expansion at the 200 mark (causing heavy bolt drop) were extremely high pressure loads seeing what the rifle/reload max was!!! And as a hunter, I've had some loads that were a few tens higher in powder charge vs max in reloading manuals!!! And there was a node there (bottom end charge)!!! 700 BDL VS, 7-08 with the 160s was one of them!!! Primers were nearly flattened, but adding more powder flattened them even more!!! At a point, it was still holding the waterline, but extruder imprints started!!! Those cases were the ones I had excess diameter at 200 mark!!! Backed it down to the node min, and the flattening decreased, but still over max by the book!!! And, the 200 mark was fine running over book max for several reloads of those cases!!
What do you mean by annealing in a furnace? Tony Boyers book talks about clickers. Without reviewing the article I believe he said that when firing the case expands and eventually in some cases the body works hardens enough that it doesn't contract enough to free it from the chamber wall. The clicking sound comes from the bolt pulling the case and freeing it from sticking against the chamber wall. Some of the 6PPC shooters with custom actions are over 60,000 PSI loads.
 
Hmmmm??? So, you've got a trey of cases sitting in water/antifreeze that goes into a furnace that's been pre-heated to something like 650°F ( 343°C ) and you leave them in there for how long. . . quite a few minutes?

Certainly, the part of of your cases below the water line will not be affected. Likewise, the lower part of my case aren't either since the amount of time they're at on that part of the cases is way lower than 650°F for less than a couple seconds. :rolleyes:

If you haven't seen this PDF file on Deformation and Annealing of Cartridge Brass, you might like to take a read the attached and see what difference temperatures and amount of times does to cartridge brass.


From my limited experience (am not a competitive shooter), I'd say it's simply a lack of enough clearance is parts of the chamber. I'd guess, different things can be a cause, like a particular reamer's cut for a chamber??? Note, I'm not a gunsmith. :rolleyes:;)
Over the years I have read many articles George Vander Voort wrote. He was always very famous for the quality of his work. I believe he had a BS in Metallurgy. I read the article you put up. Not sure if I can relate it to annealing case necks because all of his annealing was done for a half hour total time.

An article I like by a study performed at the University of Illinois Metallurgy Dept. We don't know the % deformation we have from firing and sizing necks. I usually guess and look at the 20% deformation column. If nothing else you can see that it takes a lot longer lose hardness than most people think. The annealing was done with plates about 1/8" think and cold rolled to various degrees of deformation. The coupons were annealed in a lead bath. Thermal couples were attached to the coupons. From memory the lower temp plates took about 20 seconds to reach temp, the higher temp coupons reached temp in about 5 seconds. The shortest time on the chart is 15 seconds. If there is only a couple hardness numbers drop in 15 seconds it has to be about zero change flash annealing. This chart was only for 550C (1022F). Many other temp charts in report.

I would put the entire report up but it's very large. I will look up the website and post it.

Later: Just looked at the chart, the reason no grain size is given in some of the columns is because GS is not determined on smashed elongated grains. GS is only dermined on grains that at close to being round. If the grains ae elongated they report the guestimate at % elongation.


One minor comment on Georges article: He says something like a hardness of 80 is twice the hardness of 40. You cannot interpret the numbers like that they are arbitrary scales. If you used a different hardness or temp scales the spread will be different.

1749070612748.png
 
Last edited:
Very interesting!!!

I have never Annealed without the water or water/antifreeze bath (used in the furnace)!! Like I stated earlier, the old time BR practice was using the water bath (water level at 1/4" - 3/8" below the body/shoulder junction)!! I don't like the head of the case and lower body seeing additional heat beyond the combustion heat in the chamber!!! I feel, that the head can undergo unwanted softening at the case head!!! I may be wrong, but why take the chance????????? IMO.

Here is a question I want to ask the BR and LR competitors in using the waterbath!

WHAT CAUSES CLICKERS????

The only cases I ever had problems with too much expansion at the 200 mark (causing heavy bolt drop) were extremely high pressure loads seeing what the rifle/reload max was!!! And as a hunter, I've had some loads that were a few tens higher in powder charge vs max in reloading manuals!!! And there was a node there (bottom end charge)!!! 700 BDL VS, 7-08 with the 160s was one of them!!! Primers were nearly flattened, but adding more powder flattened them even more!!! At a point, it was still holding the waterline, but extruder imprints started!!! Those cases were the ones I had excess diameter at 200 mark!!! Backed it down to the node min, and the flattening decreased, but still over max by the book!!! And, the 200 mark was fine running over book max for several reloads of those cases!!
As to what causes clickers
In my experience, brass can get hammered so hard it does not shrink back down
The brass circumference tries to expand beyond the cirumference of its container
Such as expansion at the 200 Line
If the internal hammer going on (powder/case pressure) gets to a certain point high enough...
... it can expand the brass to the point it stays there and doesn't retract
------------
I have also had this happen if the chamber is too tight, causing basically the same affect but even with mild loads.
Its a weird phenomenon but ...
That area needs to be able to expand, without hitting a hard stopping point or restriction
, in order to shrink back down
------------
I would also bet this work hardens the brass at the 200 line to where it contributes to case head seperations as well
 
Hmmmm??? So, you've got a trey of cases sitting in water/antifreeze that goes into a furnace that's been pre-heated to something like 650°F ( 343°C ) and you leave them in there for how long. . . quite a few minutes?

Certainly, the part of of your cases below the water line will not be affected. Likewise, the lower part of my case aren't either since the amount of time they're at on that part of the cases is way lower than 650°F for less than a couple seconds. :rolleyes:

If you haven't seen this PDF file on Deformation and Annealing of Cartridge Brass, you might like to take a read the attached and see what difference temperatures and amount of times does to cartridge brass.


From my limited experience (am not a competitive shooter), I'd say it's simply a lack of enough clearance is parts of the chamber. I'd guess, different things can be a cause, like a particular reamer's cut for a chamber??? Note, I'm not a gunsmith. :rolleyes:;)

Straightshooter1:

I have read the full article of your partial article!!! Big difference between a thin plate and sheet stock compared to the 0.012-0.014 inch thick neck thermodynamically!!!!

It was around 650° at 15 to 20 second!!! And with the 3 MINIs it was over 10,000 bullets purchased!!! I bought 500 WCC 79, once fired Military brass for $10.00!!! Lost some brass due to the semiautomatic throwing cases!!! Do the math!!!
It worked!!!

Now you're going to say, at that price for brass, why worry about annealing??? Because I had those cases shooting really great in the Minis!! Chamfered on both ends of uniformed reamed flash holes, uniformed primer pockets, and inside reamed necked cases!!! This prepped cases were extremely accurate in those 18.5 in barrels!! I had to much time invested in the brass prep!!!

I had only 3 or 4 cases that got the DEEP 6!!! They had dinged case mouths!!!
I did not lose a single case from over work hardening!!!
 
What do you mean by annealing in a furnace? Tony Boyers book talks about clickers. Without reviewing the article I believe he said that when firing the case expands and eventually in some cases the body works hardens enough that it doesn't contract enough to free it from the chamber wall. The clicking sound comes from the bolt pulling the case and freeing it from sticking against the chamber wall. Some of the 6PPC shooters with custom actions are over 60,000 PSI loads.
By keeping the 223 brass in a water/antifreeze bath, I did not change the hardness in middle body down!!! This reduces the growth at the 200 mark on the case!!! And some of that 223 brass seen over 25 reloads!!!
 

Upgrades & Donations

This Forum's expenses are primarily paid by member contributions. You can upgrade your Forum membership in seconds. Gold and Silver members get unlimited FREE classifieds for one year. Gold members can upload custom avatars.


Click Upgrade Membership Button ABOVE to get Gold or Silver Status.

You can also donate any amount, large or small, with the button below. Include your Forum Name in the PayPal Notes field.


To DONATE by CHECK, or make a recurring donation, CLICK HERE to learn how.

Forum statistics

Threads
165,018
Messages
2,188,266
Members
78,646
Latest member
Kenney Elliott
Back
Top