• This Forum is for adults 18 years of age or over. By continuing to use this Forum you are confirming that you are 18 or older. No content shall be viewed by any person under 18 in California.

My Stainless Steel Media Thumbler Case cleaning findings

  • Thread starter Thread starter Bradley Walker
  • Start date Start date

Bradley Walker

There have been a lot of threads about SS media tumbling and various finding, problems and solutions. Here is what I have found personally. I think this is the coolest tool for cleaning just about anything metal. I not only use mine for brass but it works great for vintage guitar parts too!!

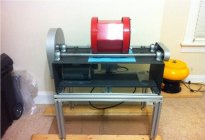
I have a Thumbler tumbler and I use pins I purchased from these guys.
http://myworld.ebay.com/skilam/

I love my pins. They are perfect and appear to be very high quality. I started with 5 lbs.

Anyway… This is what I found. I use water, Dawn, and about a half a teaspoon of Lemishine. You don't need Lemishine but the cases come out noticeably prettier and shinier with it. I have recently started playing with ratios of brass to pins and tumbling time based on reviews and feedback from other users on the forum. People had complained about the necks getting peening at the mouth. I too had witnessed this myself. Many theorized that the brass colliding with itself was causing the peening. I think I am going to agree. I think that people are trying to do too many cases at once. I did a test recently and using my 5 lbs of pins I cleaned 50 308 cases. I only had to tumble for about 45 minutes in my 5 lbs of pins to get the cases completely clean inside and out. I saw no real peening that concerned me at all. Nothing like I had seen when I was doing 200 6BR cases at a time and tumbling for 3 hours and the cases were just as clean.
Long story short… clean as few cases as possible or buy more pins. I am going to buy another 5 lbs of pins. I think the brass has to be swamped by pins and the cases need to be buried and separated as much as possible from the other brass if peening is a concern.

I am going to say the ratio that is the most efficient as about 100 223 or 50 308/6br cases per 5 lbs of pins. Tumble for about an hour or less.
 
Nice Bradley! I will have to say that I am guilty in terms of putting too many pieces of brass in and as a result having to tumble for longer periods of time. Will have to try your ratios...
 
Something to keep in mind as you add more pins.
You're working with a "14 pound" big drum? Adding more pins, brass and water might be too heavy? Go easy. ;)
 
NorCalMikie said:
Something to keep in mind as you add more pins.
You're working with a "14 pound" big drum? Adding more pins, brass and water might be too heavy? Go easy. ;)

Well the thing is built like a tank and the motor is stout. I think people tumble rocks in these things??? hahaha

I think it will handle 5 more lbs....
 
I was directed to Buffalo Arms by another forum member for the media. Their price is pretty good.
 

Attachments

  • IMG_0037resized.JPG
    IMG_0037resized.JPG
    48.4 KB · Views: 356
Bradley Walker said:
NorCalMikie said:
Something to keep in mind as you add more pins.
You're working with a "14 pound" big drum? Adding more pins, brass and water might be too heavy? Go easy. ;)

Well the thing is built like a tank and the motor is stout. I think people tumble rocks in these things??? hahaha

I think it will handle 5 more lbs....
I think the key is to keep the total weight down in the 14-15 lb area. If more pins are added, then the amount of brass/water has to be reduced. The problem here is the pins are denser than water and so the water volume might be reduced to the point where the water level is less than 1" from the top which might increase impact.

The problem as it relates to weight is not so much the drum but the motor and that belt which may wear out.
 
NCFrank how well does your setup roll the drum.I ask for I cannot see any type of rubber on the rollers,and that I am building one somewhat like yours.As of now I have it all but the drum, and was thinking to add a bike tube cut into for the drive roller for grip.

Nice tumbler you got there to add,I'd bet you could use a larger drum if you wanted too.
 
jlow said:
I think the key is to keep the total weight down in the 14-15 lb area.

The problem as it relates to weight is not so much the drum but the motor and that belt which may wear out.

I think that motor and belt are very oversized... I design material handling equipment and I have seen a 1/4 HP motor move hundreds of lbs... I think that one is 1/4 horse and is reduced about 10 to 1... (just a guess) and rolling that weight takes very little force or they would have to have geared feet...
 
Bradley Walker said:
jlow said:
I think the key is to keep the total weight down in the 14-15 lb area.

The problem as it relates to weight is not so much the drum but the motor and that belt which may wear out.

I think that motor and belt are very oversized... I design material handling equipment and I have seen a 1/4 HP motor move hundreds of lbs... I think that one is 1/4 horse and is reduced about 10 to 1... (just a guess) and rolling that weight takes very little force or they would have to have geared feet...
Give it a try and see how it works - might be OK, it's just that I seem to remember mine slipping a little a while back..
 
jlow said:
Bradley Walker said:
jlow said:
I think the key is to keep the total weight down in the 14-15 lb area.

The problem as it relates to weight is not so much the drum but the motor and that belt which may wear out.

I think that motor and belt are very oversized... I design material handling equipment and I have seen a 1/4 HP motor move hundreds of lbs... I think that one is 1/4 horse and is reduced about 10 to 1... (just a guess) and rolling that weight takes very little force or they would have to have geared feet...
Give it a try and see how it works - might be OK, it's just that I seem to remember mine slipping a little a while back..

That drum needs rubber bands around the drive portion of the drum. When the soap gets on the edge of the drum it slips.
 
Johnboy,
I got this unit by auction from my work place. I was the only one to bid on it ($30 ;D no joke) and yes it does have a larger drum, around 5gal capacity. It's the black one in the photo.

The shafts are 5/8 dia. and I replaced the old rubber on them since it was cracking from lots of use and age. I just got some 5/8 braided hose/tubing from Lowes, cut the length I needed for the shafts, very light application of oil on the shafts so the tubing would slide on all the way. It was a little tight. Turns the drum without any problem or slippage. I've seen the Thumlers system slip so the weight is an issue with it.

V Belt and pulley drive, electric 1/3 hp 60hz motor. The opposite end or the right end as you look at it in the pfoto uses belt and pulley also to drive the other shaft. The weight of the drum drives nothing.

Very pleased with this set up. Does a good job and runs quiet. Turns the Thumler drum slightly faster than the Thumler system from what I've seen in videos. But again, no slippage and this system can handle more weight.

Here's a link to give you an idea of pricing on similar but smaller units. Continue your build. You'll be glad you did. If your shafts are in bearings similar to mine, to run the Thumlers drum you'll need to keep the spacing at 6 inches C to C max on your shafts to avoid dragging the drum on the base plate unless you do some modification to compensate.

http://therockshed.com/tumbler5.html#Large
 

Attachments

  • IMG_0037resized.JPG
    IMG_0037resized.JPG
    48.4 KB · Views: 198
  • IMG_0037resized.JPG
    IMG_0037resized.JPG
    48.4 KB · Views: 151
The photo with the black drum, look closely at the shaft. You can see a gap in the tubing. This is when I was testing replacement. I've put new tubing on both shafts that fits between the bearings. No gaps now.
 
I meant to add that I too believe the additional amount of media above the recommended 5lbs helps with protection or cushioning against peening case mouths. So if you're using 7 or 8 lbs you still have enough water to clean. I've cleaned some very dirty range pick up and a good size load at one cleaning session but this was pistol brass. Came out good.
 
NCFrank I thank ya for you answers,it has helped out a lot.I too will be useing mine for pistol brass and hope a lot of it at one time.I am aimming for a 5 gal drum so that I can do all if not most of my pistol brass.Just the idea of having a clean primer pocket is great,even though its not needed.

So fare its built but waitting on a drum.I have been looking to make one but cannot choose to what way I want to go.Would love to try PVC but 8-12" PVC is hard to find in 18" length for a try.I may just wait till tax time and make one like your Black one,thinking 12ga steel then bed linner for the inside,even a drain plug.Time will only tell to what I do and that I do not walk away from the project.Your table all so gave me an idea,my mom has a stainless table that I might be able to get.

Again another good reason to love this site ;D Ideas and pics can go a long ways
 
DennisH said:
Anyone have issues with water spots on the brass after drying?

Any solutions?

What I'm wondering is if you have hard water. Water spots are usually the minerals left over after the water has evaporated. What you might what to try is adding a 1/4 teaspoon of Jet Dry to your final rinse water. Now I'm guessing at the amount of Jet Dry based on how long it last in the dish washer. You might need to experiment with the amount.

I don't have hard water, but what I do is my final rinse of the brass is done in straight hot water. I leave the brass in the hot water long enough so they heat up to full temperature. I then drain them in a colander and quickly lay them out on a bath towel. I fold the towel so I can roll the brass around on the counter top to dry them the best I can. I then let the residual heat in the brass from the hot water finish drying any places I might have missed.
 
DennisH said:
Anyone have issues with water spots on the brass after drying?

Any solutions?
Two solutions for water spots. The first one is to rinse the brass out well after cleaning - here I mean rinsing the brass in clean water 5-6 times making sure there is little left over rinse water after each rinse. The second solution is to pour your brass on a large clean beach towel afterwards and lifting the edge of the towel up many times to roll the brass over the towel to dry it.

Unless you have water that has no minerals in it (that does not mean soften water which just replace calcium and magnesium with sodium), you HAVE to dry the brass. Any mineral in droplets on the brass will cause rusting which in the case of brass will look like discoloration or as you call it "water spots". The guys who are real anal will rinse their brass out with distilled or reverse osmosis water. It's not necessary unless you want your brass to keep its bling forever.
 
jlow said:
DennisH said:
Anyone have issues with water spots on the brass after drying?

Any solutions?
Two solutions for water spots. The first one is to rinse the brass out well after cleaning - here I mean rinsing the brass in clean water 5-6 times making sure there is little left over rinse water after each rinse. The second solution is to pour your brass on a large clean beach towel afterwards and lifting the edge of the towel up many times to roll the brass over the towel to dry it.

Unless you have water that has no minerals in it (that does not mean soften water which just replace calcium and magnesium with sodium), you HAVE to dry the brass. Any mineral in droplets on the brass will cause rusting which in the case of brass will look like discoloration or as you call it "water spots". The guys who are real anal will rinse their brass out with distilled or reverse osmosis water. It's not necessary unless you want your brass to keep its bling forever.

Third solution. Clean, dry, load, shoot, all in quick succession. No time for water spots to form. 8) 8)
 

Upgrades & Donations

This Forum's expenses are primarily paid by member contributions. You can upgrade your Forum membership in seconds. Gold and Silver members get unlimited FREE classifieds for one year. Gold members can upload custom avatars.


Click Upgrade Membership Button ABOVE to get Gold or Silver Status.

You can also donate any amount, large or small, with the button below. Include your Forum Name in the PayPal Notes field.


To DONATE by CHECK, or make a recurring donation, CLICK HERE to learn how.

Forum statistics

Threads
166,352
Messages
2,217,117
Members
79,565
Latest member
kwcabin3
Back
Top