You are using an out of date browser. It may not display this or other websites correctly.
You should upgrade or use an alternative browser.
You should upgrade or use an alternative browser.
Induction brass annealer redux
- Thread starter Gina1
- Start date
FYI, I used a similar water pump on two separate builds. Both started to leak after about 4 months at the seam between the clear and black plastic. I applied a 1/4" (6mm) strip of JB Weld along this seam and the leak was eliminated. I would recommend doing this now rather than later. Your build is looking great!Water pump is in.View attachment 1376382View attachment 1376383
Thanks and thanks for the advise!FYI, I used a similar water pump on two separate builds. Both started to leak after about 4 months at the seam between the clear and black plastic. I applied a 1/4" (6mm) strip of JB Weld along this seam and the leak was eliminated. I would recommend doing this now rather than later. Your build is looking great!
Hello annealer builders! I have posted mine build a few months ago on this forum and did not check it since February! I see lots of thigs is going on here! It is great! I have a question for you who use 3D printed parts for case table and gate door to drop the case. I am using heat resistant material used in electrical isolators (glastic) because the case heats up and radiates the heat around as well. My issue of using the 3D plastic is low melting temperature. That the main reason I did not make the table out of PLA. I see many of you are using it. Did you have any issue with PLA when running the machine? 

привет станислав все тепло содержится в индукционной катушке. Вот почему вы можете использовать 3D-печатные модели. Они практически не нагреваютсяHello annealer builders! I have posted mine build a few months ago on this forum and did not check it since February! I see lots of thigs is going on here! It is great! I have a question for you who use 3D printed parts for case table and gate door to drop the case. I am using heat resistant material used in electrical isolators (glastic) because the case heats up and radiates the heat around as well. My issue of using the 3D plastic is low melting temperature. That the main reason I did not make the table out of PLA. I see many of you are using it. Did you have any issue with PLA when running the machine? View attachment 1376449
Да, но тепло проходит по гильзе и передаётся пластику.От него может повести пластик. Вы где территориально находитесь? Я в Атланте. Приятно видеть единомышленников в группе.привет станислав все тепло содержится в индукционной катушке. Вот почему вы можете использовать 3D-печатные модели. Они практически не нагреваются
Ah Atlanta, I saw the name and the English writing looked a little off, though you might have been using a translator. I'll stick to English then.Да, но тепло проходит по гильзе и передаётся пластику.От него может повести пластик. Вы где территориально находитесь? Я в Атланте. Приятно видеть единомышленников в группе.
Just moved to Texas after living in Ukraine for several years.
Induction coils only heat metal items. We are annealing the shoulder of the case and quickly dropping it.... You shouldn't get enough heat transfer to melt the plastic parts between annealing and dropping.
If the base of your case is getting hot enough to melt parts you are doing something really wrong.
I'm using PETG which has a little more heat resistance than PLA but I don't expect any problems. If there were problems, I think we would see less 3d printed parts or higher heat resistant materials being used.
Удачи
Well, I will try make the case table out of PLA dan PETG. I am using mine already about a year and happy. I posted the video about a year ago on youtube on my channel. Originally, I made it based on PLC and HMI and then simplified with arduino and LCD display. Works great. I see people are considering using flame sensor to terminate annealing, did you try that? I think by the time it detects the color of burning brass it is too late, it will be over annealed. Don't you think so? I am using tempilaq 750F to determine the annealing time.Ah Atlanta, I saw the name and the English writing looked a little off, though you might have been using a translator. I'll stick to English then.
Just moved to Texas after living in Ukraine for several years.
Induction coils only heat metal items. We are annealing the shoulder of the case and quickly dropping it.... You shouldn't get enough heat transfer to melt the plastic parts between annealing and dropping.
If the base of your case is getting hot enough to melt parts you are doing something really wrong.
I'm using PETG which has a little more heat resistance than PLA but I don't expect any problems. If there were problems, I think we would see less 3d printed parts or higher heat resistant materials being used.
Удачи
If you want to make life simpler, there are a few pre modeled parts out there.Well, I will try make the case table out of PLA dan PETG. I am using mine already about a year and happy. I posted the video about a year ago on youtube on my channel. Originally, I made it based on PLC and HMI and then simplified with arduino and LCD display. Works great. I see people are considering using flame sensor to terminate annealing, did you try that? I think by the time it detects the color of burning brass it is too late, it will be over annealed. Don't you think so? I am using tempilaq 750F to determine the annealing time.
https://www.thingiverse.com/thing:4916236
https://www.mgnz-makes.com
You're also further along than me, having a running unit.
This is my first attempt at an induction annealer.
My only experience with induction coils is from university physics courses.
My only annealing experience is with flame units.
I don't know about the tempilaq and flame sensor. My plan was to turn out the lights and anneal tell I get a dull glow and record the time and for the sake of consistency anneal the same brass at the same anneal time for the life of the cases. Everyone has their own method.
I already designed my own annealer parts with 3D modeling, these works just fine. The only my concern was a case gate table. Like I said I was using glastic (non-flammable material), but it does not look good. I will design and print it in 3D so I will fit it in my annealer.
Thanks for links anyway!
Thanks for links anyway!
The solenoid assembly - are you going to motorize it? If so, it be would possible to automate stops for different calibers.
Prefect, so far, built.
Prefect, so far, built.
Annealing is a function of temperature and TIME. It is well documented in this thread that at 750 degrees Fahrenheit, brass takes 1 hour to properly anneal. If you want to anneal the shoulder without annealing the base, then you will need to lower the time to less than a few seconds. This requires the brass to be between 1000 - 1100 degrees Fahrenheit.Well, I will try make the case table out of PLA dan PETG. I am using mine already about a year and happy. I posted the video about a year ago on youtube on my channel. Originally, I made it based on PLC and HMI and then simplified with arduino and LCD display. Works great. I see people are considering using flame sensor to terminate annealing, did you try that? I think by the time it detects the color of burning brass it is too late, it will be over annealed. Don't you think so? I am using tempilaq 750F to determine the annealing time.
I use a flame sensor in my build, and it works well even from a couple inches away from the case.I see people are considering using flame sensor to terminate annealing, did you try that? I think by the time it detects the color of burning brass it is too late, it will be over annealed. Don't you think so? I am using tempilaq 750F to determine the annealing time.
Since it is sensing infrared, the case doesn't need to be glowing for the sensor to detect heat (IR). That being said, it does need to be adjusted to almost its highest sensitivity (lowest temp) using the POT on the flame sensor module. I turn mine all the way up, and then back off the stop just a bit...experimentation is necessary.
To my mind, the flame sensor can be used exclusively, or with a timer with the sensor backing up your timer or the timer backing up the sensor (which is how mine is being used).
I talk about my solution in this post:
Induction brass annealer redux
I'm not expecting to have the flame sensor operate a relay big enough to switch the ZVS board, just as a continuity switch to trigger either the 'stop' on the Sestos timer or the drop solenoid for the case to be removed from the coil...
forum.accurateshooter.com
And follow up in this post:
Induction brass annealer redux
I'm not expecting to have the flame sensor operate a relay big enough to switch the ZVS board, just as a continuity switch to trigger either the 'stop' on the Sestos timer or the drop solenoid for the case to be removed from the coil...
forum.accurateshooter.com
I'm using inserts (for different calibers) made of aluminum or heat resistant plastic. In my case, the aluminum insert is not affected by the magnetic field, since I use ferrite core based inductor. May be a 2-3 layers coil (reduced height) would work the same way.Да, но тепло проходит по гильзе и передаётся пластику.От него может повести пластик. Вы где территориально находитесь? Я в Атланте. Приятно видеть единомышленников в группе.
As far as flame sensor is conserned, it is easily integrated with Arduino control. 1000F applied to the neck-shoulder for 3-4 seconds will limit the temperature transfer to the base.
I am trying to avoid any milling parts, so aluminum inserts will not work for me, unless these are available for sale somewhere. I may print the table out of PLA and use glastic insert, at least I can make it myself. Where do you get inserts from?I'm using inserts (for different calibers) made of aluminum or heat resistant plastic. In my case, the aluminum insert is not affected by the magnetic field, since I use ferrite core based inductor. May be a 2-3 layers coil (reduced height) would work the same way.
As far as flame sensor is conserned, it is easily integrated with Arduino control. 1000F applied to the neck-shoulder for 3-4 seconds will limit the temperature transfer to the base.
Last edited:
Machine shop - custom made (~$100).Where do you get inserts from?
I guessed it would be custom machined part! Thank you!Machine shop - custom made (~$100).
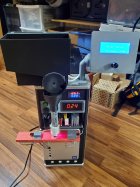
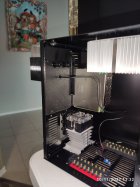
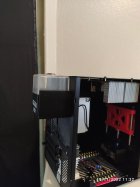
Long time lurker, first time poster here. I just completed my build. I have some "concerns". 223 cases anneal nicely, 3.5 seconds, visible line just below the shoulder. However, 308 at 8 seconds only the tip of the case starts glowing. What is the expected anneal time of a 308 case?
Also, my unit draws 11.5A with or without a case in the coil. Is something wrong, maybe with my coil? I tried 2 coils,
first 28mm ID, 6.5 turns, 2 layer, 3.18mm copper tube, coil height 20mm.
Then 20mm ID, 8 turns, 2 layer, 3.18mm copper tube, coil height 23mm.
Both perform about the same. The 28mm one takes 4.5s for 223 and the 20mm one takes 3.5s.
Is there an issue with my coil design? Or perhaps another issue with my unit?
Similar threads
- Replies
- 74
- Views
- 47,365
- Replies
- 0
- Views
- 1,576
Upgrades & Donations
This Forum's expenses are primarily paid by member contributions. You can upgrade your Forum membership in seconds. Gold and Silver members get unlimited FREE classifieds for one year. Gold members can upload custom avatars.

Click Upgrade Membership Button ABOVE to get Gold or Silver Status.
You can also donate any amount, large or small, with the button below. Include your Forum Name in the PayPal Notes field.
To DONATE by CHECK, or make a recurring donation, CLICK HERE to learn how.

Click Upgrade Membership Button ABOVE to get Gold or Silver Status.
You can also donate any amount, large or small, with the button below. Include your Forum Name in the PayPal Notes field.
To DONATE by CHECK, or make a recurring donation, CLICK HERE to learn how.


