Ledd Slinger
Silver $$ Contributor
There’s always been a bit of debate on where to tape off recoil lugs prior to bedding an action. For hunting and varmint rifles I do it a certain way so that removing the action from the stock is easier. For bench rifles some might not put any tape on the recoil lug at all for a super tight fit. I just wanted to share how and why I do it this way on everything.
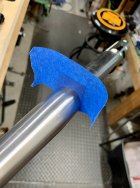
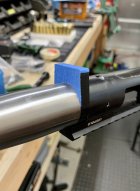
I tape the front with one layer of tape and the bottom with two layers. No tape on the sides or rear except for a small fraction at the very bottom.
Tape on the front is to give the bedding a little room to make removing and re-installing the action in the stock easier.
Tape on the bottom ensures that there is space between the lug and bedding so the receiver is not held aloft from the bedding by hitting the recoil lug when torqued down. But the tape needs to come up the sides and rear of the bottom just a little bit so that there’s no chance of the bottom hitting the cured bedding. If you cut the tape flush with the bottom, the bottom of the lug can still hold the action aloft by hitting right on the very corners of the lug.
No tape on the rear is so there is a perfect mating surface between the bedding and recoil lug to resist any movement of the action and cleanly transfer energy to the stock during recoil.
No tape on the sides helps resist any barrel rotational torque during firing.
I first apply a layer of Kiwi shoe polish to the lug and buff it out to a shine. Then apply my tape layers and finally another layer of kiwi over the tape. The kiwi under the tape makes it a little easier to remove the action from cured bedding. Kiwi on top of the tape allows easy removal of the tape from the bedding in the stock. If you don’t apply kiwi under the tape, you fight the full strength of the tape adhesive during removal.
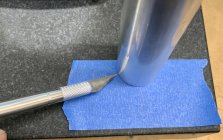
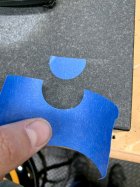
To cut the shape, I use my scope lapping bars as a cutting guide. A 30mm lapping bar is going to get you a pretty much a perfect fit on a barrel with a 1.250” shank because the tape will flex and move a bit. Using the lapping bar as a cutting guide saves a lot of time and makes the lug tape job nice and clean. Pics below.


