• This Forum is for adults 18 years of age or over. By continuing to use this Forum you are confirming that you are 18 or older. No content shall be viewed by any person under 18 in California.

Glass Bed Only OR Pillar & Glass Bed?

Fill anything you don’t want bedding to get into with modeling clay.
Thanks, I just changed my factory stock to a McMillan edge it has pillars but needs bedding. Accuracy went to hell
When I bedded factory stock I had acra glass everywhere. I'll get some tubing and fill the action he's with the plumbers putty I have.
 
  • Like
Reactions: swd
Yes Toby, I originally wanted to do this myself and watched many videos and read alot of articles. I probably don't have to right tools for the job (drill press for one).

I don't have a drill press, either. A piloted counterbore and a hand (power) drill gets the job done.

images
 
I don't have a drill press, either. A piloted counterbore and a hand (power) drill gets the job done.

images
Do you set pillars flush with bottom metal inlet,and have them finished short on top to bed over action?
 
Thanks, I just changed my factory stock to a McMillan edge it has pillars but needs bedding. Accuracy went to hell
When I bedded factory stock I had acra glass everywhere. I'll get some tubing and fill the action he's with the plumbers putty I have.

Send it on down here
 
Send it on down here
I would but then how would I learn?
I've had a couple of requests about bedding before refinishing a stock.
If I learn how not to make a mess on my stuff, it will give me the skills and confidence to not make a mess on someone else's.
 
" I'll continue to look for kits to do it myself and maybe I'll attempt it."

Savage can be a little tricky getting sear clearance around the rear pillar.

Do you have another not so nice bolt gun you can learn on? Brownells sells piloted drills that would work with a hand drill for drilling holes for the pillars.

Nothing I'd chance learning to do this. I have a stock I could sacrafice, a Remington ADL.
 
Here's a Rem 700 ADL that I just did for a buddy of mine.

I sighted in my buddy's freshly-bedded .30-06 this morning. This is the final group from a cold, fouled barrel. Not too bad for a factory sporter shooting cheap factory ammo (Remington 150gr Core-Lokt). With no recoil pad that vintage 700 ADL does pack a nasty punch, though.

I don't have a "before" (pre-bedding) picture of the groups he was shooting, but if you've seen a shotgun patterning board, you have a good idea of how "accurate" this rifle was. Much better now. He drew 3 pronghorn tags for Wyoming, and the only alternative to fixing his rifle was to loan him one of my rifles. :eek:

sight-in target post-bedding.JPG
Rem 700 finished.jpg
 
So been researching more and saw kits for pillars for Savages (eBay item 172611473435), has the cut out on the rear pillar for the sear and Devcon Plastic Steel Putty. Do you keep the pillars flush with the bottom of stock? The rear one is on the front of the trigger guard. What about the inside of the stock, pillars flush or slightly below the surface?

When people say "make my own pillars", are they machining their own? Or making them from 'other' parts?

I have some headless action screws I can use to guide the action into the stock, which sounds like the way to get it stress free, is this correct? Do you epoxy the pillars and bed at the same time or two different steps?

I see on Savages, you float the rear tang, so I'll remember that.

I've always wanted to do a bedding job by myself, so maybe I'll still do this one.

Do you set pillars flush with bottom metal inlet,and have them finished short on top to bed over action?
By the looks of things flush with stock at inlet for bottom metal but short enough on top to recieve bedding compound over pillars.
Leave headless action screws in place, wrap action and stock with surgical tubing.
Sit level for curing, dont forget release agent!
Remove trigger assembly, modeling clay or plumbers putty in an voids before applying release agent. I hear Pam works well.
 
Do you keep the pillars flush with the bottom of stock?

Yes.

What about the inside of the stock, pillars flush or slightly below the surface?

Roughly 1/16-1/8 inch below the surface, so that the epoxy bedding material covers the pillars and the rest of the action's bottom surface uniformly.

I also bed the recoil lug on the back (which everyone does), the front, and the sides, but I put 3-4 layers of painter's tape on the bottom of the lug to provide some clearance. I want the bedding to positively locate the action, just as a flat-bottomed action would be located. The bedding under the action (including the pillars) prevents the action from moving up and down (which is why some clearance under the recoil lug is provided). The bedding behind and in front of the recoil lug prevents the action from moving fore and aft. The bedding on the sides of the recoil lug prevents rotation of the (round) action due to the torque of firing.

I don't bed under the chamber area of the barrel, although some people do that for rifles where the barrel won't be changed often.

When people say "make my own pillars", are they machining their own? Or making them from 'other' parts?

A machinist friend of mine made me a pile of aluminum pillars for a few bucks. I've been using the same stash for 30 years, and still have plenty left. :)

I have some headless action screws I can use to guide the action into the stock, which sounds like the way to get it stress free, is this correct?

I use surgical tubing to hold the action in place while the epoxy cures. Electrical tape or masking tape will also work. I fold a piece of paper to the correct thickness to support the barrel at the tip of the forend, and to center it in the barrel channel.

Do you epoxy the pillars and bed at the same time or two different steps

Two steps. Glue in the pillars in Step 1, with space above the pillars for epoxy. The next day, bed the action in Step 2. When prepping the stock, be sure to leave a little stock material under the action at the "factory" height to properly locate the action. Remove enough material around the recoil lug to give a good depth of epoxy on all surfaces.

After the epoxy cures, drill out the pillars to 5/16" (for 1/4" action screws) so that the action screws don't touch the pillar.

I've always wanted to do a bedding job by myself, so maybe I'll still do this one.

Worst case (which has never happened to me) is that you have to grind out the bedding and re-do it.

Do use a relatively thick epoxy (JB Weld, Devcon 10110, MarineTex, etc.), which is much easier to handle than Acraglas. Don't use 5-minute epoxy -- you want the longer working time and higher strength of "regular" epoxy. Be generous with the release agent (I use Kiwi neutral shoe polish) and modeling clay (to fill any holes in the action where you don't want epoxy to go). Use masking tape and release agent to keep squeeze-out from getting on the stock. The more cleanup you do immediately after setting the action in the stock, the easier it will be -- acetone and Q-tips should be close at hand. Don't try to remove the action from the bedding until at least 24 hours has passed -- you want the epoxy to be fully cured. Impatience is a vice (DAMHIK).
 
Last edited:
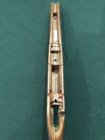
So looking at my stock. The front action screw pillar/bedding area seems straightforward. Bed the whole area in the black circle with the pillar about a 1/16" under the top of the wood.

The rear one seems different. not a lot of area to bed. the red area with the cutout on the lower right area for the bolt release. Doesn't seem like a lot of area to bed.

The yellow area, tang, will be free floated, correct?

savage boyd top view2.jpg
 
  • Like
Reactions: swd
So looking at my stock. The front action screw pillar/bedding area seems straightforward. Bed the whole area in the black circle with the pillar about a 1/16" under the top of the wood.

The rear one seems different. not a lot of area to bed. the red area with the cutout on the lower right area for the bolt release. Doesn't seem like a lot of area to bed.

The yellow area, tang, will be free floated, correct?

View attachment 1114782
Yes to all your questions, you have all correct. Be sure and scrape the finish off, down in the recoil lug mortise too. I usually chamfer the top front edge of the recoil lug mortise a good amount so the epoxy is a bit thicker there. It's an area that sometimes chips out easy if it's thin.
 
Last edited:

Upgrades & Donations

This Forum's expenses are primarily paid by member contributions. You can upgrade your Forum membership in seconds. Gold and Silver members get unlimited FREE classifieds for one year. Gold members can upload custom avatars.


Click Upgrade Membership Button ABOVE to get Gold or Silver Status.

You can also donate any amount, large or small, with the button below. Include your Forum Name in the PayPal Notes field.


To DONATE by CHECK, or make a recurring donation, CLICK HERE to learn how.

Forum statistics

Threads
165,892
Messages
2,205,608
Members
79,192
Latest member
pkitrinos01
Back
Top