• This Forum is for adults 18 years of age or over. By continuing to use this Forum you are confirming that you are 18 or older. No content shall be viewed by any person under 18 in California.

BBTO or bearing surface?

I just measured the hole in my .26 comparitor and it is .254 or .010 smaller than the bullet diameter. As reloaders we butcher the term ogive, technically an ogive is a shape not a datum used for measurement. We use it to provide a datum in our hobby to set the bullets to a known and constant depth and everyone knows what you mean when you say measuring BTO but the comparitor on your bench and the comparitor on mine can give two entirely different reading and both will be correct. That is because a comparitor dies exactly what the name implies. It is a tool for comparing it does not measure, it gives you a constant datum so you can compare two like objects. You could take any piece of metal, drill a hole in it smaller than the bullet diameter and use it as a comparitor as long as the metal is thick enough so the meplat does not interfere with measuring . On another forum a poster took a 1 inch hex nut and a drill index and made his own Sinclair style comparitor

https://www.sinclairintl.com/reload...r-hex-style-bullet-comparators-prod83792.aspx
 
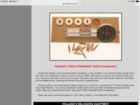
bsl1502.jpg

(borrowed pic from net)This is how I am performing it. As stated in pic, it probably will not match bullet manufacturers dimensions but it is repeatable and you can sort by it due to contacting the same reference point on each bullet.

I agree with you that there can be "deceiving results" with this dual comparator system, although it is marvelously conceived. There is a lot of slop in it stemming from many sources. I found that this pictured system did not deliver "repeatable results"...you must be able to get repeatable results! If you cannot supposedly measure and sort by "length of bearing service" one afternoon with your measurement system and return the next morning and get "repeat" identical measurements of what you got last afternoon, you are wasting your time.

I only started to get "repeatable results" by using a home-made point-guage system (not unlike the Tubb bearing-length sorting system; but, which I failed to get "repeatable" results on, either) using a special point-tip made by John Whidden to closely house the bullet boat tail and a barrel stub with the same lead cut from my reamer. Then, afterwards...soooooo tenderly, so tenderly bringing the bullet to bear between these two measuring points to capture a measurement.

Dan
 
If you're really concerned that commercially available tools aren't giving you the best possible measurement, simply have your smith use the exact reamer that cut your rifle chamber on a piece of barrel stub in order to make your own custom comparator insert. That way, you can measure bullets seated essentially the same way they would be in the throat of the rifle.
 
If you're really concerned that commercially available tools aren't giving you the best possible measurement, simply have your smith use the exact reamer that cut your rifle chamber on a piece of barrel stub in order to make your own custom comparator insert. That way, you can measure bullets seated essentially the same way they would be in the throat of the rifle.

+1. These have always worked great for me and are easy to make or have made. Shoot straight!:D:D

Paul
 
One thing is certain - whatever a bullet looks like and measures while holding it, it will not look and measure the same as it comes out of the barrel. It will be mashed and most likely elongated to conform to the lands and groves of the barrel and have some degree of copper jacket stripped off. For this reason, measuring bullet for me takes the form of finding big outliers and the only important measurement to me is the point on the ogive that is the same diameter as the lands and the distance of this point to or into the lands.
 
Where is the most “bang” for your time sorting by bullet base to o-give or bearing surface for BR accuracy?
I have sorted some Berger 108’s by bearing surface using two hornady comparators but I can still see difference in them when comparing base to ogive.
Be careful, if you don't mark the two comparators and get them mixed up, all your loading data won't work. Test them bto only on the same loaded round and you will probably get a different reading.
 
it isn't like a comaparator has a lot of moving parts or any sensitive adjustments. The only error possible is operator error or a malfunction in the measuring device. The diameter of the hole in the metal will not change if you measure the same bullet three times and get three different reading either the calipers or the operator is to blame
 
I think the difficulty lies in the alignment, and also the radius on the comparator. Too much lets the bullet tip, and too sharp let’s it dig into the jacket. I don’t see the need for precision beyond what a typical Hornady tool will give you, but that’s just me.
 
I don't know if this will help but I "spin" the bullet or case in the comparitor while gently squeezing the calipers jaws snug with the other hand with a light source behind the measuring tool, the bullet or case tends to center itself and you can try make sure the base is level with the caliper jaws. That is how I use a Hornady comparitor, I am sure it would work with others
 

Upgrades & Donations

This Forum's expenses are primarily paid by member contributions. You can upgrade your Forum membership in seconds. Gold and Silver members get unlimited FREE classifieds for one year. Gold members can upload custom avatars.


Click Upgrade Membership Button ABOVE to get Gold or Silver Status.

You can also donate any amount, large or small, with the button below. Include your Forum Name in the PayPal Notes field.


To DONATE by CHECK, or make a recurring donation, CLICK HERE to learn how.

Forum statistics

Threads
165,867
Messages
2,205,355
Members
79,189
Latest member
Kydama1337
Back
Top