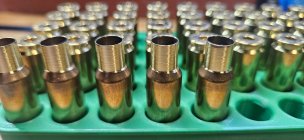
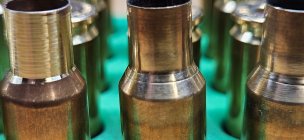
Extreme closeup.... after 6 firings I notice this Black carbon ring on the brass. You can "feel" the ring with your fingernail.
Im wondering if I cut too far into the neck when turning.
With little 30BR experience not every piece looks like this. However enough of them for me to be ready to pitch the lot.
So should I pitch this lot of brass?
Im wondering if I cut too far into the neck when turning.
With little 30BR experience not every piece looks like this. However enough of them for me to be ready to pitch the lot.
So should I pitch this lot of brass?

") -Al
-Al