• This Forum is for adults 18 years of age or over. By continuing to use this Forum you are confirming that you are 18 or older. No content shall be viewed by any person under 18 in California.

True Bore Alignment System

I invested in the True Bore because my lathe’s primary use is not chambering barrels. It’s headstock is long and does not allow the use of more common practices like inboard/outboard spiders.

I thought the system had nice features, the primary being the ability to hold a barrel or action without inducing stresses by way of a 6 jaw chuck. I’ve used mine now for almost 10 years without any issues.

When I first started off I overcame holding the barrel taper by the same ways already mentioned, bushings. After making a hand full of those I decided I wasn’t gonna continue down that path so I made jaws that swivel to match any taper. I combined that with a tennon extension so I can support the outboard end.

Minus the weight (66 lbs with D1-6 back plate) I am still very happy I invested in it.

View attachment 1462802

That is INSANE cool.

What a great invention. Do you sell them?
 
Would I mount this to the chuck on my drill press or the table? Asking for a friend
Most drill presses, and the work performed on them, lack the built in precision to make use of a chucking system that can be trued to within .0001.

Now, a true Milling Machine used as a drill press, yes.

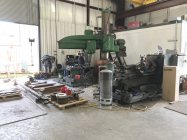
Just for the fun of it, here is our big CarltonIMG_0235.jpeg
 
Last edited:
Most drill presses, and the work performed on them, lack the built in precision to make use of a checking system that can be trued to within .0001.

Now, a true Milling Machine used as a drill press, yes.

Just for the fun of it, here is our big CarltonView attachment 1466518
Nice. Thats a beast! I don't even own a drill press anymore. Just use a high precision drill chuck arbor in the milling machine for things that require nice straight holes. Ifnit doesnt need to be perfect, i do itnwith a hand drill. Best part about drilling on the mill is being able to true up your work perfectly square to the table and head with the high precision vise and blocks. Normal drill presses and their vises aren't designed for high precision
 
I just got a call from Nate.

All fixed now. I know exactly what I need now. I'm going to buy one.
I wonder how many Kids Nate is up to now. Its bunch....And all Home schooled... He certainly has his hands full. LOL. Glad he has connected with you as that is one busy dude for sure!
Not relevant to the conversation but his Lovely wife is the better shooter of the two and has won her share of stuff.
 
I have 2 of these true bore alignment chucks. No there is not an issue with chatter in the Chuck while parting off. No there is not an issue with barrel whip while turning i thread at 1300rpm on the Cnc with this Chuck. As for the video he just started machine work a few years ago and learning along the way. I have a 14x40 lathe like the one in the video and my barrels have won numerous events with this Chuck and small baby lathe. Lol. If you haven’t tried this Chuck that’s a failure on your part. As far as machine shop knowledge I’ve been in the tool and die and aerospace machining work for 35 years and in my opinion there is no better way after using this system for so long.
 
@urbanrifleman, curious if you purchased and have used one of the TBAS chucks and if so, I'd like to hear about your experience so far. It is probably too big for my 12X36, but I may order one anyway. I won't always have this starter lathe. Not concerned about the speed limitations at this time.

Thank you,
Hank

Not yet. Hoping this year.
 
I have 2 of these true bore alignment chucks. No there is not an issue with chatter in the Chuck while parting off. No there is not an issue with barrel whip while turning i thread at 1300rpm on the Cnc with this Chuck. As for the video he just started machine work a few years ago and learning along the way. I have a 14x40 lathe like the one in the video and my barrels have won numerous events with this Chuck and small baby lathe. Lol. If you haven’t tried this Chuck that’s a failure on your part. As far as machine shop knowledge I’ve been in the tool and die and aerospace machining work for 35 years and in my opinion there is no better way after using this system for so long.

Thank you so much. :)
 
Leaving this here as a reminder to not jump to conclusions but see edit below.

I purchased a TBAS for my lathe, have set it up and, using a barrel that needs to be set back, I dialed in the muzzle end to get some experience.

I am sure that my lathe, a Grizzly G4003G, is too small for this chuck or very marginal at best. I followed the instructions that came with the chuck and did purchase one of SSGs range rods as well.

The words that are used here to describe the kinds of adjustments are from SSG.

The instructions state that radial alignment should be set first. That means without turning the chuck you should set the work piece to be level when jogging the carriage from one end of the range rod to the other. You do this in pairs and split the error between the pairs that are 180 degrees apart. So 1 & 3 followed by 2 & 4. So, you will not end up with no dial movement when jogging the indicator from one end to another but the same movement between the 180 degree pairs. This is the same as using the rear spider to get the far end of the range rod running with minimal or no runout. If you think like a machinist, and, I don’t, this is probably relatively easy. I had to write notes about which way to turn the adjustments and some admittedly easy math to split the error between the pairs. I was able to get close but not as close as I would like. About .001 was as close as I could get.

Next was to set the axial alignment. That means jogging the indicator close to the chuck, rotating it and adjusting it, just like on a set-tru, to get the workpiece running true. I expected that when I got that perfect that it was going to be perfect on the far end as well, but it was nowhere close—.004 off. I don’t mean .0004, I mean 4 thousandths.

After messing around with this for a while, I decided to dial in the way I normally do which is by rotating the chuck and getting an inboard section of the rod and an outboard section of the rod running true and then transitioning to the long stem Interapid for final adjustments using the direct indication method. I found that this worked perfectly fine and was relatively easy to accomplish. Could easily attain almost no discernible needle movement on the Interapid which I choose to interpret as less than +/- .0001.

I am waiting on a reamer that should be here any day and am looking forward to trying the TBAS out for real. I do like that all adjustments are made at the chuck. I also like that you set the jaws on the barrel once and are sure that they are not too tight or loose when ready to part, thread and ream. It is a very nicely made chuck. I got the Gator 6-jaw and have read some unflattering reviews of it but mine is perfectly fine for this job. Will report back when I’ve gained more experience.

Hank

EDIT: I tried this again tonight starting from scratch and using a different barrel. Experience is a good thing! I also rewrote the instructions to make them clearer to me. I did approach this with the knowledge I gained from the first dial-in and was much more disciplined about what I wrote down and was more intentional about all adjustments setting precise targets for each. Understanding that you have to overshoot the radial adjustments to get what you want reduces the iterations significantly.

From loading the barrel into the chuck to completing the dial-in as described in the instructions was 35 minutes. This resulted in all measurements ≤ .00025 TIR. From that point I removed the SSG rod and direct indicated using the Interapid. 10 more minutes and < .0002 TIR both inboard and outboard. Ready to thread tenon. I am sure the next dial-in will be faster.

Thanks for the long read.

Hank
 
Last edited:
Leaving this here as a reminder to not jump to conclusions but see edit below.

I purchased a TBAS for my lathe, have set it up and, using a barrel that needs to be set back, I dialed in the muzzle end to get some experience.

I am sure that my lathe, a Grizzly G4003G, is too small for this chuck or very marginal at best. I followed the instructions that came with the chuck and did purchase one of SSGs range rods as well.

The words that are used here to describe the kinds of adjustments are from SSG.

The instructions state that radial alignment should be set first. That means without turning the chuck you should set the work piece to be level when jogging the carriage from one end of the range rod to the other. You do this in pairs and split the error between the pairs that are 180 degrees apart. So 1 & 3 followed by 2 & 4. So, you will not end up with no dial movement when jogging the indicator from one end to another but the same movement between the 180 degree pairs. This is the same as using the rear spider to get the far end of the range rod running with minimal or no runout. If you think like a machinist, and, I don’t, this is probably relatively easy. I had to write notes about which way to turn the adjustments and some admittedly easy math to split the error between the pairs. I was able to get close but not as close as I would like. About .001 was as close as I could get.

Next was to set the axial alignment. That means jogging the indicator close to the chuck, rotating it and adjusting it, just like on a set-tru, to get the workpiece running true. I expected that when I got that perfect that it was going to be perfect on the far end as well, but it was nowhere close—.004 off. I don’t mean .0004, I mean 4 thousandths.

After messing around with this for a while, I decided to dial in the way I normally do which is by rotating the chuck and getting an inboard section of the rod and an outboard section of the rod running true and then transitioning to the long stem Interapid for final adjustments using the direct indication method. I found that this worked perfectly fine and was relatively easy to accomplish. Could easily attain almost no discernible needle movement on the Interapid which I choose to interpret as less than +/- .0001.

I am waiting on a reamer that should be here any day and am looking forward to trying the TBAS out for real. I do like that all adjustments are made at the chuck. I also like that you set the jaws on the barrel once and are sure that they are not too tight or loose when ready to part, thread and ream. It is a very nicely made chuck. I got the Gator 6-jaw and have read some unflattering reviews of it but mine is perfectly fine for this job. Will report back when I’ve gained more experience.

Hank

EDIT: I tried this again tonight starting from scratch and using a different barrel. Experience is a good thing! I also rewrote the instructions to make them clearer to me. I did approach this with the knowledge I gained from the first dial-in and was much more disciplined about what I wrote down and was more intentional about all adjustments setting precise targets for each. Understanding that you have to overshoot the radial adjustments to get what you want reduces the iterations significantly.

From loading the barrel into the chuck to completing the dial-in as described in the instructions was 35 minutes. This resulted in all measurements ≤ .00025 TIR. From that point I removed the SSG rod and direct indicated using the Interapid. 10 more minutes and < .0002 TIR both inboard and outboard. Ready to thread tenon. I am sure the next dial-in will be faster.

Thanks for the long read.

Hank

Nice.

Thank you. Great response. :)
 
That's a great and fair question. I do want to preface my answer by acknowledging that I have been changing a lot of processes around dialing in, and change often leads to increased time--especially at the front end. I started with tapered range rods and transitioned to a much more repeatable "Grizzly rod." This evolved into using the "Grizzly rod" to get close enough to drill, bore and direct indicate.

My strategy moving forward with the TBAS involves a similar methodology: to achieve preliminary alignment using the TBAS & SSG rod, followed by drilling, boring, and the direct indicating processes to attain final concentricity before proceeding with turning, threading, and reaming.

With that backdrop I am estimating approximately 2 hours +/- 30 minutes of setup and dial-in time before making the first chips prior to using the TBAS.

I do think a meaningful amount of time can be saved now that I can eliminate the shims, the back and forth between the front and rear spiders and the constant verification that nothing moved between dial-in to threading to reaming.

Hopefully that is a reasonable answer.

Hank
 
  • Like
Reactions: oht
I didn't want to pay what he was asking so I machined my own. As far as cutting the crown it was really easy. I made aluminum bushings with the correct taper and diameter and split them on one side so they compress. It takes 20 minutes to dial in each side of the barrel give or take 5 minutes. Mine is relatively rigid considering the design. I could put an 8 inch chuck on it if needed. I actually made mine on a cnc mill because cutting a radial knuckle was too difficult on a manual lathe. I'd make it more compact next time though.
 
I didn't want to pay what he was asking so I machined my own. As far as cutting the crown it was really easy. I made aluminum bushings with the correct taper and diameter and split them on one side so they compress. It takes 20 minutes to dial in each side of the barrel give or take 5 minutes. Mine is relatively rigid considering the design. I could put an 8 inch chuck on it if needed. I actually made mine on a cnc mill because cutting a radial knuckle was too difficult on a manual lathe. I'd make it more compact next time though.
Pictures?
 

Upgrades & Donations

This Forum's expenses are primarily paid by member contributions. You can upgrade your Forum membership in seconds. Gold and Silver members get unlimited FREE classifieds for one year. Gold members can upload custom avatars.


Click Upgrade Membership Button ABOVE to get Gold or Silver Status.

You can also donate any amount, large or small, with the button below. Include your Forum Name in the PayPal Notes field.


To DONATE by CHECK, or make a recurring donation, CLICK HERE to learn how.

Forum statistics

Threads
165,582
Messages
2,198,732
Members
78,989
Latest member
Yellowhammer
Back
Top