First, I would do whatever was necessary to uniform the flash holes (and primer pockets, if necessary). Next, Starline brass seems quite hard in my hands relative to other brands, I would also
anneal the cases before doing anything else to them. At that point, you have some choices with respect to generating more consistent neck tension (interference fit) with the virgin brass.
Below, I have outlined a couple variations of approaches I have used in the past with virgin brass. First and foremost, you can certainly load it and shoot it straight out of the box. In that event, I would still uniform the flash holes and trim/chamfer the necks. Nonetheless, you can load and shoot virgin brass with only minimal prep. However, you may notice that the velocity isn't very uniform due to the variance in neck tension, and precision can suffer as a result. Virgin brass prepped using either of these methods can shoot very well indeed, but again, the real key is to obtain uniform neck tension. In my hands, neck tension can be all over the map with virgin brass straight from the box. I'm sure the manufacturers try to make the necks as consistent as they can, but it usually isn't. So in order to generate more consistent neck tension with virgin brass, sizing steps are necessary. The idea is to size the necks more uniformly than they come straight out of the box, thereby improving the precision of loaded rounds. In order to accomplish that, the necks need to be expanded, then sized back down to a uniform diameter,
OR sized down, then opened back up to a uniform diameter with a mandrel.
Method 1 - oversized mandrel 1st, bushing die 2nd
The approach here is to use a mandrel first to open up all the necks to some diameter that is slightly
larger than the subsequent bushing die step will leave them. Then a bushing die with the appropriate bushing is used to size them back down to provide the desired neck tension as the final neck-sizing step.
I might typically start with a .224" mandrel (i.e. ~bullet diameter). If there is a range of neck diameters within the box as I typically find, a bullet diameter mandrel will bring them all to some consistent
minimum diameter that is
larger than desired for loading. You will likely find that the 0.224" mandrel will open some necks up a lot, some only a little, and some hardly at all. However, they should all be opened up to a diameter slightly larger than the subsequent bushing die step will leave them. Next, the cases would be sized using a bushing die, which will then size the necks back down just a bit to achieve the desired neck tension.
Note: neck wall thickness can vary by brand of brass, so the exact mandrel and bushing sizes need to be determined by the user.
In each step, the brass must actually be moved at least ~.001", or even slightly more. In other words,
work must be done on the brass by the mandrel or bushing die in order to achieve the desired consistency.
Also, the bushing die needs to be set correctly to re-size brass fired from the specific chamber in which the virgin will be used. That way, the reloader will not be affecting the base-to-shoulder measurement of the virgin brass through the sizing steps, only "re-setting" the neck tension. In other words, if the bushing die is already set correctly for the rifle chamber, only the virgin case necks will be re-sized, not the bodies/shoulders.
Method 2 - bushing die 1st, mandrel 2nd
The approach here is basically the opposite of Method 1, in that the all the case necks will be sized down first using a bushing die to some diameter that is slightly
smaller than the subsequent mandrel step will leave them. Then a specific diameter mandrel is used to open the necks back up to the desired neck tension.
In this approach, a bushing is selected that is ~.001"
smaller than would be used if the bushing die were to be the sole neck sizing step. For example, if one typically uses a 0.248" bushing as the sole sizing step for .223 Rem brass, then a 0.247" bushing would be a good place to start. As in Method 1, you want to be sure you're not bumping the shoulder back on virgin brass, which doesn't need to be done. So having a bushing die that is already set up to yield the appropriate shoulder bump with brass fired in the same rifle chamber is a benefit because it will not move the shoulders of virgin brass. After the bushing die step, the necks will then be opened up with the appropriate mandrel as the final neck sizing step.
It is important to note that spring-back of the brass works in opposite directions when sizing neck down with a bushing die versus opening them up with a mandrel. With a bushing die, the necks
open up slightly as the cases are withdrawn from the bushing die. With a mandrel, the necks
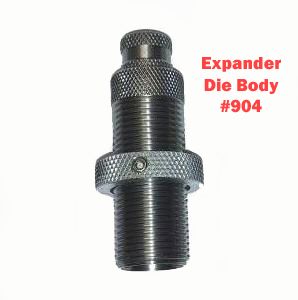
close up slightly as the mandrel is withdrawn from the cases. Thus, in order to achieve a neck tension (interference fit) of approximately .002", which is a typical starting point, a mandrel of only 0.0015" under bullet diameter will be necessary as the necks will close up about .0005" or so as the mandrel is withdrawn. I use a 0.2225" mandrel to set neck tension in this fashion with .223 Rem brass. Mandrels of specific diameter or pin gauge sets can be obtained from various sources. I use the SS mandrels and die body from 21st Century:
Expander Die Body Introducing the much anticipated Generation X Expander Die Body with viewing window! Set up of an expander die has not been easier! The viewing window allows the user to set the die to allow for optimal mandrel use without “bottoming out”. Machined out of 7075 Aluminum and...

21stcenturyinnovation.com
Our caliber specific expander mandrels are available in .0005” increments in calibers 22 to 338 and will range from .001” above bullet diameter to at least .003” below bullet diameter depending on caliber. This will allow the reloader to find proper neck tension to fine-tune their loads. The...

21stcenturyinnovation.com
There may be slightly less expensive sources such as pin gauge sets, but I have been very happy with the quality and consistency of 21st Century's products, and I only need certain mandrel diameters. Regardless of the source of the mandrel(s) for .223 Rem brass prep, I'd start with a 0.224" mandrel for expanding all the necks to a minimum diameter prior to the bushing die step (
Method 1),
AND/OR a 0.2225" mandrel for setting neck tension with the mandrel (
Method 2).
Likewise, it is usually beneficial to have a few different sized bushings for a given cartridge. As with the mandrels, I will usually start with SS bushings as they're much less expensive than titanium nitride-coated bushings. Those can always be purchased later once the specific size needed is known. For .223 Rem, a set of 0.248", 0.247", and 0.246" bushings will usually cover the majority of applications one is likely to encounter.
Regardless of which approach is taken, you will probably want to trim/chamfer the brass prior to loading.
Summary
This may seem like a lot of work and expense to use with virgin brass. Nonetheless, the results speak for themselves. Virgin brass prepped by these methods can shoot very, very well. Yes, you can simply load virgin brass straight out of the box and accept that the results may be mediocre until it has been fire-formed and fully processed for the 2nd firing. But with a little extra time and effort, virgin brass can usually be made to shoot almost as well as brass that has been fire-formed. Because of the variance in neck tension in virgin brass straight out of the box, one
either needs to expand all the necks with a mandrel to a minimum diameter larger than the bushing die, then size the necks back down with the bushing die to set the appropriate neck tension (
Method 1), OR size the necks down to some maximum diameter smaller than the expander mandrel, then use the mandrel to set the appropriate neck tension (
Method 2).
Both of these methods work very well. Virgin brass prepped using either method is far more consistent in my hands than straight out of the box, and it clearly shows in terms of performance. Nonetheless, it does require a bit more effort and may also require obtaining a few bushings and mandrels if one doesn't already have them.
FWIW - several years ago I started using
Method 2 as my standard approach for brass prep. In other words, I not only use
Method 2 on virgin brass, but for subsequent brass preps, as well. One reason for using a mandrel as the final neck-sizing step is so that slight differences in neck wall thickness with un-turned necks get pushed to the
outside with a mandrel, whereas a bushing die will tend push neck wall thickness variance to the
inside, exactly where you don't want it. In fact, it is easily possible to "feel" the difference through the press handle when seating bullets. I have found that
Method 2 provides more consistent neck tension, and therefore more consistent bullet seating force than simply using a bushing die alone to size necks/cases. Yes, it is more work, but the results are worth the effort, IMO. Further, if one obtains the appropriate bushings and mandrels to use
Method 2 on virgin brass, then they will have already acquired the tools necessary to use the same procedure on every brass prep (i.e. the expense of the bushings/mandrels necessary for prepping virgin brass only need be felt once).