• This Forum is for adults 18 years of age or over. By continuing to use this Forum you are confirming that you are 18 or older. No content shall be viewed by any person under 18 in California.

Bedding a v block

With all due respect, a chassis is a totally different animal than a fiberglass stock with a bedding block molded in. My chassis is dead nuts as well. All my fiberglass stocks with blocks needed bedding to say the least. Good shooting!

Paul
 
With all due respect, a chassis is a totally different animal than a fiberglass stock with a bedding block molded in. My chassis is dead nuts as well. All my fiberglass stocks with blocks needed bedding to say the least. Good shooting!

Paul
This is a wood stock with aluminum block, same issues can happen, though. I'll be sure to check for alignment. I should have it waiting for me when I get home today.
 
Stock showed up yesterday, I need to do a little relief work on it first (jewel trigger with top safety) before I cinch it down with action screws to test fit, but hopefully by this weekend I'll have that done.
 
I checked the contact on my Revolution 700 SA stock with an aluminum bedding block after a couple hundred rounds. Good contact from the recoil lug to the mag well but very little cntact at the tang (only on one side). I bedden the tang with JB weld. I just tightened the front action acrew to maybe 20 in-lbs without installing a rear screw. I will post a pic tomorrow after the JB Weld sets up.
 
  • Like
Reactions: SBS
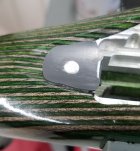
Here is what it looked like when I removed the action the next morning. I was surprized on how much JB Weld it took to fill the gap. I got lucky on the amount of JB I used as it spread out to just cover the aluminum block and I only had to remove material from the hole and the front side. I cleaned up the hole and the front side with a drywall bit in my MotoTool because I did not want to disturb the JB Weld with the mill.

20221003_103334.jpg
20221003_103322.jpg
20221003_104859.jpg
 
Here is what it looked like when I removed the action the next morning. I was surprized on how much JB Weld it took to fill the gap. I got lucky on the amount of JB I used as it spread out to just cover the aluminum block and I only had to remove material from the hole and the front side. I cleaned up the hole and the front side with a drywall bit in my MotoTool because I did not want to disturb the JB Weld with the mill.

View attachment 1374364
View attachment 1374366
View attachment 1374367
Just goes to show how every single stock made needs to be bedded to its action
 
As Mikey mentioned, bolt it up ang go shoot. You only need
to bed if your stock is a known POS. I'll wrap 1200 grit cloth
to the action being used and take a few swipes to see what's
up. Generally you'll only find a nick from miss handling. All my
rifles are chassis designed, and never needed to bed any. If you
shoot bad targets. it's something else. I do not advise bedding
but I do advise taking that swipe across the block.
I've got guys shooting even at the regional level benchrest and f class both with aluminum bedding block stocks without any bedding
 
In theory, yes, but in practice, with Remington actions (et al) the rear tang tapers inward so that it is no longer supported by the "V". Torquing the rear tang bolt with anything much more than hand-tight is going to stress the action. Skim bedding gives a solid surface for all of the rear-tang.
When using V-Block fixtures in the shop for working on the actions in the mill the same thing can happen. Tighten front screw first and be gentle on the rear.
 
Here is what it looked like when I removed the action the next morning. I was surprized on how much JB Weld it took to fill the gap. I got lucky on the amount of JB I used as it spread out to just cover the aluminum block and I only had to remove material from the hole and the front side. I cleaned up the hole and the front side with a drywall bit in my MotoTool because I did not want to disturb the JB Weld with the mill.

View attachment 1374364
View attachment 1374366
View attachment 1374367
Bedding the tang helped reduce group size. I torqued the front screw to 50 in-lbs and the rear to 30 in-lbs.
 
This week I made pillars and epoxied them pre compressed in Devcon steel putty.
Later I came back and epoxied the rear of the recoil lug while the pillars were again compressed.

It is 55kpsi 45acp that goes hunting with me in a week. I will also take to sight in 7 other rifles I have built for this year; 243 [3" OAL], 270, 6.5-06, 300WM, and 308. They all got pillars too.
 

Attachments

  • 1903 Turk Mauser Shilen 45acp pillars 20221003_173942.jpg
    1903 Turk Mauser Shilen 45acp pillars 20221003_173942.jpg
    82.5 KB · Views: 29
  • Brownells wood plus walnut 45 acp 1903 Turk Mauser pillars only 20221004_124548.jpg
    Brownells wood plus walnut 45 acp 1903 Turk Mauser pillars only 20221004_124548.jpg
    74.9 KB · Views: 29
  • 1903 turk Shilen 45acp 20221006_171756.jpg
    1903 turk Shilen 45acp 20221006_171756.jpg
    76.9 KB · Views: 29

Upgrades & Donations

This Forum's expenses are primarily paid by member contributions. You can upgrade your Forum membership in seconds. Gold and Silver members get unlimited FREE classifieds for one year. Gold members can upload custom avatars.


Click Upgrade Membership Button ABOVE to get Gold or Silver Status.

You can also donate any amount, large or small, with the button below. Include your Forum Name in the PayPal Notes field.


To DONATE by CHECK, or make a recurring donation, CLICK HERE to learn how.

Forum statistics

Threads
164,702
Messages
2,183,035
Members
78,492
Latest member
Paulsen27
Back
Top