@Nic Swink , I just scanned the thread and may have missed this question/answer, but did the duds ever get disassembled to verify 1) there was actually powder in them and 2) if the primers in fact failed to ignite? Forgive me if I missed it someplace scanning this over too quickly.
No I have not taken the primers apart yet
No I have not taken the primers apart yet
Okay, high on the to-do list after a failure to ignite on a cartridge is to disassemble, but only after 1) it is safe, 2) taking all the relevant external dimensions 3) sometimes the weight is important to record but not always 4) then a disassembly should be done to check to see the condition of the bullet, powder, case, and primer.
If we get this bullet removed, it would be best to very carefully inspect the powder for clumps or caked up looking chunks or any smell or evidence of burnt powder. Then take a look down with some light to see if you can tell if the primer actually ignited. Then with eye and ear protection on, very carefully decap a sample to see if the primer was ignited.
ETA: all the previous advice should be noted as well. For example the parts about primer depths as well as firing pin function.
Was the batch all assembled in one sitting by the same person? Any chance a row of a loading tray was missed for powder charge, or just at random? We will know for sure after disassembly.
Yes I will do that thanks for the good info. And thank you for your time
M.Ezell
Gold $$ Contributor
Misfires in mid January? Let's clean the bolt and trigger ,too.
Unless I missed it above, do you possibly have too much headspace with this brass? I traded a rifle decades ago for ftf's caused by shoving the shoulder back too far. At that time I was new to reloading and adjusted my full length die according to the written instructions without any knowledge of proper headspace.
I also had issues with 1 tray of Remington 7 1/2 primers. it was 12 out of 50. After pulling the bullets and dumping the powder, I removed the primer and found most of them with some type of compound issue. Either discolored or gritty. Safely disposed them and went to a new brink and no problems since.
It could also be shoulders bumped to far. Ask me how I know.Another problem I encountered was a Lee tool that the cam was so worn it felt like the primer bottomed out when seated but it was not. A new tool quickly solved the problem.
As was already suggested...try shooting a couple of them a second time...if they go bang, then you know that they were not completely seated. This is the quickest way to find out. Also as stated, check to see that you used the small diameter primer seating rod versus the large diameter primer seating rod. This will help to maybe address your problem.
Mentioned it before and I will mention it again, maybe I missed it, did you pull the bullets to make sure you have powder in them!?!??
When seating primers they should be seated with the anvil contacting the bottom of the primer pocket with a slight primer crush. And seating the primers flush can keep the anvil from contacting the bottom of the primer pocket. Meaning the primer will not go off as the firing pin seats the primer deeper.
And are the fired primers flush with the base of the case or are they protruding?
Could be a moisture problem. How were primers stored? Was the brass wet cleaned?
Mentioned it before and I will mention it again, maybe I missed it, did you pull the bullets to make sure you have powder in them!?!??
I think he mentioned that the primers did not go bang...
I think he mentioned that the primers did not go bang...
Yes he did. He said the primers didn't even pop. Too many not reading the posts before replying. Poor guy must be really confused by now.
Mentioned it before and I will mention it again, maybe I missed it, did you pull the bullets to make sure you have powder in them!?!??
Yes they have powder
Could be a moisture problem. How were primers stored? Was the brass wet cleaned?
They were wet cleaned but I dryed them out with an air compressor and primed them prob 24 hours later
When seating primers they should be seated with the anvil contacting the bottom of the primer pocket with a slight primer crush. And seating the primers flush can keep the anvil from contacting the bottom of the primer pocket. Meaning the primer will not go off as the firing pin seats the primer deeper.
And are the fired primers flush with the base of the case or are they protruding?
-
64C56F2C-CC6B-4B6B-956F-1F86AEED56F7.jpeg
228 KB
· Views: 36
They were wet cleaned but I dryed them out with an air compressor and primed them prob 24 hours later
I would not trust them to be dry, unless they were stored in a very warm and dry place for that 24 hours. Still probably might not. It’s hard to fool me twice, but that method did.
When you disassemble them pay attention to powder clumping or powder sticking to the walls.
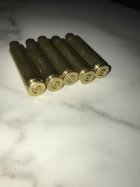
Anyone else have this many duds at once??
View attachment 1226830
Whenever I had a fail to fire I think it was my fault. For a couple of years I tried to set my primer seater to a certain depth. All the pockets have a different depth since they are swaged and not machined. Went back to seat by feel and never had another FF. I now uniform the pockets but I don't think it's necessary.. All of the manufacturers say seat to the bottom of the pocket. If the FP pushes the primer deeper into the pocket it is absorbing energy that should be used to crush the priming compound pellet.
I would not trust them to be dry, unless they were stored in a very warm and dry place for that 24 hours. Still probably might not. It’s hard to fool me twice, but that method did.
When you disassemble them pay attention to powder clumping or powder sticking to the walls.
Ok thanks will fo


