• This Forum is for adults 18 years of age or over. By continuing to use this Forum you are confirming that you are 18 or older. No content shall be viewed by any person under 18 in California.

Crafting a Rifle Stock

I have recently taken up crafting rifle stocks and have learned a lot in the last year or so. I have learned a lot on this forum and picking a few other people's brain. I craft a few for friends, some for sale, and some for myself. I would like to share my process of fabbercobbling, for those interested. So ladies and gentleman welcome to my empire of dirt.

I start out by searching the interwebs for quality pieces of lumber. Sometimes that is via eBay or craigslist for local saw mills. I have made a few connections with local clearing/logging contractors to find decent raw pieces but they still need drying and boarding out. Also just like with anything you can pay $50 for a piece of wood that is mediocre but maybe a great piece to learn on. Or you could buy a gorgeous piece for thousands of $$$. There are entire dissertations on figure/curly/birdseye etc on what constitutes a pieces "grade" but I dont want to get into that.

I try to find pieces that have some nice figure that are not crazy pricey and fit my measurement requirements. I generally search for a piece that is at least 30-36" in lenght, 6-8" in width, and depending on the design idea 2-3" in thickness. A larger piece is always better than a piece too small. The more beautiful pieces grab your attention at first but some aren't the measurements I am looking for.

Once I find a piece that seems to be worth it I run it through a planer. This gets the piece flatter and easier to make cuts with the bandsaw.

This piece shown below that I will be showing some of the process with was originally sold as a mantle piece. It was larger than I needed so I was able to get two stock blanks from it. 52" long x 10-3/4" wide x 2-3/4" thick. I had it shipped to my door for $137.79
20190330_213151.jpg

After the piece goes through the planer I select a "template" that I have made for the outline
20190510_172822.jpg

Once I select a template I layout the basic outline and try to place the template in areas that miss the sapwood or large knots. Luckily this piece didn't have any troublesome knots, just some sapwood on one side. Then the blank is cut from the slab and I can move on to the next steps.
20190330_184012.jpg
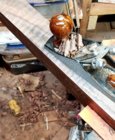
Depending on how well I cut the blank with the bandsaw, I will either run the top across the jointer or smooth out the top with a hand plane. ( Some of these photos are from different stock but its the same process)
20190326_193105.jpg

20190326_185858.jpg

Then blank is cut and ready to be measured up for the initial inletting.
 
Last edited:
I start my marking out the center cut for the barrel channel and the action area. In these example pictures the inlet is for a Remington700 short action. I dont have a milling machine, so I use what I have. Don't judge to harshly- I currently use a Jet 3/4HP 16 speed drill press. I put a cross slide table similar to a milling table on the drill press. It took a bit of fiddling with the chinesium cross slide table to tighten it up and make it usable. This first passes are with a 1/2" shank 7/16" radius Box Core bit. I run the drill press at 1600-2300 rpm I normally take a piece of scrap from the same blank and do a few test runs to see which speed that particular piece of wood cuts best at. I dont know or claim to know if that is the most appropriate speed to run the bit, but if I make shallow passes and take my time it works well. This is after dozens of passes, I didnt take this deep of a cut the first go

20190327_204925.jpg

Once the barrel channel is cut to the approx depth I switch to start working on the action area inlet. I use a 1-3/8" dia 1/2" shank Box Core Bit. During the cutting of the action area, I have found it is critical to take my time and make shallow passes, the bit has a large cutting surface and if you push it to hard it tends to chatter and go off course. Patience is key!
20190516_201956.jpg
.
.
.

At this stage I will also cut the recoil lug area, and the start of the trigger area with a 1/4' roughing end mill.---( picture shows the box core bit still int the chuck, I had to smooth the transistion from action to barrel channel out a bit)

20190516_213156.jpg


Once the action area is getting close to the correct depth, I do a few test fits with a beat up barrel action I have.
20180903_175741.jpg
 
Last edited:
After the barrel action fits well into the stock inlet I will start inletting the magazine well and trigger area. unfortunately I dont have very many photos of this portion of the inlet. I tend to get so busy doing it that I forget to take photos. Here are some from various builds
20180720_192109.jpg

It takes a few test fits to get the depth correct on the bottom metal.
20190402_195713.jpg


20180903_175836.jpg

At this time I will also drill holes for the action screws, more often than not I will drill the holes large enough for pillars. With the use of the pillars I can inlet the bottomw metal deep enough to makes sure the web thickness ( pillar height) is correct for the bottom metal & action fitment. Once I know that everything bolts up the way it should and the magazine will fit into the inlet and have the correct depth I mark the area that needs to be removed from the bottom of the stock.
20190526_172230.jpg
Dont mind the mess in the background.

Next is shaping
 
Here are few photos of the shaping process from various stocks...I dont have a detailed techinque on how I do this. I do this portion by eyecalibration, it is more artistry than science. I generally start with the rear of the stock and work my way to the tip. I rough most of the shape with an aggressive sanding disk and move to finer grit as I get closer to the design shape. I mostly use an angle grinder with a 36grit disc, I remove the guard, but do this at your own risk as the knuckle remover can bite you in a hurry if not careful. I would also caution you if you attempt this, it is going to be extremely dusty and should be done outside also with a mask ( not the cheap paper mask) a resporator or similar to protect your lungs. I will also add a little boiled linseed oil through out the shaping progress to see the grain and figure.
20190120_154409.jpg
20190402_180610.jpg
20190519_191442.jpg
20190611_184136.jpg 20190611_184129.jpg
 
I try to work on the shaping portion of the stock crafting when the weather is nice since I am doing it outdoors. Once I have roughed in the shape with the angle grinder I use a small belt sander to get into the detail areas around the grip and the rear of the stock. The angle grinder removes too much wood to be used in this area of the stock. I use a 1/2"x18" belt sander from harbor freight, it works well enough but if you get one, make sure the belt is oriented in the correct direction of travel or you will waste a few sandind belts. I also use the belt sander to make what I refer to as "linework" getting the angler look to the stock.
20190521_191822.jpg

20190521_191841.jpg
This allows me to get the break lines and linework symmetrical on both sides of the stock without removing too much wood at one time. I normally use 80 grit to start, then move to 120 and 220 once the lines become crisper. I also find it helpful to add a little bit of boiled linseed oil on the stock during this process. It helps me see the areas that are still rough vs the areas I have made smoother with the belt sander. You can see in the pictures above the areas I am referring to that still show the aggressive angle grinder marks in the stock. After the rear of the stock is gets to 75% shaped I move on to the front of the stock and use the same angle grinder & belt sander combo to get it roughed in.

In the picture below I actually worked from the front of the stock rearword and that was the first and last time I did it that way. In the few stocks I have crafted it seems easier to work back to front .

( these are photos of various stocks I have crafted-I am trying to show the process more than an individual creation)
20180907_182435.jpg

For me the shaping portion of the crafting process is the most rewarding and interesting. It is the most unique aspect of the work, no piece is shaped exactly the same. I also really enjoy seeing the grain and figure get revealed.
 
For my next trick...

The hardest part of the process and the part I receive the most questions about. The cheek riser! I have two methods to do this, just depends on your patience and what tools you have as to which will work better.

Method A)- Coping Saw, steel, clamps, drill, foster bits, chisels, and patience patience.
As shown below, I have a few pieces of steel that get clamped to the stock and act as guides for the coping saw. I can't cut straight enough and accurately to do this part free hand. You want the end result to look clean and have the cuts straight. Now you can do this before or after you do the shaping of the rear of the stock. There are Pros and Cons to either timing.

Before shaping the rear--Pro hopefully the stock is square and straight enough that the steel lays flat and clamps easily, its easier to measure as you dont have as many complex angles to work with. The Con is there is more material to cut with a tiny saw blade.

After shaping the rear--Pro is there is less material to remove and the cutting generally is faster and easier. The Con is if you dont shape the stock well, you may have difficulty getting the cut to line up and it may not be as straight.

This is how I set up the first cut on the cheek riser
20180909_125443.jpg


Next is a workout. The cutting is slow and painful. But you want the line to be straight as you can get it. Also I prefer a coping saw for this as the blade is thin and does not remove a ton of wood. I have also thought about doing this portion on a bandsaw...but I feel like it could get out of hand quickly and I dont know for certain that it will be symmetrical on both sides.

Making the turn to the next cut is difficult and requires patience to cut slowly and keep from getting the cut out of line.
20180909_132148.jpg

I continue to cut and adjust the clamps accordingly. I cut the line shown above almost to the end, then back up and reset. I cut the rear most portion last using the same technique as shown above
20180909_143529.jpg

This gets the cheek riser free from the main stock and sometimes it may require a little sanding to get it clean and crisp. I cut the cheek riser, glued it back on the stock and shaped it. Then finished the hardware install

Once the riser portion is free I start measuring for the hardware. I prefer to use KMW Loggerhead cheekr riser hardware. It is the highest quality of all the variations I have tried. I use a drill and foster bits to remove the majority of the material.
20180915_113945.jpg
20180915_115050.jpg
I use a hand chisel to complete the rest of the hardware inlet on the stock portion
 
Last edited:
20180915_115058.jpg

Then I move on to the riser portion inlet, I do this portion on the drill press
20180915_005707.jpg

Once all the hardware is inletted, you need to drill a hole on each side of the stock for the clamp bolt. I find this to be difficult as you really only get one shot to get it right. This follows the old saying measure twice cut once.
Here is the cheek riser & hardware installed using Method A
20180916_013955.jpg
 
Cheek Riser Method B)

This process follows almost the same technique as the other, the key difference is using a ocsilating multi tool instead of a coping saw for the cut of the cheek riser. The use of the multi tool saves a lot of time and arm workout. It can be a little tough to get used to but I think it worked great. I also had already shaped this stock before the cheek riser cut. I used some painters tape to help with the measurements and layout for this one. I use either the cordless drill and foster bits for the hardware install, or use the drill press/cross slide table.
20190527_104513.jpg

I use a multi oscillating tool with a round blade so I can "roll" the blade along the cut line. I also clamp a piece of steel on each side of the stock as a guide for the cut.
20190527_110726.jpg
Once I have cut most of the way through on each side, while being careful to make sure my blade is perpendicular to the stock. I take a normal hacksaw blade or I use a coping saw, both work
to finish the rest of the cut.
20190527_113630.jpg
20190527_120716.jpg
20190527_120724.jpg
 
The cut wasn't 100% perfect but after a little sanding and clean up it looks great in my opinion

20190527_134107.jpg
20190527_185906.jpg
20190527_190147.jpg

A note I forgot to mention--I always build the stock long in the rear, it allows me room to make a cut for the correct length of pull later
 
Now that the majority of the hard parts are near complete. The remaining work is finish sanding, oiling, sanding, and oiling. Then detail work like stippling or checkering.

For the finish sandind I use an orbital sander and start at 120 grit. I will sand the entire stock until it is a smooth as 120 will get it. Then I move to 150 grit or 180grit and repeat. I will continue the sanding until it is smooth as I can get it with 400 grit paper. There are portions of the stock that the orbital sander can not reach, so those areas are done by hand.

Once I have it sanded with the 400grit paper, I will mist it with water, this will raise the grain. I will wait for the water to dry and sand again with 400 grit. Once I have raised the grain and sanded it off again I will put a coat of boiled linseed oil on the entire stock*. I rub it in my hand or with an old t-shirt. The oil will soak right into the wood and bring out the grain and it should look amazing. Now depending on where you live and what the climate is like, the drying of the oil may vary for you. I live in South Carolina and sometimes it is so humid that it is unbearable, that humidity will make it take much longer for the oil to dry on the stock. I generally leave the stock's in my work shed and without the airconditioner turned on, it will bake in the sun and dry out the oil fairly quickly. Once the oil is dry, I will oil it and sand right away. I use the oil/sawdust slurry to press into the pours of the wood. This will help give it a nice shiny finish. I repeat this oil/sand procedure as many times as need to get the smooth finish I want.

This is one that did not have a cheek riser but I got some nice photos of how smooth the finish turned out.
20190324_010113.jpg
20190309_011942.jpg
( the inlet looks a tad rough, I hadn't finished bedding it at this point)
20190312_202343.jpg


*If you use a rag or t-shirt for the boiled linseed oil there are other complications to worry about. Boiled linseed oil has a reputation/rumor that it will spontaniously combust...I have never experienced this but I put oiled rags in a metal coffee can outside so if it were to happen it wouldn't burn down my shed.
 
Here are few photos of some of the finished stocks. I wrote this up to hopefully inspire some of you guys to get creative and try your hand at it. I will be glad to help anyone who wants to tackle this project themselves.

First Stock I crafted
20181006_154422.jpg
20181006_15441312121212121212.jpg

My Second Stock
20181008_1237501q212121.jpg
20181006_161130222231123223123212312.jpg
20180923_211712.jpg
 

Upgrades & Donations

This Forum's expenses are primarily paid by member contributions. You can upgrade your Forum membership in seconds. Gold and Silver members get unlimited FREE classifieds for one year. Gold members can upload custom avatars.


Click Upgrade Membership Button ABOVE to get Gold or Silver Status.

You can also donate any amount, large or small, with the button below. Include your Forum Name in the PayPal Notes field.


To DONATE by CHECK, or make a recurring donation, CLICK HERE to learn how.

Forum statistics

Threads
165,485
Messages
2,196,994
Members
78,946
Latest member
ballistic bezzy
Back
Top