• This Forum is for adults 18 years of age or over. By continuing to use this Forum you are confirming that you are 18 or older. No content shall be viewed by any person under 18 in California.

Varmint Rifle Build Blog - 25x45AI (Step 4: The Barrel)

AllThingsAI

Silver $$ Contributor
Profiling Barrel Blank:

I have to admit, I’m not a huge fan of profiling barrels from a blank. I’d much rather just purchase a previously profiled barrel and head straight for the fun stuff, but beggars can’t be choosers. I got a good deal on a Stainless .257”, 1:10, 27”, 1.200” OD Blank from Green Mountain and thought I’d give it a go.

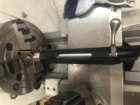
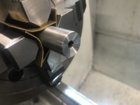
The first step in my process is to align the barrel through the headstock of my lathe. I managed to align within a few tenths. I then cut a temporary tenon on the breach side of the barrel. This will later become the barrel shank, but for now it’s oversized and gives me a good surface to put in my collet chuck. I also reverse the barrel and cut a 60 degree chamfer on the muzzle end to locate my tailstock live center. Temporary tenon below:
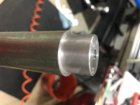
AE49C43A-5425-4CB6-8F27-BF6E57640EF5.jpeg

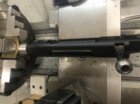
With my precision collet chuck driving the barrel, I also set up my live center and a steady rest to help eliminate chatter. Chatter is always a problem with long unsupported spans and I’ve found that if I work by cutting towards the tail stock my system stays more ridged and I get less/no chatter.
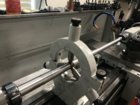
13C1924C-DBEF-4F94-988C-99572AF0402E.jpeg

For this barrel profile I needed to be at a final Od of 1.125” at the breach and 0.875” at the 26” mark. Being my own CNC what happens between these points is what I call “artistic license”...aka good luck! I shot for the first 4” or so to be at full diameter then tapering down to 1” OD at around the 7” mark. From there to the end it’s pretty much a straight taper to the final 26” diameter of 0.875”.
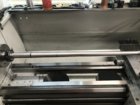
1132B4B4-5D96-49C0-B88E-03AB90FDDACE.jpeg

I run a few passes along the entire barrel more or less roughing out the shape. For my final contour I mark out the barrel with sharpie and calculate the depth of cut change rate I need to make on the cross slide for a given feed speed along the barrel. As I engage the auto feed I turn the cross slide at approx the rate I calculated for that given section....it’s hard to gauge and not always accurate. This is why I call it “artistic license”! Hard to focus on turning that dial with sweat pouring into your eyes!
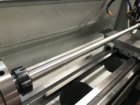
211FDA18-8B5C-4C4B-B6CC-2A4A0BB69446.jpeg

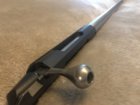
All things considered it turned out pretty nice. Kinda like my pancake batter....only a few lumps! But certainly nothing a file, sandpaper, scotch brite, and some elbow grease won’t fix!
 
Threading The Barrel:

For some reason I really enjoy threading barrels. There is a bit of magic in it for me to slowly watch those threads pop out. I learned a technique of threading backwards with an upside down threading tool. This allows you to thread much faster and get threads much closer to the barrel shoulder. I’ll never go back to threading the “high pucker factor” direction.

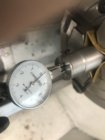
So barrel alignment here is critical. I spent a lot of time aligning the barrel through my headstock. I have a spider on the outside and can align both sides of the barrel accordingly. I am actually using the lands in the barrel to do my alignment, this is the original bore and retains good accuracy. I worked through my dial indicators and finally ended up with an alignment of < 0.0002” (two tenths) on both sides. This is as true as I can make it. You can see the high below. The low was at zero...not bad!
B7A7BFB2-951B-4EC9-8684-81E440770801.jpeg

With the alignment out of the way I cut the barrel tenon down to 1.000” OD and 0.975” in length. This should give me a tenon that is a bit too long, but I will cut it down in a later step. I set my machine to 16 Threads per inch, adjust my carriage stop, make an undercut on the shoulder and take a scratch pass to verify my thread pitch. Right on the money.
4E3A0F6D-2FB5-4C3A-9B49-FF06B87F4BAD.jpeg
271CBC90-5BAC-42A7-B6F2-FB30D6C64560.jpeg

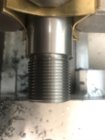
Time to rinse and repeat. Like I said I threat towards the tailstock with my threading tool upside down. This allows me to thread at 300 or greater RPM, which produces really clean threads. I also change my depth of cut with the cross slide, usually around 0.010” per cut. As I get closer to final dimension the cuts get much smaller and I take several spring passes. The threads were a final depth of 0.092” (diameter). They turned out beautiful!
0A370E9E-A8FE-4629-8E01-14059D589E14.jpeg

To get to the final thread depth is trial and error (fitting receiver again and again) until the receiver threads on freely with very little, if any, play. The next step is to set the gap between the bolt face and the barrel. I used 0.008” as my go to gap. So with the bolt in the receiver and locked, I thread the receiver on to the barrel until hard contact is made with the bolt face. Time to measure the gap between the front of the receiver and the shoulder of the barrel. I’m my case a 0.007” shim first snuggly into the gap. This means I need to cut 0.007+0.008 or 0.015” off the end of the barrel to get the gap I desire.

47BE15E3-42B2-469A-96F7-E7E2211A6E64.jpeg

I made a few cuts and repeated the gap measurement until it was spot on! My bolt was free with no binding and the receiver was threaded all the way down.

Now on to chambering!
 
Chambering The Barrel:

Glamour time! I do enjoy chambering, it’s in my nature to have attention to detail. For this job it’s going to be a bit of a challenge. Here’s what I’m working with: One solid pilot 223AI Reamer, one 0.284” chucking Reamer (for neck), and one .257 throating Reamer with 1.5 degree angle. So for me it’s going to be a three step process and the second time I have tried this method.

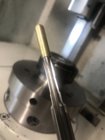
I start by making a long, precision brass pilot bearing 0.250” OD and 0.218” ID to fit over my solid pilot Reamer (ended up with air tight fit)
846D0D80-A256-4766-A310-0A6D17427730.jpeg

This will give me a bit of extra alignment insurance with the Reamer I have. Next I single point turn a starter bore into the barrel...this is what really ensures properly Reamer alignment. With an aligned barrel I bore a hole the size of my reamers neck diameter until it’s a snug fit. I then chamfer the outer edge of the barrel so the Reamer can “funnel” into the bore. Using a floating Reamer holder I start feeding my heavily oiled Reamer into place. 180rpm or so seems to behave properly. Constant removal of the Reamer to clear chips and reoil, always keeping the barrel turning when moving the Reamer in or out (very important). I finally reach my mark of 0.150” from the barrel to the end of my go gauge.
F811408D-4B17-446E-8E28-3BB27B21A434.jpeg F4E5F29E-C2DB-4D14-B394-96C879F26BCB.jpeg

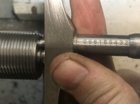
Time for small steps, threading the receiver down and checking if my bolt closes on my go gauge. If it doesn’t, the I ream a little deeper....and repeat until my bolt closes on my go gauge. Below bolt closed on go gauge.
8CDCCC8C-9BF5-4B15-9ECE-3F9C54D99E00.jpeg

Then I check my no go gauge and hope my bolt will not close on it...and it doesn’t
E67130CD-9E66-4E05-A49C-408138E112A6.jpeg
 
Last edited:
Chambering part two:

After checking my headspace with my go/no go gauges my chambering is nearly complete, two more steps.

Since I used a 223AI Reamer I need to increase the neck diameter of the chamber, this is a simple step of using the appropriate (.284”) size chucking reamer. I needed a depth of ~ 0.240” for the neck. Inserting the Reamer and feeling for alignment (more or less self aligning as reamers follow bores well), I cut the hole 0.240” deep. This gave me the neck size I was looking for. You can see the results of this step below
E2D5884C-446B-4ED2-9A60-BE979CE7A765.jpeg

Everything is looking nice and concentric in the chamber...that’s good news! My work and patients is paying dividends. If you notice the lands have no taper, or leade, on them yet, they come right to the end of the neck. The final step here is to cut the 1.5 degree taper and set the freebore. In my case I estimated about a freebore of 0.115” from the end of the neck. Using a throating reamer is touchy, at best. You have very little feel so it’s slow go. I got to a state that I would call “zero freebore” where the taper starts at the end of the neck.
57EBC586-4175-4EBE-B7FA-B658F9639CCE.jpeg

Once I have a reference point “zero freebore”. I can now proceed to throat ream an additional 0.115” to accommodate the 70g Sierra Blitzking. This freebore allows the bullet base to sit just above the neck shoulder junction. Here is my finished chamber!
DA9276AB-0DA4-403D-A679-7AD0187ABEB8.jpeg
0EB381A5-D30B-4901-A76A-85F773056B06.jpeg

I’m really happy with the way the chamber turn out...hopefully the barrel is a shooter, its always a risk with lower end barrels...but I’ve had decent luck and it looks very true.

Now let’s put the icing on top, the crown!
 
The Crown:

One thing is for sure, you had better get good at indicating if you want to cut a proper barrel. Now that the chamber is complete it’s time to flip the barrel around and realign it to within two tenths again...this would be the 4th, maybe 5th time I’ve indicated this barrel.

For cutting the crown the process is straight forward. In this case I will use a 11 degree target crown. I like the way they look. First I need to cut off 3/4” or so off the end of the barrel. After using a cutoff tool to trim the end of the barrel off I square it up with a carbide insert. Set my compound angle to give me the 11 degree angle. Using a nice sharp high speed steel cutter I start from the bore of the barrel and work my way out. This keeps a burr from forming at the end of the bore. Repeat this moving to a Progressively deeper cut until the angle reaches the outer diameter. Chamfer the edges and that’s it.....the barrel is finished! Look at the nice crown and the rifling, crisp and sharp!
5FE7D869-A3EE-45EB-B1A8-91AD698942CA.jpeg 83D4338F-1778-4B4C-BBEE-09C0E35961E4.jpeg

Time to hand lap and clean the barrel. This will smooth out any rough edges and remove metal and oils from the barrel.

It’s time to put it all together and make it look pretty!

Stay tuned
 
Last edited:
AllthingsAI -


Howdy !

Boy..... nice, straight-forward and understandable explanation of what's going on ! The pics are superb, and allow us to see both work in-progress; and the end results of your efforts.

Great fun watching the evolution of a new build, especially one from a machinist performing the work personally.
And....certainly do want to see how it shoots for you.

Many thanx for your dedication to our continuing education, not to mention our recreational reading.


With regards,
Kevin 357Mag
 
Nice to see how you build your gun. And of course, as I used to be cnc-machine center operator for 10 years, respect precise work.
 

Upgrades & Donations

This Forum's expenses are primarily paid by member contributions. You can upgrade your Forum membership in seconds. Gold and Silver members get unlimited FREE classifieds for one year. Gold members can upload custom avatars.


Click Upgrade Membership Button ABOVE to get Gold or Silver Status.

You can also donate any amount, large or small, with the button below. Include your Forum Name in the PayPal Notes field.


To DONATE by CHECK, or make a recurring donation, CLICK HERE to learn how.

Forum statistics

Threads
166,266
Messages
2,214,542
Members
79,479
Latest member
s138242
Back
Top