AllThingsAI
Silver $$ Contributor
After a hard fought battle removing my Tikka T3x barrel it was off to the next step. Time to get rid of the hammers and enter the world of 0.0001" dial indicators. Honestly I'm not a huge fan of the tenths indicator, they are very, very touchy and can provide me just as much disinformation as real information. I much prefer my 0.0005" indicator for the majority of my work, jumping into the tenths when finalizing my work (if required).
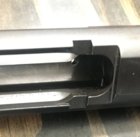
So having previously done work with T3x receivers, including making a complete bolt body from scratch, I know their engineering and machining is very good for a factory receiver. Knowing this I started with the bolt and specifically the lugs. They can be off a bit and uneven contact and wear can occur. The receiver I have is lightly used so I did have some initial indications of uneven wear on the lugs. You can easily see this on the receiver lugs. (But look at that machining! Impressive)
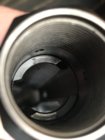
Time to Sharpie up the bolt lugs. I covered the back of the bolt lugs with a black Sharpie marker and reapplied the original barrel. I like to use an empty case to engage both the chamber and the bolt while I do the contact test. This helps to assure better alignment. The bolt has some room to move inside the receiver and this can throw off your measurement. Cycling the bolt 10 or so times being sure to apply pressure both forward and backward when engaging and disengaging the bolt handle (to try to compensate for any bolt tilt during the process, kind of like sanding in a figure 8 pattern).
The results are below...no engagement on one side. Why? Bolt? Receiver?
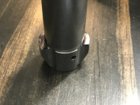
For me its easiest to check the lugs on the bolt first. I have a nice collet chuck on my lathe which allows me to get within a couple of tenths runout. And this was true in this case. The bolts are very nicely machined, hardened, and straight.
I indicated the lugs and they were about 0.0008" out from one to the other. Again, this is very close and is testing my measurement ability for my given setup, but it makes sense with what I saw earlier.
So let's true those puppies up. I took a little over 0.001" cut until both lugs showed no sign of sharpie. They turned out nice!


Time to redo the contact test...If i have good even contact there is no need for me to do any work on the receiver, I crossed my fingers and............ Boom, looks good enough to me! I can always lap a bit to refine, but I certainly am within a gnats hair of true. (Both sides look exactly the same).

This was good news. I know my bolt lugs are square, now I know my receiver lugs are square. Life is good. Measuring a receiver accurately is very difficult and requires extreme care and precise fixtures. They best I can do is set up my receiver in my squared up milled vice. After measuring the shoulder of the receiver I found that it was out <0.0005" from side so side and top to bottom. The is well within my ability to measure with this setup and a testament to Tikka/Sako quality. This certainly isn't worth touching in my book. Just holding a receiver accurately in a lathe is a challenge and I cannot get it more accurate than I'm already measuring.....THIS IS WHY I USE TIKKAS!!
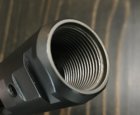
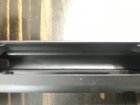
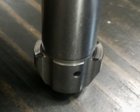
More pics of the quality machining in the post below. I can only post 5 pics per post.
Stay tuned....It's barrel time
So having previously done work with T3x receivers, including making a complete bolt body from scratch, I know their engineering and machining is very good for a factory receiver. Knowing this I started with the bolt and specifically the lugs. They can be off a bit and uneven contact and wear can occur. The receiver I have is lightly used so I did have some initial indications of uneven wear on the lugs. You can easily see this on the receiver lugs. (But look at that machining! Impressive)

Time to Sharpie up the bolt lugs. I covered the back of the bolt lugs with a black Sharpie marker and reapplied the original barrel. I like to use an empty case to engage both the chamber and the bolt while I do the contact test. This helps to assure better alignment. The bolt has some room to move inside the receiver and this can throw off your measurement. Cycling the bolt 10 or so times being sure to apply pressure both forward and backward when engaging and disengaging the bolt handle (to try to compensate for any bolt tilt during the process, kind of like sanding in a figure 8 pattern).
The results are below...no engagement on one side. Why? Bolt? Receiver?

For me its easiest to check the lugs on the bolt first. I have a nice collet chuck on my lathe which allows me to get within a couple of tenths runout. And this was true in this case. The bolts are very nicely machined, hardened, and straight.
I indicated the lugs and they were about 0.0008" out from one to the other. Again, this is very close and is testing my measurement ability for my given setup, but it makes sense with what I saw earlier.
So let's true those puppies up. I took a little over 0.001" cut until both lugs showed no sign of sharpie. They turned out nice!


Time to redo the contact test...If i have good even contact there is no need for me to do any work on the receiver, I crossed my fingers and............ Boom, looks good enough to me! I can always lap a bit to refine, but I certainly am within a gnats hair of true. (Both sides look exactly the same).

This was good news. I know my bolt lugs are square, now I know my receiver lugs are square. Life is good. Measuring a receiver accurately is very difficult and requires extreme care and precise fixtures. They best I can do is set up my receiver in my squared up milled vice. After measuring the shoulder of the receiver I found that it was out <0.0005" from side so side and top to bottom. The is well within my ability to measure with this setup and a testament to Tikka/Sako quality. This certainly isn't worth touching in my book. Just holding a receiver accurately in a lathe is a challenge and I cannot get it more accurate than I'm already measuring.....THIS IS WHY I USE TIKKAS!!
More pics of the quality machining in the post below. I can only post 5 pics per post.
Stay tuned....It's barrel time
Last edited:


