• This Forum is for adults 18 years of age or over. By continuing to use this Forum you are confirming that you are 18 or older. No content shall be viewed by any person under 18 in California.

Used S&W Model 65 with Play in Yoke and Cylinder

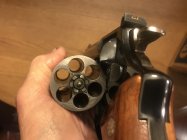
I found a cosmetically nice Model 65 357, one with a recess in the rear of the cylinder, for a good price. There is very little fore and aft play in the cylinder when it’s in the gun and it’s locked up pretty well when the hammer is cocked.

However, when you open the cylinder, there is what I’d call significant fore and aft movement in both the yoke and the cylinder. I know you can shim both, but I’ve seen shims in the order of .002-.004 and think the play might be more than that. The dealer has a gunsmith on site and said they’d install the shims for free if I bought the gun.

They said the gun is safe and operates properly, but it’s a lot looser than my S&W model 29 or Colt Trooper.

Thoughts?
 
There is only one screw holding the yoke in and earlier revolvers have a non-spring loaded tip. Lets the yoke move fore and aft when open.

On the left side of the revolver towards the rear of the cylinder opening their is a lug or shoulder that the cylinder hits to keep it from sliding off the yoke.

Shimming needs to be done with correct understanding of revolver headspace. I have fixed quite a few that were shimmed into "not working"

Long story short if it feels good and looks good closed you are all set for safety. Providing timing and cylinder gap are both good.
This is sound advice. Any shimming must take into account the effect on headspace.

This condition (yoke play) is fairly common in S&W revolvers that has seen a lot of wear. The yoke screw on the older models which are not spring-loaded, wear faster and create additional movement.

Sometimes, switching the yoke screw on older models with the other oval head plate screw (NOT the flat headed screw cover by the stocks) will tighten up the yoke. Sometimes, installing a new yoke screw will tighten the yoke. Many, many years ago, oversized yoke screw were available to correct this condition, but I don't believe they are available anymore.

As long as the headspace is correct, and the cylinder timing is not compromised, there should be no need to employ shims at this point.

When shimming is needed, this is best done by someone, preferable a pistol smith, who has experience and knowledge in the correct process involved. I have seen extractor rods, cylinder pins, and hands damaged by inexperienced home gunsmithing jobs that have went sideways.
 
The yoke actually trust on the inside face. Any “shim” placed in there would probably be extruded pretty quick, especially in high recoil revolvers.

the old trick is to slide a snug fitting rod, (around 5/16 diameter), into the center of the yoke and peen the center of the undercut center, actually stretching the steel and tightening the cylinder back against the frame thrust block, removing end play when the cylinder is closed.

It takes some skill, but it is the most viable way to reduce forward to aft play when in battery.image.jpgimage.jpg
 
Last edited:
The repairmen at S&W don't use 'shims' when repairing the old series revolvers..........
That is correct.

Companies like Power Custom and the like provided shims to reduce "end shake" but it is not the optimum fix - however shipping a firearm especially today, can be a pain.
 
Last edited:
That is correct.

Companies like Power Custom and the like provided shims to reduce "end shake" but it is not the optimum fix - however shipping a firearm especially today, can be a pain.
Well, if the shop where the 65 is has a "gunsmith", why doesn't he correct any problems the revolver might have the 'factory' way? I haven't looked for the required tools in 30yrs as I acquired mine 30+ years ago. Some I made, some came from Brownells. I guess the 'trick' is to know how and when to use them!
 
Well, if the shop where the 65 is has a "gunsmith", why doesn't he correct any problems the revolver might have the 'factory' way? I haven't looked for the required tools in 30yrs as I acquired mine 30+ years ago. Some I made, some came from Brownells. I guess the 'trick' is to know how and when to use them!
Several of mine are 40 to 50 years old and have some "end shake" and the yoke has some play. If you shoot them as much as I have, I think that is unavoidable. But they are still in time, function reliably, and still can shoot 10's if I do my part. For the most part, I chose not to "fix" them unless I need to from a functionality point of view.

I am not a gunsmith, but I have shimmed a few with excessive "end shake" rather than send them back to the factory. If you want to watch a video by a S&W factory trained armorer watch gunblue490's video on Disassembly and Care of S&W Revolvers. He'll explain the technical issues involved. I believe it is very informative. He does not advocate shims.
I certainly don't feel "the need" to learn about S&W revolvers on Utube, as I am Ron Power trained, and a gunsmith school grad (MCC, class of '93), where S&W was well covered in "Advanced Repair". On 2 S&W revolvers we were required : install oversized hand and time, install and fit DA sear for proper function, and install OS cylinder stop. That is all hand fitting. thumbnail_DSCF1335.jpgWe straightened the yoke where the cylinder rides for alinement between firing pin and barrel, (make proper cylinder to barrel alinement) and peened and fit the end that goes in the frame to tighten yoke to frame fit,,,, along with smoothing and tuning. The Ron Power classes were more about tuning and fitting custom thread and forcing cone PPC barrels from a blank, make an underlug from bar stock and fit the 'ball lock'. The pic is of tools from my S&W tool box, not one I 'pulled' off the web, somewhere. I have built several over the past 30yrs, and repaired many, including removing broke-off hammer studs and then installing a new stud. I feel I know a bit about the workins' of S&W revolversthumbnail_DSCF1107.jpg
 
Last edited:
I certainly don't feel "the need" to learn about S&W revolvers on Utube, as I am Ron Power trained, and a gunsmith school grad (MCC, class of '93), where S&W was well covered in "Advanced Repair". On 2 S&W revolvers we were required : install oversized hand and time, install and fit DA sear for proper function, and install OS cylinder stop. That is all hand fitting. View attachment 1466506We straightened the yoke where the cylinder rides for alinement between firing pin and barrel, and peened and fit the end that goes in the frame to tighten yoke to frame fit,,,, along with smoothing and tuning. The Ron Power classes were more about tuning and fitting custom thread and forcing cone PPC barrels from a blank, make an underlug from bar stock and fit the 'ball lock'. The pic is of tools from my S&W tool box, not one I 'pulled' off the web, somewhere.
Back in the 1970’s, I built the revolvers for the Houston Texas PPC team, that being Police Proficiency Competition Matches.
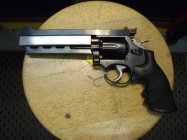
I took generic Model 10 38’s, installed a flat sided custom 6 inch barrel, (I bought Shilen blanks and did all of the machine work), removed all of the single action function including the hammer spur, polished all of the internals, got the spring tensions correct, timed them, and mounted a Bomar Rib on top.
Shooting 148 grn wadcutters at 750 fps, these pistols would place 6 shots inside an inch when fired in a Ransom Rest at 25 yards.

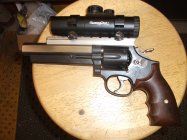
My crowning achievement was my “45 magnum” built on a N frame. I gained around .040 diameter cylinder clearance by dressing and squaring the inside of the frame. With the help of a Metallurgist, Mr. Korny Smith at Jorgensen Steel, I acquired a piece of Premium Aircraft Quality E4340..

He had the piece normalized and annealed. I then roughed out the cylinder, and Mr Smith had the final heat treating performed. He had it hardenned, then the temper drawn on two steps for a final RC hardness of 38.
I then did all of the finished machining.

I used a Model 28 as a start, you could buy them back then for less than $200 with the police discount.

I did all of my action tricks, and used a Model 25 6 1/2 inch barrel.

This is truly a one of a kind. The pistol was the feature article in July 1978 Guns and Ammo, where shooting editor Howard Glaze declared it the finest Smith he ever shot.

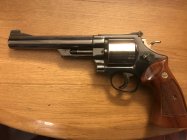
here is the pistol I haven’t shot it in a while. My favorite load was a 250 grn hard cast Keith IMG_1264.jpegIMG_1263.jpegIMG_1262.jpeg Semi Wadcutter with enough Blue Dot to push it to 1275 fps.
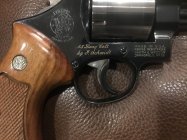
 
I certainly don't feel "the need" to learn about S&W revolvers on Utube, as I am Ron Power trained, and a gunsmith school grad (MCC, class of '93), where S&W was well covered in "Advanced Repair". On 2 S&W revolvers we were required : install oversized hand and time, install and fit DA sear for proper function, and install OS cylinder stop. That is all hand fitting. View attachment 1466506We straightened the yoke where the cylinder rides for alinement between firing pin and barrel, (make proper cylinder to barrel alinement) and peened and fit the end that goes in the frame to tighten yoke to frame fit,,,, along with smoothing and tuning. The Ron Power classes were more about tuning and fitting custom thread and forcing cone PPC barrels from a blank, make an underlug from bar stock and fit the 'ball lock'. The pic is of tools from my S&W tool box, not one I 'pulled' off the web, somewhere. I have built several over the past 30yrs, and repaired many, including removing broke-off hammer studs and then installing a new stud. I feel I know a bit about the workins' of S&W revolversView attachment 1466507
If I had known of your extensive expertise and experience, I would not have suggested the video.

While I have shot S&W revolvers since 1970-time frame, I do not have anywhere near the expertise or experience you have in repair and maintenance of them thus I found the video helpful since this guy was trained at the S&W factory as armorer for a police department.
 
When I shimmed mine it was to get the correct cylinder gap, as it was touching.
A package of shims and a few minutes made mine operable again.
 
A 65 is a K frame. if shot a lot it might be cylinder end shake simple fix have a good gunsmith look at it.
 

Upgrades & Donations

This Forum's expenses are primarily paid by member contributions. You can upgrade your Forum membership in seconds. Gold and Silver members get unlimited FREE classifieds for one year. Gold members can upload custom avatars.


Click Upgrade Membership Button ABOVE to get Gold or Silver Status.

You can also donate any amount, large or small, with the button below. Include your Forum Name in the PayPal Notes field.


To DONATE by CHECK, or make a recurring donation, CLICK HERE to learn how.

Forum statistics

Threads
165,064
Messages
2,188,945
Members
78,679
Latest member
Janusz
Back
Top