jimmymac
Jim McGregor
For those of you that have unscrewed the top off your seater die and had your bearings fly everywhere, I have a fix to get them back in the die once you get the replacements from Wilson. Apparently this is pretty common. The girl at Wilson told me they make the repair frequently. For the hard headed like me, I just ordered the bearings and decided to figure it out on my own.
You’ll need a large plastic bag and a thick rubber band to do the job. That’s it. The rubber band must be wide enough to completely cover the holes with the band under tension.

My band selection here wasn’t the best, so I took the best candidate and tied it in half so it would provide enough resistance to prevent the springs from pushing the bearings out.
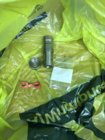
You want to put the die down in the bag and perform all work inside this bag so you don’t lose parts...yet again.
Put the die down in the bag, then take it apart. Have your bearings and springs at the ready, also located down in the bag. Better safe than sorry.
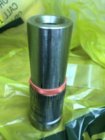
Make sure all your springs are inserted, then slide your rubber band up the die and over the top of the holes where the bearings and springs reside.
Now the fun part. It’s kind of like herding cats, but can be done.
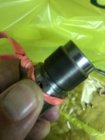
One at a time, flip a small portion of the band away from a single hole and lay a bearing over the hole. While holding the bearing in place with a finger or thumb, use your other hand to slide the band over the top of the bearing. It will look like this.

Now move to the next hole and repeat being careful not to disturb the rubber band at the previously installed bearing location. Continue to do this until all bearings are in place.

Once that is accomplished, take your die top and lay it upside down in the bag. Carefully insert the die bottom in to the die top down to the level of the rubber band.

At this point, place the palm of your hand over the die bottom. Take your fingers and thumb to push inward on the 5 bearings while simultaneously pushing down on the die bottom with the palm of the same hand. If all goes well, the die bottom will slide into the die top and the band holding the bearings in place will slide down the die leaving the bearings captured between the die top and bottom. Once you are there, it’s just a matter of screwing the bottom to the top. Just be careful to apply pressure between the two parts getting the threads started or you may end up in the same situation you started with.
This is a ten minute fix. It took me a couple attempts to get things set up just right though. The biggest obstacle is making sure the band you select has plenty of tension and completely covers the holes.
Word to the wise who want to open the die for cleaning and lube. Don’t.
You’ll need a large plastic bag and a thick rubber band to do the job. That’s it. The rubber band must be wide enough to completely cover the holes with the band under tension.

My band selection here wasn’t the best, so I took the best candidate and tied it in half so it would provide enough resistance to prevent the springs from pushing the bearings out.
You want to put the die down in the bag and perform all work inside this bag so you don’t lose parts...yet again.
Put the die down in the bag, then take it apart. Have your bearings and springs at the ready, also located down in the bag. Better safe than sorry.
Make sure all your springs are inserted, then slide your rubber band up the die and over the top of the holes where the bearings and springs reside.
Now the fun part. It’s kind of like herding cats, but can be done.
One at a time, flip a small portion of the band away from a single hole and lay a bearing over the hole. While holding the bearing in place with a finger or thumb, use your other hand to slide the band over the top of the bearing. It will look like this.

Now move to the next hole and repeat being careful not to disturb the rubber band at the previously installed bearing location. Continue to do this until all bearings are in place.

Once that is accomplished, take your die top and lay it upside down in the bag. Carefully insert the die bottom in to the die top down to the level of the rubber band.

At this point, place the palm of your hand over the die bottom. Take your fingers and thumb to push inward on the 5 bearings while simultaneously pushing down on the die bottom with the palm of the same hand. If all goes well, the die bottom will slide into the die top and the band holding the bearings in place will slide down the die leaving the bearings captured between the die top and bottom. Once you are there, it’s just a matter of screwing the bottom to the top. Just be careful to apply pressure between the two parts getting the threads started or you may end up in the same situation you started with.
This is a ten minute fix. It took me a couple attempts to get things set up just right though. The biggest obstacle is making sure the band you select has plenty of tension and completely covers the holes.
Word to the wise who want to open the die for cleaning and lube. Don’t.
Last edited:


