Ledd Slinger
Silver $$ Contributor
$47.50 shipped for 4.
Sounds good. Sending you a PM
Follow along with the video below to see how to install our site as a web app on your home screen.
Note: This feature may not be available in some browsers.
$47.50 shipped for 4.
Didn’t have gas for my mig welder and haven’t cleaned up the slag yet so kinda sloppy but they are solid! Not going for good looks under a bench anyhow.
Great little kits. I couldn’t buy the raw material for what he is selling these for and it saves me having to cut the threaded couplings, plates, and drilling holes. Just grind off the primer to get a bare metal surface, slap the angled cut coupling on the plate how you want it and let the welder rip!
View attachment 1324286
Can you send me a PM with purchase details please ?
PM sent
Thanks, I placed an order.Sent.

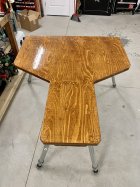
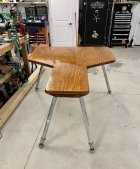
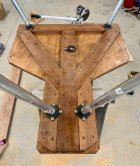
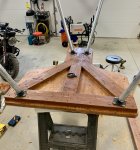
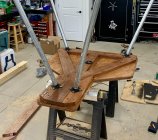
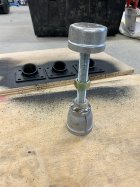
Got my bench built with the leg brackets. Worked out pretty good! Will also be adding some cable and turnbuckle cross bracing with eye bolts on the legs for even more support.
Top is two pieces of 3/4” plywood that are glued and screwed for 1.5” total top thickness. All lagged and screwed to 2x6 treated lumber flat frame. Bench is 48” wide and 56” long to accommodate bench rifles with 30-32” barrels and still have plenty of room to put a LabRadar up by the muzzle.
Legs are 1.5” galvanized Rigid Metal Conduit. Rear legs are adjustable. Welded a 3/4-10 flange nut to a 1.5”-1” RMC reducer coupling then used 7”, 3/4-10 carriage bolts with the head welded to 1.5” RMC end caps. Bolts have jam nuts for locking in place. Front legs are set up for adjustment with reducer couplings as well just in case its needed in the future. Stance on the front legs is 62" wide.
Bench has a D ring with 3” lag bolts to add weight or strap it down. It’s so heavy and sturdy it probably won’t need extra weight tho.
Finished off with multiple heavy coats of Man-o-war marine varnish. She’s a beast! Very heavy but also very sturdy.
View attachment 1332753View attachment 1332758View attachment 1332755View attachment 1332754View attachment 1332756View attachment 1332757
I don’t see how it could possibly wobble the way it is now.Very nice, Please update with pictures of your cable /turn buckle set up once done.
Jim
I don’t see how it could possibly wobble the way it is now.
Very nice, Please update with pictures of your cable /turn buckle set up once done.
Jim
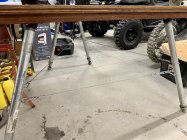
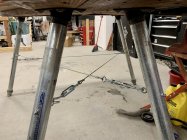
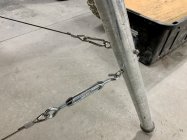
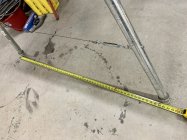
Great job on your shooting bench! If that isn't stable I don't know what would be. Happy shooting .1/8” cable and turnbuckle cross bracing is complete. This thing is so solid right now it’s not even funny. Probably the most solid portable shooting bench I’ve ever felt. With the legs settled in the dirt where I shoot and the turn buckles tightened it will probably feel like the whole thing is made out of solid concrete!
I drilled and installed 316 stainless 1/4” eye bolts in the legs and custom cut and crimped each piece of cable to the proper length. Carabiner clips are also 1/4” 316 stainless and turnbuckles are regular steel with 5/16” bolts. The X cross bracing pattern really locks it all in super tight. The front legs have an additional brace to help further support the huge 62” wide stance.
Cables are attached higher in the rear to ensure they don’t get in the way of my legs while shooting. Turnbuckles are easy to access from the rear while in the shooting position as well for quick and easy adjustments. Eyebolt heights on the two crossed X cables are very slightly offset so cables clear each other without rubbing. Cable as are easily removed so the legs can be unscrewed to reduce weight during transport. I also stamped the legs and cables with numbers so they don’t get mixed up.
At one point I was going to weld a steel flat bar frame underneath all of the leg brackets to connect them together but decided on this cabling method instead. The lower points of contact on the legs with the cable system is much more stable for sure. Way less outward flex in the legs this way.
Really happy how it all turned out. This bench is gonna be amazing to shoot with
View attachment 1333738View attachment 1333740View attachment 1333739View attachment 1333741

