• This Forum is for adults 18 years of age or over. By continuing to use this Forum you are confirming that you are 18 or older. No content shall be viewed by any person under 18 in California.

Pilot bushings

not buying it.
4Mesh did it and much more. Definitely someone thinking, working and succeeding outside of the box. I believe he stated it wasn’t faster than using a reamer but it added the flexibility to change something and implement it right away and not have to wait for a reamer.

Straight Shot did it too. He had some custom tooling made. I’m sure I saved photos of it but no idea what drive they might be stashed on. A quick web search didn’t turn up anything but it was many years ago. I thought he might have done a video or two at the time but nothing on his YouTube.
 
Last edited:

4Mesh

Every rifle I've ever built has been chambered in a CNC and done with single point tooling. The longest I've ever done was a 300 WBY throated for 240's. I'll say that holding tolerance was difficult in the throat area when the end of the throat was 3+" deep in the hole, , but was as close to nominal as any reamed job I have ever seen. I would not want to try doing a 270, but, a 6br is a slam dunk.

I can't immagine doing it without a CNC lathe. The advantages that outweigh the setup time and "unnecessary" effort as some would say, is that you can make dies that actually fit your cases. And, when you decide you don't like them, you can make more. The chamber itself is not all that different from a reamed chamber. IF you decide to make small changes, you can do that without paying again for a reamer. Is this practical for gunsmith work, no. Would it work in a production environment such as Remington or Winchester where they make more than one gun at a time, certainly.

Difficulties... I'd say, don't waste your time unless you use coolant through tooling and don't waste your time with a commercially produced carbide bar that's coolant through. The coolant holes are WAY too small and won't do squat with the chips you need to move. With my own tooling and nice big coolant holes, the chips from a chamber form as something that looks like a "Chore-Boy" in the tail stock of the lathe. I find that stringing chips that flow down the bore and out are preferred to chips that break up and get jammed around the tool.

An NC Mill to make the toolholder is a nice luxury for making your own indexable tools. I make the pockets with an NC mill, tap and then harden. I prefer steel to carbide for the toolholder itself. I harden mine to 60-62 rc. I avoid straight portions on my tooling to reduce resonance in the tool itself, and hold chatter to a minimum. Most of my tools run without making any audible sound at .007-.010 depth and .0005-.002 feed/rev.

Indexable 80Deg inserts are available that use a #1-72 screw and will bore down to a 6mm throat size if you're careful about the holder design. For my 30cal work I use 120 Deg inserts with a .007 nose r. I find in the barrel steel, I've not had as good of luck with a tool holding up for an entire chamber when using the .002 nose radius, thus I use 7. When you're fussy about the dimensions, loosing .0005 off a tool edge is not acceptable.

The smallest I've ever done is in 17 cal but that was dies only. They were in A2 and L6. Those I did with a Bokum bar. They're too small for indexable tooling.

Where there's a will there's a way. However, for competitive use, given what I've learned in my time at this, I would say that without an NC lathe, this is not worh your time. Under no circumstance should it be considered cheaper to single point than to ream, unless your'e doing hundreds of chambers, and even then, I'd have to study costs a while.
 
I know- I use Micro-100 ones for boring after pre-drilling. They still deflect- even with a higher moduli of elasticity compared to steel.
I've not seen one 3" long that'll fit in a 1/4" hole, and even if there is such an animal there's very little cutting pressure that can be placed on them before SNAP. I've got small pile of skinny carbide bars that I pushed too hard...

Maybe because it's CNC the code calls for a gazillion pecks at .001, no idea. I'm just wondering how this is actually executed, beyond the theory. You'd have to prove it to me that a chamber can be bored with the exacting precision of a precision ground form tool- not buying it.

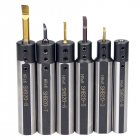
Holder for the boring bars to make them much more rigid.
s-l1600.jpg
 
Holder for the boring bars to make them much more rigid.
View attachment 1407550

Seems much more complicated than that to me.
In order to cut, the tip of the boring bar must be outside of the OD of the bar (or holder above)- the reach must be several inches, not an inch or so. None of these would cut a chamber...

I'll re-phrase. "Not buying it" as in, I don't see it as practical from any perspective. I have zero CNC experience but I don't see how this could be done without multiple tool changes and complicated offsets.

How could single-pointing a chamber be simpler, faster, better, more precise (pick any or all) than just running in the damn reamer?
 
A local guy came in with a .243 Win Pre-fit barrel from a large name company several years ago. He was having problems resizing brass for it, and needed to push the shoulder back .007" before resized brass would chamber freely. Any less than that and the brass would have a sharp ring imprinted around it at the nk/shoulder junction.

Inspecting the chamber showed a very sharp NK/shoulder junction with .000 radius instead of the typical .060-.100 radius most reamers have ground into that transition. A light cleanup by hand with a reamer put the proper radius on that corner and life was good.

I wasn't sure what happened at the time, but looking back, I'd bet a lot of money that the original chamber was CNC'd and they omitted the radius in their programming.
 
So as a new guy with aspirations of using a rigid set-up for chamber reaming with tailstock, chamber flush, TBAS on a Acra 1440TVS (hefty, variable), preboring etc do I need to invest in bushing sets? I was about to make a sizeable investment in little tubes (literally in the website cart) for a variety of calibers so I would be ready and then I ran into this thread.
 
If you set the bore up to run true (Interapid 312B-15 indicator) and have a concentric roughed out chamber a bushing is not needed. The reamer follows the hole. It's self centering. For a lot of years and thousands of barrels I never change bushings. I run -.0005" under nominal bore diameter on everything.
I've got a drawer full of bushings I don't use. What are looking for?
 
Until this thread and some other informational sources shed some light on bushing use I was under the impression I would need a "fitted" bushing each and every time I used a reamer (chamber, throat, neck) and I was going to get the entire set for each caliber so that I could accommodate a perfect tight fit for each barrel and bore variation I came across. So Dave, if I am understanding correctly, you have a bushing on the reamer but it is an "under", loose fit, bushing that works for all your barrel work for a specific bore OR you don't have a bushing on the reamer at all..am I correct?
 
Until this thread and some other informational sources shed some light on bushing use I was under the impression I would need a "fitted" bushing each and every time I used a reamer (chamber, throat, neck) and I was going to get the entire set for each caliber so that I could accommodate a perfect tight fit for each barrel and bore variation I came across. So Dave, if I am understanding correctly, you have a bushing on the reamer but it is an "under", loose fit, bushing that works for all your barrel work for a specific bore OR you don't have a bushing on the reamer at all..am I correct?
I'm thinking Dave has a loose bushing on his reamer. If you setup as he does the bushing is superfluous.
 
Until this thread and some other informational sources shed some light on bushing use I was under the impression I would need a "fitted" bushing each and every time I used a reamer (chamber, throat, neck) and I was going to get the entire set for each caliber so that I could accommodate a perfect tight fit for each barrel and bore variation I came across. So Dave, if I am understanding correctly, you have a bushing on the reamer but it is an "under", loose fit, bushing that works for all your barrel work for a specific bore OR you don't have a bushing on the reamer at all..am I correct?
Yes undersize. It acts as a guide not a centering device. Tolerances stack up, so even a close fitting bushing isn't as precise as most think. I have done chambers with no bushing, no problems. It's all about the setup and preliminary work. Done right the only way to screw it up is how you hold the reamer. On a manual machine with all the variables, a rigid setup would be the last thing I would do. There's the possibility of getting oversize chambers. A simple pusher has served me well for many many years.
 
Awesome conversation - I have a question though. When you indicate your bore in, are you indicating in the grooves like I see most doing, or are you indicating on the tops of the lands? Or both, depending on the situation, and then, what determines the path you take?
I've been indicating in the grooves, but if there's a better way to do it....
 
I assume we are talking about precision match grade barrels here. I think either will work. On top of the lands for me. Just seem easier. You might be surprised on what you'll find on top of the lands in some barrels.
 
I agree much with Mr. Tooley here.
I have had on rare occasion when a bushing fit tightly in a barrel,
...so didn't use that bushing
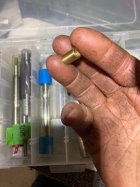
A bushing does not spin in the bore, therefore a bushing which is a simple initial guide into the bore can easily be made out of brass
I also like the fact that brass is easier on the bore should it hit a tight spot
or get bound up with chips somehow and suddenly not spin freely on its pilot.
(not had it happen though)
 

Attachments

  • IMG_3839.jpg
    IMG_3839.jpg
    58.6 KB · Views: 19
Last edited:

Upgrades & Donations

This Forum's expenses are primarily paid by member contributions. You can upgrade your Forum membership in seconds. Gold and Silver members get unlimited FREE classifieds for one year. Gold members can upload custom avatars.


Click Upgrade Membership Button ABOVE to get Gold or Silver Status.

You can also donate any amount, large or small, with the button below. Include your Forum Name in the PayPal Notes field.


To DONATE by CHECK, or make a recurring donation, CLICK HERE to learn how.

Forum statistics

Threads
165,796
Messages
2,203,579
Members
79,130
Latest member
Jsawyer09
Back
Top