• This Forum is for adults 18 years of age or over. By continuing to use this Forum you are confirming that you are 18 or older. No content shall be viewed by any person under 18 in California.

P-14 P-17 Wing removal/Remodeling

Hello,

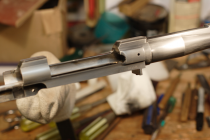
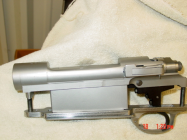
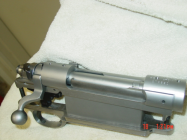
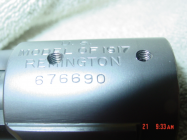
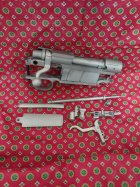
I have a couple of stripped P14 and P17 actions that I have been saving for a project someday and that day has come. I have done lots of building of Mausers, Mosins Etc. But I have never done what used to be referred to as "Remodeling" of the wings on the action. Does anybody have any drawings or photos of how this is accomplished. I have it in my head to make a mandrel that screws into the action and put it in my dividing head with it's tailstock and remove the wings with the mill, But how much and what contour?
 
one of the vintage NRA gunsmith books has a good how to on it . If I remember correctly, a cupped stone in a dtill press with action screws in the receiver and you rock the receiver. Of course thats for final shaping and a lot of setup is needed . I used a grinder , having outlines on the receiver, grind the bulk off then used the cupped stone in the drill press . I had/have a Remington 30 to use as a pattern
 
I've done a bunch of them. Depending on what you want to accomplish, several ways to do it. You want a model 30 contour or more of a rem 700 contour, or there's other options too. Do they have holes that need filling?
 
I've done a bunch of them. Depending on what you want to accomplish, several ways to do it. You want a model 30 contour or more of a rem 700 contour, or there's other options too. Do they have holes that need filling?
Spitfire, they still have the wings on them, There are lots of pics on google, But I can't find much info on how to go about doing the job.

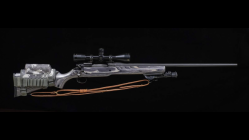
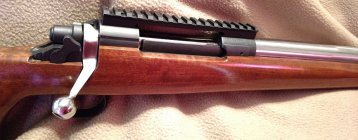
Nice rifle Butch.
 
Spitfire, they still have the wings on them, There are lots of pics on google, But I can't find much info on how to go about doing the job.

Nice rifle Butch.
Easiest way would be CNC, but I doubt many guys do enough to justify even programming that.

Second easiest way would be on a horizontal mill with a full profile cutter.

Third way is to use a ball nose end mill in a mill and take progressive cuts following the contour of the front ring. Then with a surface grinder contour a stone and grind to final dimensions. Both of these operations could be done with an indexing head too and a standard cutter with the action on a snug mandrel. Could finish by hand too and take the high spots down.

Last option is to do it all by hand. Taking your time with a good file and a machinist square. Takes time, but you can get them pretty damn spot on. This of course after you whack off the ears and fill the hole if needed.

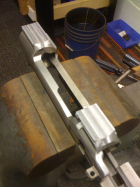
I made a action holding fixture to mount 1917/14's into where I can ether clamp it easily is a vise or on a surface grinder if needed. It's just square stock with the bottom of the action inletted to the holding fixture and a plate in the mag well to hold it really solid along with action screws. A mandrel is easy to make too just a little time on the lathe.

I don't have any photos of the work, but I could get one of my fixture if needed.

An alternative if you are going to use weaver bases is to cut the rear Flat and blend the edges into the flat. You can use a #61 I believe and go with that in the rear and a #46 up front. Will shave a ounce or two off as well. A #46 should fit a model 30 style front and rear. You'll have to measure the height difference between the 46 and 61 and there's your #.
 
Last edited:
Easiest way would be CNC, but I doubt many guys do enough to justify even programming that.

Second easiest way would be on a horizontal mill with a full profile cutter.

Third way is to use a ball nose end mill in a mill and take progressive cuts following the contour of the front ring. Then with a surface grinder contour a stone and grind to final dimensions. Both of these operations could be done with an indexing head too and a standard cutter with the action on a snug mandrel. Could finish by hand too and take the high spots down.

Last option is to do it all by hand. Taking your time with a good file and a machinist square. Takes time, but you can get them pretty damn spot on. This of course after you whack off the ears and fill the hole if needed.

I made a action holding fixture to mount 1917/14's into where I can ether clamp it easily is a vise or on a surface grinder if needed. It's just square stock with the bottom of the action inletted to the holding fixture and a plate in the mag well to hold it really solid along with action screws. A mandrel is easy to make too just a little time on the lathe.

I don't have any photos of the work, but I could get one of my fixture if needed.

An alternative if you are going to use weaver bases is to cut the rear Flat and blend the edges into the flat. You can use a #61 I believe and go with that in the rear and a #46 up front. Will shave a ounce or two off as well. A #46 should fit a model 30 style front and rear. You'll have to measure the height difference between the 46 and 61 and there's your #.
Thank you for taking the time to write that out! A surface grinder is in my future, Just not right now. I am torn between an old US made one or a new Grizzly. Please post pic of fixture. I just want to do a nice job on these, I have seen a bunch of them that look like the "Butcher of Baghdad" Took a stab at it:eek:
 
They are commonly referred to as Pattern 14 or Pattern 17, Or p-14 P-17 M1917 Etc. Nice job on your rifle Butch!
Not trying to raise a stink, but I've had numerous serious Enfield people that disagree. Not worth arguing about. I've seen them in a spin colletts with stops horizontally in a Bridgeport. Take a small cut and index it and take another cut. Tig weld a plug in the duckpond and finish in your grinder. I have pics somewhere that I will look for. I was lucky on my receiver as it was new and never made into am weapon. The serial number on it is higher than I have found doing research on it. Mine never had ears or the duckpond.
1670955878372.png
1670955936791.png
We did use a P14 bolt as the boltface on it works well for the 416 Rigby.
1670956071220.png
1670956181001.png
 
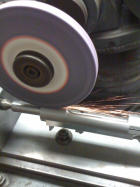
Cut off most of wings with angle grinder with cut-off blade. Chucked in lathe with 2" radius off-set. Will now use Remington 700 long action scope rail. Barrel(CM) just came in yesterday.
 

Attachments

  • P14 blasted.jpg
    P14 blasted.jpg
    229.2 KB · Views: 51
Old school way was cut the wings off flat, then use a tool post grinder to put the radius on, or, just leave it flat. My 1917 sporter is cut flat.

Screenshot_20180107-123855.png
 
Old school way was cut the wings off flat, then use a tool post grinder to put the radius on, or, just leave it flat. My 1917 sporter is cut flat.

View attachment 1392284
That looks good!

I definitely want to use a 20MOA pic rail. I think I am going to fast forward my surface grinder purchase, I am looking at one now, I'm actually looking at an old tool grinder that doubles as a surface grinder and has a fixture to hold things between centers.
 
I just ordered 3 complete Bolts for the P14 from Apex Gun Parts, That way I can open one up to a larger rimmed caliber If I need to and I will have spare extractors etc. Right now they have a lot of P14 parts in stock, But they seem to be moving fast.
 
Cut off most of wings with angle grinder with cut-off blade. Chucked in lathe with 2" radius off-set. Will now use Remington 700 long action scope rail. Barrel(CM) just came in yesterday.
How do you do the 2" offset??
 

Upgrades & Donations

This Forum's expenses are primarily paid by member contributions. You can upgrade your Forum membership in seconds. Gold and Silver members get unlimited FREE classifieds for one year. Gold members can upload custom avatars.


Click Upgrade Membership Button ABOVE to get Gold or Silver Status.

You can also donate any amount, large or small, with the button below. Include your Forum Name in the PayPal Notes field.


To DONATE by CHECK, or make a recurring donation, CLICK HERE to learn how.

Forum statistics

Threads
166,885
Messages
2,224,640
Members
79,979
Latest member
Cableman22b
Back
Top