• This Forum is for adults 18 years of age or over. By continuing to use this Forum you are confirming that you are 18 or older. No content shall be viewed by any person under 18 in California.

Making an MDT Field Stock usable ! I'll show you how

Hello friends
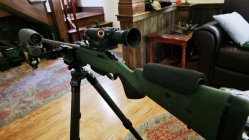
I am in the process of building a second 22 Creedmor for a back up and I'm doing it on the cheap
Coyote and Chuck Rig ....no need to spend a fortune in this economy ...

Besides I love to tinker ..
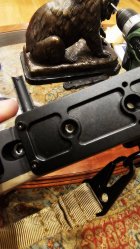
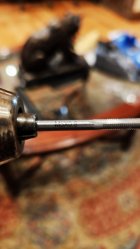
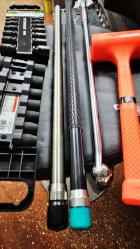
So I bought a Nice Savage SA small shank action with big bolt handle on another forum for $300
I bought a 26" 22 Creed EABCO barrel 1-7 new off another member on that same Forum for $250
I almost bought a sweet Bell and Carlson stock for it that was only $185 ..but it wasn't set up to
take any bottom metal and I didn't wanna mill out and compromise the aluminum bedding block

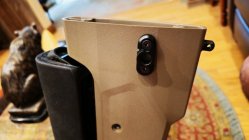
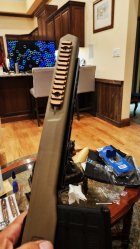
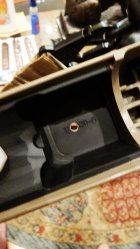
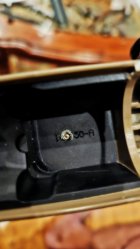
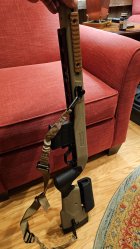
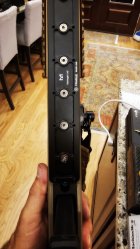
So I happened upon the MDT Field stock at Midway for $300 with the hardware ready for my AIC
style mags ...it was a that or the KRG Bravo , and I opted for the MDT ...

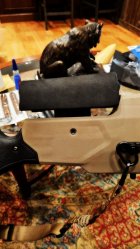
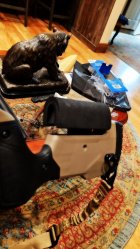
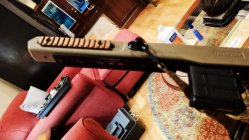
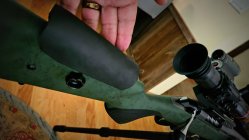
When it arrived with my Barrel nut I took it out and was immediately deflated by the skinny
plastic cheek piece that is as comfortable as a AK47 paratrooper folding metal stock..
NOT anything you wanna lay your face on ...hard , thin plastic feels like chit ..

The stock left me looking at my Favorite McMillans but I don't wanna wait nor spend a bunch
of coin I have 4 Grand rifles from Lawton and GAP already ,,this one is to remain cheap !

BUT ....I have to improve it...on the cheap ..
Innovation and availability of things on Amazon at a steal was put to task.

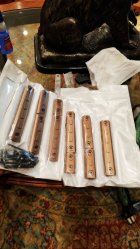
So I ordered closed cell foam sheets 15 dolla
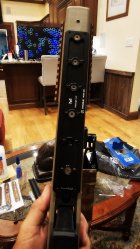
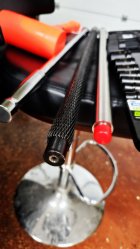
some arca rails from a superb company , for this stock you will want the

FANAUE MLok Arca Rail Tripod Mount Adapter Compatiable Arca-Swiss/RRS Dovetail Tripod Ballhead Quick Release Plate (MLOK-240)​


Then I bought 2 packs of pic rails to get the desired 2 long ones https://www.amazon.com/dp/B0CSYNW2WB?psc=1&ref=ppx_yo2ov_dt_b_product_details 22 dolla


CVLIFE Two-Point Sling Adjustable Length Traditional Sling for Outdoor Sport​


18 dolla

The action I purchased for $300...he also threw in a 20 moa base....
 

Attachments

  • Screenshot_20240530_174710_DuckDuckGo.jpg
    Screenshot_20240530_174710_DuckDuckGo.jpg
    267.7 KB · Views: 39
Last edited:
First thing I was gonna do was attack that pathetic lifeless cheek pad ..
I took the thing and cleaned the surface with alcohol
Then cut and applied them , first layer I used plenty of super glue at the surface
You can use gorilla glue etc....as well

I'll still wrap this one more time over the 2 layers of this foam with a camo pattern
or FDE nylon material I'll get from a craft store like Michaels

glue that to this surface ...This stuff really made it beefy and fat ,,like laying your
face on mama's breasts ....ahhhh perfection


XCEL 4 Pack 12" x 12" x 1/4" Self Stick Foam Rubber Pads with Adhesive Versatile Adhesive Foam Rubber Pads Sheets for Appliances and Furniture, Neoprene Foam Pads Adhesive​

Visit the XCEL Store
 

Attachments

  • 20240608_204159.jpg
    20240608_204159.jpg
    384 KB · Views: 73
  • 20240608_204204.jpg
    20240608_204204.jpg
    425.8 KB · Views: 71
Then I went and picked out 2 spots I liked for my QD mounts ..
Watch where you align them and place the 2 holes you drill through the stock
with a 5mm drill bit flanking both sides of any web ...
Use the M lok hardware and loctite or super glue the threads so these never come loose
 

Attachments

  • 20240608_201636.jpg
    20240608_201636.jpg
    249.1 KB · Views: 63
Remove the plastic channel obviously before getting busy on this
I removed the swivel stud at front as this gal is going on my Tripod..
 

Attachments

  • 20240608_201639.jpg
    20240608_201639.jpg
    393.2 KB · Views: 56
Now remove the rear Butt plate and spacers and open up the cavity to install the rear QD mount
again same process use the mlok hardware and super glue the threads ..
drill 2 holes with a 5mm bit ...torque them down...
 

Attachments

  • 20240608_201348.jpg
    20240608_201348.jpg
    82.6 KB · Views: 39
  • 20240608_201357.jpg
    20240608_201357.jpg
    106.3 KB · Views: 38
Install the 2 Pic Rails and secure mlok hardware with thread locker
using the 2 longest ones in each pack ..
 

Attachments

  • 20240608_204136.jpg
    20240608_204136.jpg
    413.3 KB · Views: 46
  • 20240608_204545.jpg
    20240608_204545.jpg
    398 KB · Views: 45
Last edited:
Time for the Arca Rail ...this thing is really nice and covers the entire bottom of this
pathetic plastic stock and makes it feel a bit more solid , and makes for a great
solid lock up to the Tripod...

You will have to take one side and grind off the raised locator blocks
4 of them ...use a draw file to completely flush the rear surface ...

This will then allow you to perfectly lay it in place and lock down
4 of the screws....thread lock all your work..

we will then focus on the 6th screw closest to the mag well ...far end
 

Attachments

  • 20240608_203607.jpg
    20240608_203607.jpg
    393.6 KB · Views: 61
  • 20240608_201648.jpg
    20240608_201648.jpg
    338.4 KB · Views: 58
The 5th screw hole sits right smack below the stock screw hole for the platic cover, so leave that one blank.
number 6 at the rear sits right over the aluminum block ...perfect !! we will use a drill bit 4 mm
and bore all the way through ... then tap that sucker to use the nice hardware they supplied ..
 

Attachments

  • 20240608_203629.jpg
    20240608_203629.jpg
    343.9 KB · Views: 56
  • 20240608_201648.jpg
    20240608_201648.jpg
    347.7 KB · Views: 56
  • 20240608_204032.jpg
    20240608_204032.jpg
    313.5 KB · Views: 50
  • 20240608_203614.jpg
    20240608_203614.jpg
    350.4 KB · Views: 55
Last edited:
Once my action arrives and I screw on the barrel and headspace it ..
I will wax the bottom and bed the action lug into the cavity full of
epoxy ...
 

Attachments

  • 20240608_204424.jpg
    20240608_204424.jpg
    376.9 KB · Views: 49
Ive gotta jump on the lathe and turn a nice long 5/8" x 24 TPI thread on this fine
chrome moly EABCO barrel....

She's staged up next to her expensive sister ..a Criterion 26" 5R 22 250 1-8 twist
thats going to get reamed to 22 Creed and put on my custom GAP AI gun...
 

Attachments

  • 20240608_205000.jpg
    20240608_205000.jpg
    436.5 KB · Views: 42
  • 20240608_204913.jpg
    20240608_204913.jpg
    257 KB · Views: 40
  • 20240608_204941.jpg
    20240608_204941.jpg
    425.8 KB · Views: 39
May get fancy with some sea sponge and paint and add some character with a few colors
and a camo pattern ...

definitely not keeping that barrel blued....the action is flat black and barrel nut stainless...
she's gonna get the rattle can treatment ....it's an affordable LASER in 22 Creed for field use...

No shiny parts wanted

How can you NOT love a 600 yard cartridge that only requires 2 mils of elevation ?
Got a 20 MOA mount ready for her ...

Just ordered the Elftmann Tactical ELF SE Precision Rifle Trigger, SAVAGE 110, Straight,


I'm NOT a fan of the savage accu trigger !
 

Attachments

  • Elftmann-Tactical-ELF-SE-Precision-Rifle-Trigger-Up-to-10-00-Off-Highly-Rated-w-Free-Shipping.png
    Elftmann-Tactical-ELF-SE-Precision-Rifle-Trigger-Up-to-10-00-Off-Highly-Rated-w-Free-Shipping.png
    173.9 KB · Views: 7
Last edited:
In the name of keeping this build economical but awesome !! you just cannot skip an Arken scope...
I have grabbed a few of the SH4J 6x24 with VPR and VHR reticles...as well as the Zulus LRF model
and decked it out with some Red Shot accessories....

don't know just yet what Ill drop on her ...?? since she's so flat shooting Ill
probably leave glass on her and maybe one of my EP5 to 25 Arkens ?
 

Attachments

  • 20240608_221437.jpg
    20240608_221437.jpg
    525.6 KB · Views: 34
  • 20240608_221509.jpg
    20240608_221509.jpg
    268 KB · Views: 33
Last edited:
Since I'm a perfectionist ...I couldn't leave that #5 hole in that arca rail unfinished
Leave the screw fully in at the plastic cover ...

Drill very carefully your 4mm drill bit until you bottom out on the
tip of that top screw ...

Then run your 5mm tap into that blind hole ...then screw your screw that came
with the rail in....bam ! all 6 screws are fully in place ..

#5 screw will be tapped into the plastic not aluminum...but damn did it
torque down with authority ....
 

Attachments

  • 20240608_230601.jpg
    20240608_230601.jpg
    326.2 KB · Views: 40
  • 20240608_204424.jpg
    20240608_204424.jpg
    376.9 KB · Views: 36
Even my Tikka T3x Super Varmint had a cheek piece that could use a lil comfort
so this closed cell foam is just perfect for this....Feels supa dupa !
installs nicely .... its like a memory foam mattress for your cheeks...
 

Attachments

  • 20240609_110556.jpg
    20240609_110556.jpg
    213.3 KB · Views: 43
  • 20240609_110544.jpg
    20240609_110544.jpg
    323.7 KB · Views: 42
Even my Tikka T3x Super Varmint had a cheek piece that could use a lil comfort
so this closed cell foam is just perfect for this....Feels supa dupa !
installs nicely .... its like a memory foam mattress for your cheeks...
Shotafter-

Howdy !

Great work there !

Thanx for the details, and all the pics !


With regards,
357Mag
 

Upgrades & Donations

This Forum's expenses are primarily paid by member contributions. You can upgrade your Forum membership in seconds. Gold and Silver members get unlimited FREE classifieds for one year. Gold members can upload custom avatars.


Click Upgrade Membership Button ABOVE to get Gold or Silver Status.

You can also donate any amount, large or small, with the button below. Include your Forum Name in the PayPal Notes field.


To DONATE by CHECK, or make a recurring donation, CLICK HERE to learn how.

Forum statistics

Threads
164,960
Messages
2,187,136
Members
78,605
Latest member
Jonathan99
Back
Top