• This Forum is for adults 18 years of age or over. By continuing to use this Forum you are confirming that you are 18 or older. No content shall be viewed by any person under 18 in California.

Drilling/tapping 416SS question

Al, I agree that the blind hole is solely for aesthetics. But if you are set on it, first drill your hole with the #3 drill with the point at the desired depth, being as close close to break through as you feel comfortable,

Then, at the Bench Grinder, square the point of the drill, (grind it flat). then re establish the cutting edges on the drill. This will allow you to establish a flat bottom in the hole,

Then chuck your tap up in the collet, and start it dead straight. If you are worried about tapping 416 stainless, it drills and taps quite easily due to it’s free machining qualities.

I have added a 3d screw to several of my bolt ins for the same reason you described. My Bat M, the one I converted to a screw in shroud where I had to move the trigger hanger back, I use three bolts, discarding the rear tang. Two are 1/4 28, one 10 32.

Al, for an old tip, use a carbon steel tap. For one or two holes, it will cut just like HSS, but in the case you do break it, you can take a small torch, heat it red, let it cool, and drill it out as, unlike HSS, it will anneal.
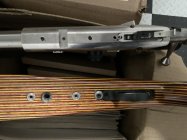
image.jpg
Remember, the two biggest causes of tap breakage are too small of a tap drill, and the tap going in crooked.44186C96-4815-46D2-9F04-ECAF6E6FEEC4.jpeg
 
Last edited:
Don't be afraid to step up to the #7 if the tap seems to want to fight....and as always with stainless....pay attention to potential work hardening if the drilling op isn't going well. bottom tap is not much fun to start a hole with max root depth.
 
There is some inaccurate stuff in this discussion starting with the original post. A #7 drill bit is not .228”, a #1 is .228”. A #7 is .201”.
 
Well, after yesterday's debacle and getting hit with a broken end mill, I wasn't sure if I should do this today or not. But God can't stand a coward so with a fresh cup of coffee, it was time to get to it.

I put some Davidson bases on the action and topped them off with this home made rail to get flat sides to clamp to. The screws in the top of the rail are indexed to go down on the countersunk base screw holes so they pull up against the dovetail...pretty secure. A bit of painters tape goes on the sides.


In the vise, I used a gauge pin that was a nice fit in the existing action screw holes and put it in a good chuck. Located the front hole and ran it back to the rear...it was dead on. Went back to the front hole and moved 2.750 from that.

Gave it a nice countersink.

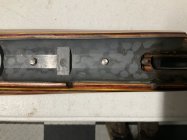
I had decided to go with a through hole rather than a blind hole for the extra 3 threads of engagement.

Swapped out for a 1/2" arbor and this guided hand tap. Worked great....thanks Wayne Shaw for the tip on this tool.

A little inner/outer chamfering on the hole and it's good to go.
Thanks everyone for the helpful tips and suggestions. :) -Al
 
Last edited:
Well, after yesterday's debacle and getting hit with a broken end mill, I wasn't sure if I should do this today or not. But God can't stand a coward so with a fresh cup of coffee, it was time to get to it.

I put some Davidson bases on the action and topped them off with this home made rail to get flat sides to clamp to. The screws in the top of the rail are indexed to go down on the countersunk base screw holes so they pull up against the dovetail...pretty secure. A bit of painters tape goes on the sides.


In the vise, I used a gauge pin that was a nice fit in the existing action screw holes and put it in a good chuck. Located the front hole and ran it back to the rear...it was dead on. Went back to the front hole and moved 2.750 from that.

Gave it a nice countersink.

I had decided to go with a through hole rather than a blind hole for the extra 3 threads of engagement.

Swapped out for a 1/2" arbor and this guided hand tap. Worked great....thanks Wayne Shaw for the tip on this tool.

A little inner/outer chamfering on the hole and it's good to go.
Thanks everyone for the helpful tips and suggestions. :) -Al
Just judging by the pics, looks like it could stand a little more chamfer before starting the tap. Helps it start straighter, less binding and generally looks cleaner. Not picking on ya. Great job!
 

Upgrades & Donations

This Forum's expenses are primarily paid by member contributions. You can upgrade your Forum membership in seconds. Gold and Silver members get unlimited FREE classifieds for one year. Gold members can upload custom avatars.


Click Upgrade Membership Button ABOVE to get Gold or Silver Status.

You can also donate any amount, large or small, with the button below. Include your Forum Name in the PayPal Notes field.


To DONATE by CHECK, or make a recurring donation, CLICK HERE to learn how.

Forum statistics

Threads
165,802
Messages
2,203,309
Members
79,110
Latest member
miles813
Back
Top