• This Forum is for adults 18 years of age or over. By continuing to use this Forum you are confirming that you are 18 or older. No content shall be viewed by any person under 18 in California.

DIY camo jobs - rifle chassis

Something like this would be cool.... it looks like a fairly easy sponge technique... ???

1074.jpg

Yeah that’s actually my favorite camo pattern. Simple, every stock is unique, really shows the contrasting colors, and most importantly it’s cheap and easy to do! You do waste a lot of paint though, so be careful!

It’s all about the prep work. The more you prep the surface, degrease, and clean the better the paint job will look and the tougher it will be.
 
Last edited:
Yeah that’s actually my favorite camo pattern. Simple, every stock is unique, really shows the contrasting colors, and most importantly it’s cheap and easy to do! You do waste a lot of paint though, so be careful!

It’s all about the prep work. The more you prep the service, degrease, and clean the better the paint job will look and the tougher it will be.


Any step by step DIYs for this one? Technique? Materials? Etc...
 
I have cerakoted a few barrelled actions - it's an intensive, but easy process. the prep is the key. krylon will just chip off, eventually, not a problem, really - depends on how good you want your paint job to look. and last.

I'd agree with an earlier post - the air dry/ non heat cure Cerakote stuff is very good.

I painted a McMillan blue / white swirly stock OD green (air dry), and it looks great, and lasts. It's fun - if you enjoy the detail + prep work.

If you take the sheen off + leave a slightly rough, non - oily surface - best results. sand, blast, or use acetone. Maybe you want to find a beater stock + practice technique?
tip: clean the heck out of your airbrush nozzle. Acetone...
bit spendy - but this will prep metal, etc. VERY well. https://www.brownells.com/gun-clean...egreasers/tce-degreaser-aerosol-prod1157.aspx
 
Any step by step DIYs for this one? Technique? Materials? Etc...

Super easy

1. Prep surface: for metal if you have it, lightly abrasive blast, for stock rough up the surface with sand paper. Be careful with composites they are usually textured enough to not need it.

2. Degrease

3. Tape off any parts you don’t want painted like barrel channel, bedded areas, threads, etc.

4. Apply your base coat. I usually do 2-3 light coats until you have a nice even, solid base. I use a light base like desert sand.

5. Have multiple, natural sponges, that are all new. Natural sponges have better texture. Take what colors you want to use and use one sponge per color. Have the colors you want readily accessible and Dab in random patterns. I would do one color first, then move to the next, until you have all the colors represented and with the appropriate color density you want.

6. Let dry over night

7. Apply 2-3 layers of clear coat.

8. Dry over night and reassemble.

You can use krylon or duracoat. I’ve never done it on a gun but I’ve done it on a bow and Jon boats before. Here’s a cool video that shows that you can do with this technique.

Go slow and do light coats. It’s better to go light and reapply than it is to have to much and it runs down the stock.


I hoped I helped. I’m no expert, but I know it’s not impossible to do a good job yourself. It’s rewarding too.
 
Or you could send it to bc’z and be done with it


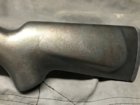
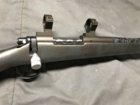
View attachment 1129610 View attachment 1129609
That is 1 good lookin rifle.
dusty, what color cerrakote on the action?
Matching it using a picture on my phone wasn't the easiest. 1st attempt I wasn't happy.
Super easy

1. Prep surface: for metal if you have it, lightly abrasive blast, for stock rough up the surface with sand paper. Be careful with composites they are usually textured enough to not need it.

2. Degrease

3. Tape off any parts you don’t want painted like barrel channel, bedded areas, threads, etc.

4. Apply your base coat. I usually do 2-3 light coats until you have a nice even, solid base. I use a light base like desert sand.

5. Have multiple, natural sponges, that are all new. Natural sponges have better texture. Take what colors you want to use and use one sponge per color. Have the colors you want readily accessible and Dab in random patterns. I would do one color first, then move to the next, until you have all the colors represented and with the appropriate color density you want.

6. Let dry over night

7. Apply 2-3 layers of clear coat.

8. Dry over night and reassemble.

You can use krylon or duracoat. I’ve never done it on a gun but I’ve done it on a bow and Jon boats before. Here’s a cool video that shows that you can do with this technique.

Go slow and do light coats. It’s better to go light and reapply than it is to have to much and it runs down the stock.


I hoped I helped. I’m no expert, but I know it’s not impossible to do a good job yourself. It’s rewarding too.
Couldn't have said it any better.
I still have to do data retrieval from my other phone.
I have step by step photos of a camo job I did for my brother.
 
20190916_223312.jpg This chassis: XLR Element -


Chassis body and buttstock is fairly textured already. "Buffer tube" is not & would need Light sanding I think.

I like the black base color of the chassis its self and think a sponge technique with OD green and FDE would look good with the solid FDE barreled action.

So… tape off the areas not to be painted, degrease, apply sponge technique with Cerakote c- temp air cue, then several matte sealer coats.

Any flaws in this plan/things I missing?
 

Attachments

  • 190808_Element3.0_TR2_Ergo.jpg
    190808_Element3.0_TR2_Ergo.jpg
    36.9 KB · Views: 7
View attachment 1129693 This chassis: XLR Element -


Chassis body and buttstock is fairly textured already. "Buffer tube" is not & would need Light sanding I think.

I like the black base color of the chassis its self and think a sponge technique with OD green and FDE would look good with the solid FDE barreled action.

So… tape off the areas not to be painted, degrease, apply sponge technique with Cerakote c- temp air cue, then several matte sealer coats.

Any flaws in this plan/things I missing?
I never did sealer coats. You should not need them. Bc is right, leave some parts black for contrast. And wear a respirator if you have one. That stuff stinks
 
Last edited:
Personally I'd leave buffer tube black, along with pistol grip and butt pad.
It adds contrast.


Grip, m-lok rails, butt pad,mag body, cheek riser, scope and (now maybe.... still thinking ) buffer will remain black, as recommended. :)
 
Last edited:
First try... I think the OD green is too dark and the application of both colors was too heavy... should have left more black... final scheme will be black, fde and od green

20191003_193654.jpg 20191003_201934.jpg 20191003_201949.jpg
 
Last edited:
Lookin good!
Add a few dabs of orange.
You can come back over the lighter color with the darker also.
Remember camo is about break up.
 

Upgrades & Donations

This Forum's expenses are primarily paid by member contributions. You can upgrade your Forum membership in seconds. Gold and Silver members get unlimited FREE classifieds for one year. Gold members can upload custom avatars.


Click Upgrade Membership Button ABOVE to get Gold or Silver Status.

You can also donate any amount, large or small, with the button below. Include your Forum Name in the PayPal Notes field.


To DONATE by CHECK, or make a recurring donation, CLICK HERE to learn how.

Forum statistics

Threads
164,705
Messages
2,182,912
Members
78,480
Latest member
Castle204
Back
Top