• This Forum is for adults 18 years of age or over. By continuing to use this Forum you are confirming that you are 18 or older. No content shall be viewed by any person under 18 in California.

Bedding - behind, around, or capturing the recoil lug

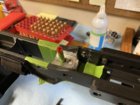
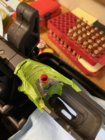
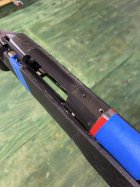
Took the plunge tonight and chose to skim the front action screw area, rear tang, and lug to chassis (rear of lug) interface. There is enough material relieved on the sides of the lug that I wasn't confident going all the way to bed to the sides of the lug without having a huge amount of compound slump down under the lug. I build it up a little bit and we'll see what happens. I can always clean the release well, grind a little and build it up some more on a second attempt if this is the only problem area that needs to be addressed :eek:

I did a dry run with plumbers putty as my compound to see roughly how much I would need without excessive squeeze out. A little bit of a pain to clean it all up for the real thing, but worth doing on my first job so I didn't overshoot by 2-3x the amound of material and end up squeezing out a ton everywhere. On a chassis that fits fairly well, you need a whole lot less than you might think initially.

Only real snafu was that I was planning on using the surgical tube tie method for action pressure and the weight of the barrel was too much to hold it without pivoting forward I could have removed the barrel on but was concerned about making sure barrel was nicely lined up in the channel. I ended up having to use the well waxed action screws just finger/hand tight spinning an allen key to set the action in place just like first steps of normal chassis mounting. Tight enough so it was making good vblock contact and it displaced just enough epoxy to get what i would consider good, but reasonable squeezeout (coming from a woodworker joint perspective), but certainly not anywhere near torqued to 65 in/lb. Hard to believe i could have tweaked the action at all this way, but who knows.

Everything cleaned up pretty easily with acetone, paper towels and a few q-tips and only one ding to the chassis that i didn't "mean to" while grinding. Nothing a tiny drop of paint won't hide forever.

We'll see what it looks like come morning! Hoping for 75% coverage on my first try!

Thanks for all the opinions guys - keep 'em coming.

good luck! I bet itll be perfect
 
.....
Only real snafu was that I was planning on using the surgical tube tie method for action pressure and the weight of the barrel was too much to hold it without pivoting forward I could have removed the barrel on but was concerned about making sure barrel was nicely lined up in the channel. I ended up having to use the well waxed action screws just finger/hand tight spinning an allen key to set the action in place just like first steps of normal chassis mounting. Tight enough so it was making good vblock contact and it displaced just enough epoxy to get what i would consider good, but reasonable squeezeout (coming from a woodworker joint perspective), but certainly not anywhere near torqued to 65 in/lb. Hard to believe i could have tweaked the action at all this way, but who knows.
.....

Use electrical tape to get perfect barrel channel alignment. I run two wraps. One in front of the receiver and another wrap out towards the end of the fore arm.

With 700 style actions, I will do a couple wraps of tape on the receiver. It sets my barrel free float spacing and also acts as a dam so the bedding doesnt run up the barrel haphazardly and require trimming afterwards. But mainly it's to ensure the action screw holes stay centered on the pillar holes. There's really no pressure on the receiver wrap, just using the adhesion of the tape to keep the round 700 style actions from twisting screw holes out of alignment. I dont wrap tape around flat bottom receivers at all. Just do the two wraps on the barrel with flat bottoms.

The front barrel wrap is for extra assurance of perfect barrel channel alignment and prevents weight of the barrel from making the barreled action rock forward.

Screenshot_20200225-172446_Gallery.jpg
 
Last edited:
Like a kid on christmas, I woke up this morning to hopefully find my action not glued into a chassis :)

Results definitely exceeded my expectation for a first attempt. I had it in my mind that I should expect to have to grind it all out/off, but I’m not sure I’ll even attempt to add any to the sides of the lug. At least not until I shoot it and see what diff this makes. It’s got to be a 100-1000x increase in contact area, so you’d think 99% of the battle is won.

The stippling in the finish appears to be from my overzealous use of johnson pastewax that tends to leave little “balls” of you don’t really rub it smooth. i was worried about taking too much off the action however if i smoothed things too much

8383C0BA-414D-4C85-92FA-7109FA797D0F.jpeg

430A4E4B-835B-4CB6-A360-7B16471C3063.jpeg

060AD0BD-B075-4741-8C00-7D7D58EBB51D.jpeg

2248FE9A-B91E-4694-B83A-83FE298A351C.jpeg
 
Last edited:
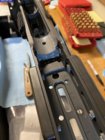
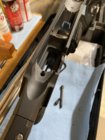
And the results... after 10 hours. Will let it cure another 24 before cleaning out wax any further and reassembling.

Only thing I’m really worried about is that I maybe didn’t grind into the aluminum “enough” and the epoxy is pretty thin in some places. That might cause it to crack out over time, we’ll see. Would be pretty trivial to grind out and re-do however now that I've gotten the first one under my belt with no major issues and only one ding to the chassis that is visible - doh!

2106E8F6-7550-4CA4-BD26-48E8AC901165.jpeg

8BADBFC5-69BD-41FA-B3D5-33B939B7BF19.jpeg
 
Last edited:
I have tested a couple rifles with and without the sides of the recoil lugs bedded.

When I first started bedding, I tried a couple rifles where I taped off the sides, front, and bottom for clearance on all those areas. Made it really easy to remove the barreled action from the stock. The rifles shot good, but were not what I would call extremely consistent with POI on target. I later went back and skim bedded the side walls of the lugs, but left the clearance on bottom and in front. In both instances, the accuracy and consistency of POI in the groups immediately improved on paper using the same exact loads.

It was enough evidence for me to never bed a rifle again with the sides of the lug not fully supported.


Well Ledd Slinger, you have convinced me to bed the next one like you do.
 
This is a Great Read.
As Dusty would say been a Rifle Assembler for years. I have had Rifles Done by Top Line Gun Smith . These are all Target Rifle Projects .
I have Pillar Bedded a few SA 700 with over sized Recoil Lugs and had not floated or taped off any part of the Lug ?
I have had good to Match Winning Rifles ??
I will now have to try a New Trick for a Old Timmer !

I have had a Few Barnard Action with the V-Block and the Head of a 1/4x25 Allen Head Screw setting in a Steel Bushing for Recoil Lug ?
Blows the Brain how that works , or a Eliseo Tube Stock
 
And the results... after 10 hours. Will let it cure another 24 before cleaning out wax any further and reassembling.

Only thing I’m really worried about is that I maybe didn’t grind into the aluminum “enough” and the expoxy is pretty thin in some places. That might cause it to crack out over time, we’ll see. Would be pretty trivial to grind out and re-do however now that I've gotten the first one under my belt with no major issues and only one ding to the chassis that is visible - doh!

View attachment 1160465

View attachment 1160467
Not bad! I can't tell from the photo for certain but it appears that you bedded the small area in the middle of the action...I'd float that area. In your stock, I'd do what I call a two point bedding, front and rear only...fwiw.
 
Not bad! I can't tell from the photo for certain but it appears that you bedded the small area in the middle of the action...I'd float that area. In your stock, I'd do what I call a two point bedding, front and rear only...fwiw.

Hmmm - I see what you mean looking at the photos now. I definitely didn't bed that area and I don't remember it showing any rubbing/wear as if there was action contact there (which would create a really nice fulcrum to rock on). It might just be the pictures showing a weird shadow but I'll definitely double check this, thanks for the inspection!
 
I'm not going to count my chickens quite yet, but...
Just went out to shoot some groups for a seating depth test and see if bedding did anything for me.
Turns out mirage had already set in, so wasn't a great day for it. But I'm already there, so shot it anyways.

5 shots each at 100 yards prone:

.005 jump - .4xx
.010 jump - .3xx
.015 jump - .4xx
.020 jump - .4xx

Given that I've only -ever- shot a -couple- of 5x5 group tests where all groups held in the .4's...

This is suddenly looking very promising given that I could barely see the bullet holes.
I'm gonna stick with the small group load and stretch it out to 300 on a nicer day next week and will post up some target results.

Fingers crossed the bedding experiment will hold up under more scrutiny!
 
And the results... after 10 hours. Will let it cure another 24 before cleaning out wax any further and reassembling.

Only thing I’m really worried about is that I maybe didn’t grind into the aluminum “enough” and the epoxy is pretty thin in some places. That might cause it to crack out over time, we’ll see. Would be pretty trivial to grind out and re-do however now that I've gotten the first one under my belt with no major issues and only one ding to the chassis that is visible - doh!

View attachment 1160465

View attachment 1160467
Looks really good.
Report back please.
S
 
Hey guys - sorry for not following up. My "long term" (season's worth of shooting ~5k rounds out of two guns) review on bedding the chassis is that its 100% worth the effort. I ended up doing a second MDT chassis with the same process but a lot more bedding compound around the sides of the lug (but not bottom) so that it was mechanically locked in place extremely well.

While I hate to say that you absolutely need to bed a v-block chassis, because they do work without it - my group sizes across both guns shrank and I didn't have any issues with a zero not holding the whole season. There is something about having it go into the action one way and one way only with no play which inspires confidence in the gun and makes it less stressful if you're a PRS style shooter and the gun gets banged around a bit.

The only downside is that now I'm going to bed every gun I've got this winter regardless of what stock or chassis its in.

Maybe this was already gospel to all the great gunsmiths out there, but I'm now convinced bedding should be standard process for people chasing accuracy. There are benchrest guys physically gluing their actions in so they can't move... I no longer wonder why ;)
 
Last edited:
Hey guys - sorry for not following up. My "long term" (season's worth of shooting ~5k rounds out of two guns) review on bedding the chassis is that its 100% worth the effort. I ended up doing a second MDT chassis with the same process but a lot more bedding compound around the sides of the lug (but not bottom) so that it was mechanically locked in place extremely well.

While I hate to say that you absolutely need to bed a v-block chassis, because they do work without it - my group sizes across both guns shrank and I didn't have any issues with a zero not holding the whole season. There is something about having it go into the action one way and one way only with no play which inspires confidence in the gun and makes it less stressful too if you're a PRS style shooter and the gun gets banged around a bit.

The only downside is that now I'm going to bed every gun I've got this winter regardless of what stock or chassis its in.

Maybe this was already known to all the great gunsmiths out there, but I now think bedding should be standard process for people chasing accuracy. There are benchrest guys physically gluing their actions in so they can't move... I no longer wonder why ;)
There is absolutely zero stocks that do not need to be bedded. Never listen to any hype saying no bedding needed
 
Any pro tips on breaking it free from the bedding? it's got a liberal amount of release agent... I'm just a little anxious to pull it apart.
 

Upgrades & Donations

This Forum's expenses are primarily paid by member contributions. You can upgrade your Forum membership in seconds. Gold and Silver members get unlimited FREE classifieds for one year. Gold members can upload custom avatars.


Click Upgrade Membership Button ABOVE to get Gold or Silver Status.

You can also donate any amount, large or small, with the button below. Include your Forum Name in the PayPal Notes field.


To DONATE by CHECK, or make a recurring donation, CLICK HERE to learn how.

Forum statistics

Threads
164,783
Messages
2,183,868
Members
78,507
Latest member
Rabbit hole
Back
Top