You are using an out of date browser. It may not display this or other websites correctly.
You should upgrade or use an alternative browser.
You should upgrade or use an alternative browser.
A subtle sign of risk of case head separation
- Thread starter Cassidy
- Start date
Ledd Slinger
Silver $$ Contributor
Case head separation is usually due to an improperly spec’d chamber or brass with undersized case heads. I had the same exact issue with 300 Norma Peterson brass after 3-4 firings due to the brass heads being undersized. The case over expanding in that area of the chamber then being sized back down by the FL die causes excessive working of the brass in that area which leads to creases that create separation.
Can also sometimes just be defects in the brass alloy used for a specific lot of brass.
I changed over to Lapua 300 Norma brass with proper size heads and haven’t had an issue since.
Can also sometimes just be defects in the brass alloy used for a specific lot of brass.
I changed over to Lapua 300 Norma brass with proper size heads and haven’t had an issue since.
That was my thought also. I've had my share of case separations but none that close to the head.
Mine as well, i have seen some dies on especially 30.06 and 284 brass leave that line
Ledd Slinger
Silver $$ Contributor
I just carefully tried the paperclip method on those cases - tested 10-12 cases - all with the slight lines around the same area of the cases as where the separation occurred in the separated case. In each case (no pun intended) I could not detect any inside circumferential groove with the paperclip - the inside of each case at the separation area felt absolutely smooth with repeated tries. It could possibly be that such visually slight lines around the outside of the barrel of the cases toward the base could be a more sensitive test than the paperclip method. All comments are welcome.
Better to use a small 45 deg or 90 deg pick. The sharp point on the pick will detect much thinnner cracks that a paper clip might float over. Can get whole sets of picks for really cheap. And the picks are actual tools so much nicer to work with than a paper clip.
I've been at this for years, and I defy you to visually, reliably, distinguish incipient case head separation from the horizon line caused by the termination of die and chamber contact.
Fortunately, you don't need to. Ray Charles could detect incipient case head separations with a sharpened paperclip.
And you can avoid creating them by setting your sizing appropriately. Pressure has nothing to do with it.
Fortunately, you don't need to. Ray Charles could detect incipient case head separations with a sharpened paperclip.
And you can avoid creating them by setting your sizing appropriately. Pressure has nothing to do with it.
shoot4fun
Gold $$ Contributor
I have normally found it easy enough to see a potential case head separation and it is quick to give the suspect cases the paper clip test. The one case that has ALWAYS fooled me is the 223. I had Lapua 223 that had approximately 8 firings separate "without warning". There was no tell-tale ring and no feel of the crack forming inside. Apparently the 223 thins in an area over time and finally just comes apart. None of the ones that separated caused any problem, except they didn't do my scope any good.
The problem with using an FL die to size case heads smaller at the web is that you also bump the shoulder. It’s the nature of the beast. You make the problem even worse by buying or grinding the shell holder so that you can size further into the base. That problem can be solved by buying what we call a ring die. It is a straight inside wall die that sizes only the base and doesn’t touch the neck shoulder area, only the base. One sells for $135.00 plus $12.00 shipping.
divingin
Gold $$ Contributor
Before everyone jumps off the cliff over full length resizing, if done properly it will not result in case head separation. This means measuring the bump with a bump gauge and caliper or the old fashion way using the rifle chambering method which admittingly is not as precise which in both instances, should result in only sizing enough so the case chambers with slight resistance i.e. .001 to .002" shoulder set back from the fire case's head space measurement.
I don't think anyone is jumping on full length sizing as a cause of case separation. It's been stated that over-full length sizing (as is generally the setup suggested by the die manuals) is often the cause.
A stripped carbide 45ACP sizing die will also size the pressure ring on '06 size cases if you can manage to push the case all the way through or at least into the die far enough.The problem with using an FL die to size case heads smaller at the web is that you also bump the shoulder. It’s the nature of the beast. You make the problem even worse by buying or grinding the shell holder so that you can size further into the base. That problem can be solved by buying what we call a ring die. It is a straight inside wall die that sizes only the base and doesn’t touch the neck shoulder area, only the base. One sells for $135.00 plus $12.00 shipping.
divingin
Gold $$ Contributor
A stripped carbide 45ACP sizing die will also size the pressure ring on '06 size cases if you can manage to push the case all the way through or at least into the die far enough.
For 6BR, I use a small base 308 die with the decapping assembly removed. Works for me.
The lines seems too low to be incipient separation. I have seen chambers that may be a tiny rough make marks like this as well. Cut one in half and put the pic up.
I discarded 3 R-P WinMag cases just yesterday after coming back from the range. Checking them as I was depriming with my modified paper clip, I found the tell-tale "dip" after noticing a slight brighter colored ring in the typical area separation usually occurs. This brass had been fired 7 times.
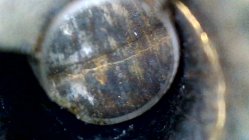
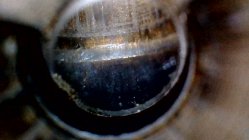
i brought this thread back just as a reminder to some of the newer reloaders. when you see that line on the outside of the case look inside. you might see this:

this was a once fired imi range brass that i formed and fired one time in my 20P. head space datum was only about 0.008" short for the 20P chamber.

this was a once fired imi range brass that i formed and fired one time in my 20P. head space datum was only about 0.008" short for the 20P chamber.
Thanks for doing that, that’s a good visual.and while i am here.... here is a donut formed after a 'few' loadings on a piece of lapua brass formed for 20p using a bushing die:
View attachment 1453270
neck is to the top. shoulder is dark at the bottom. donut is slightly ahead of the junction.
I think that there is a lot of bad information out there about setting FL and body dies. The first problem is die manufacturers' basic instructions that come with dies. A lot of them say to raise the ram with the shell holder in place, screw the die down untill it touches the shell holder, lower the ram and then screw the die down an additional eighth to quarter turn. Do not do this. If you disagree you really do not understand FL sizing at all. Another point is this bump .002 thing. I have stumped a lot of new reloaders asking them one simple question. I ask them why we bump back shoulders. Their answer tells me a bit about where they are in their reloading journey. Generally, cases are not tight at the shoulder after one firing, so my advice is to set your die so that the sized case has a head to shoulder dimension to produce the same shoulder to head dimension as the fired case (properly measured) and try it in the rifle. On the belted and rimmed cases separations and splits happen differently, The main issue for belted cases is that the headspace is from the front of the belt, and without a tight standard at the shoulder cases are made very short at the shoulder, to work with all chambers. I have experience with two belted calibers where the first firing blew the shoulder forward .021". Back in the day, when none of us knew anything about measuring cases, belted magnum shooters only got about four firings from a case before they would split. They wrote this off to "magnum pressures". The real culprit was that they were screwing the die down to the shell holder and by doing that pushing their case shoulders back way too far.
jds holler
Gold $$ Contributor
With my old 218 Bee brass, I've always used "case head separation" as a sign that it's time to retire that case out of service.
I even keep a little tool handy to flick the remaining case out of the chamber. I admit that I'm not as casual about it with my higher powered cartridges. jd
I even keep a little tool handy to flick the remaining case out of the chamber. I admit that I'm not as casual about it with my higher powered cartridges. jd
Similar threads
- Replies
- 36
- Views
- 3,215
Upgrades & Donations
This Forum's expenses are primarily paid by member contributions. You can upgrade your Forum membership in seconds. Gold and Silver members get unlimited FREE classifieds for one year. Gold members can upload custom avatars.

Click Upgrade Membership Button ABOVE to get Gold or Silver Status.
You can also donate any amount, large or small, with the button below. Include your Forum Name in the PayPal Notes field.
To DONATE by CHECK, or make a recurring donation, CLICK HERE to learn how.

Click Upgrade Membership Button ABOVE to get Gold or Silver Status.
You can also donate any amount, large or small, with the button below. Include your Forum Name in the PayPal Notes field.
To DONATE by CHECK, or make a recurring donation, CLICK HERE to learn how.


