• This Forum is for adults 18 years of age or over. By continuing to use this Forum you are confirming that you are 18 or older. No content shall be viewed by any person under 18 in California.

A REALLY Simple DIY Induction Annealer

[I looked through the threads and couldn't find this solution referenced yet.....]

I love the thought of induction annealing. (Simple. Consistent.) I don't like the price tags.

I love the various DIY induction projects that have been documented here, but they're more DIY than I have the desire or skill to take on.

I currently use a Benchsource. I love it relative to not annealing at all. The overhead of setting it up for a session, calibrating it, etc. is less than ideal.

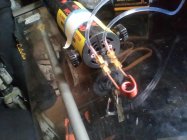
I stumbled on this induction solution last night. WAY simple. Obviously not elegant. But it seems like you'd very much be able to get the case-to-case consistency, which is what I'm most interested in. If I were to go this route I'd probably try to work out some sort of manual method to bring the case to the unit rather than the other way around.

Has anyone seen this? Thoughts?


It was a good video, but he went very quickly past the wiring of the timer.
- where did he cut the extension cord and why did he have two black wires?
- he clearly attached the DC adapter to some sort of connector befor he attached it to the timer. Hiow?
 
Last edited:
I bought it and tried it. The unit overheats and very inconsistent. I’m not waisting any more money on cheap annealers. I will buy a AMP!! I agree with Lou Murdica” if you don’t use a AMP it’s best not to anneal”
I own an AMP and disagree. Convenience over other methods is the AMP's biggest plus in my opinion
 
It was a good video, but he went very quickly past the wiring of the timer.
- where did he cut the extension cord and why did he have two black wires?
- he clearly attached the DC adapter to some sort of connector befie he attached it to the timer. Hiow?

He's done a follow up which explains a bit more. You can cut the extension cord anywhere, to suit your application, depends on how much free cable you need to plug the annealer into and how much to get to the wall socket. The two black wires used to be one, its simply the live that is cut in two and sheathing pared back. These are then fed into the relay and are input and output, so the relay is controlling the power available to the annealer, just like an on/off switch. The relay is powered by the 12v DC. It's really simple when you figure that out. I've used mine for 18 month or so, very pleased with the results.
 
I put together one of these last Spring. Picked the induction heater and timer up through Amazon.

I works great. It is very consistent. I use it with 30-06 brass (so far).

I changed the wiring a bit, for two reasons.

One, I was concerned about switching that much current through a relatively light set of contacts might reduce the life of the relay.

Two, when you switch off the power the fan turns off also - cutting airflow and allowing heat to build up.

What I did was to drill a small hole where the handle transitions to the larger diameter (near the button switch). A small four conductor cable was routed through the hole with a zip tie inside serving as a strain relief. Inside, the wires from the switch were connected to 1 pair, and the other pair to the wires that went from the switch to the control board. This allowed me to switch the low-current side of things. I believe it solves both issues, as I'm switching a low-voltage / low-current signal that stops the induction heating but since I'm not removing 110VAC from the device the fan continues to run. No cooling issues.

I could have pulled just two wires and inserted the relay into one of the two wires between button and control board, but I wanted the options for other features of the timer and the 4-conductor cable was small enough.

20220611_004831.jpg

To help with consistency I put two pieces of wood together at a right angle, and drilled a hole just the right size to hold the case (horizontally) while I slide the coil over it. I'm careful to locate the coil consistently to get the heat to affect the brass just where I want it, centering the case in the coil for uniformity also.

20220611_004858.jpg

The timer runs about 10 seconds. Use anything handy to remove the brass once hot, and place it elsewhere to cool.

No complaints here.
 
I built the unit referred to by the op. It was fine until it burned. It's basically a chinese annealer plus timer. The thing is that once it's burned, the new component you have to import from china.It's called H30sr5.
 
I bought/built one of these annealers, and it works great. May not be able to do hundreds at a time, but I can do my 50-60 Dasher brass and never have a problem....I've adapted mine to where the coil is water cooled tubing, so the coil never heats up.....I literally can hold the coil while annealing and it stays cool. Had a flame annerler, and it worked, but this one is much better, in my opinion...... rsbhunter. P.S. bend the coil so that the coils are horizontal, not vertical...
 
I bought/built one of these annealers, and it works great. May not be able to do hundreds at a time, but I can do my 50-60 Dasher brass and never have a problem....I've adapted mine to where the coil is water cooled tubing, so the coil never heats up.....I literally can hold the coil while annealing and it stays cool. Had a flame annerler, and it worked, but this one is much better, in my opinion...... rsbhunter. P.S. bend the coil so that the coils are horizontal, not vertical...

Can you explain how you water cooled the coil?
 
1/8" copper tubing, 1/8" "L" or 90° compression fittings, solder 10ga stub of copper to side of 90, one end of tubing up, one aimed out...insert stubs into induction unit....plastic tubing on copper tubing stub going up, to pump on one side, return on other...small submersible pump in tank....pump runs off 12 volt same as timer....rsbhunter
 
I bought it and tried it. The unit overheats and very inconsistent. I’m not waisting any more money on cheap annealers. I will buy a AMP!! I agree with Lou Murdica” if you don’t use a AMP it’s best not to anneal”

I bought one and have been using it for a couple years now. It does tend to overheat if you try to anneal too many cases without taking a break. I bought an additional 5v fan that I glued on the back to help reduce overheating due to the built in fan only running when the button is pushed (i.e. when annealing)
 
I feel it's much tougher to get the right annealing temperature with an induction annealed than with a gas set up. There temperature is so dependent on the amount of brass inside the coils, including the thickness of the brass. This is why the AMP annealer's instructions are for testing a case to find the correct code for the correct temperature. Even with gas, it takes a some adjusting to get it right, but I feel it's much easier than with an induction setup.
Just how much annealing can take place in a couple seconds. It's time at temp, not just reaching a temp.

AMPS has published hardness numbers on their website. I believe they are correct. The shorter the time the higher temp you need. I used to do that type of work. I still anneal with a single handheld torch. Groups under .500" are good enough for me. I am not trying to compete. Most of use cannot shoot good enough to see an improvement at the target. I would think you need to shoot consistant groups about .250" or smaller to see small improvements.

AMPS spent a lot of money having a lab anneal samples and perform tensile testing and hardness testing on metallography case cross sections. All their data is on their website.
 
Last edited:
Just how much annealing can take place in a couple seconds. It's time at temp, not just reaching a temp. AMPS has published hardness numbers on their website. I believe they are correct. The shorter the time the higher temp you need. I used to do that type of work. I still anneal with a single handheld torch. Groups under .500" are good enough for me. I am not trying to compete. Most of use cannot shoot good enough to see an improvement at the target. I would think you need to shoot consistant groups about .250" or smaller to see small improvements.
I agree. . . "the shorter the time the higher temp you need". Conversely, the lower the temp, the longer the time is required. When watching an AMP do some annealing, I took notice that see how red hot the brass was getting in that machine. It convinced me to use the glow method to determine how long I let my brass say in my torches' flame.

My point was that when one is dealing with a very short period of time and rapidly bringing up the heat, it can be kind of hard to determine the split second to bring the case out of an induction annealer to get the job done right. The AMP annealer determines the timing by the recommended testing procedure and makes for a job well done.
 
I put one of them together a couple years ago, but did away with the timer setup. It seems to work just fine without the timer.
I use it for all of my rifle brass. Before this, I always used a propane torch.
It's much faster than the torch method.
 
I don't propose that the diy annealer is equal to the amp, it is 5 times cheaper, and as stated, sufficient for the level of competition I engage in. Using my K&N arbor with low force gauge, I keep the pressure consistent. Whatever works for the shooter is what matters....rsbhunter
 
Just how much annealing can take place in a couple seconds. It's time at temp, not just reaching a temp.

There is a thread on sniper's hide where people are building their own induction annealer and the contention there is that for an instantaneous anneal, you need to hit 1000 degrees. The 750 degrees everyone seems to think you need to hit also requires that you maintain that temperature for 30 minutes (something that people don't realize)
 
The gentleman that does the "diy " induction annealer has some videos that explains the temp/time requirements. Without having a means to accurately gauge the hardness, or lack of , the brass after annealing, most are doing the best they can to reach a state of anneal that gives a workable point. AMP is the best going right now....maybe it will take the route of chronographs and become affordable to the masses....but let's not criticize those that use what they have....it is a learning experience...rsbhunter
 

Upgrades & Donations

This Forum's expenses are primarily paid by member contributions. You can upgrade your Forum membership in seconds. Gold and Silver members get unlimited FREE classifieds for one year. Gold members can upload custom avatars.


Click Upgrade Membership Button ABOVE to get Gold or Silver Status.

You can also donate any amount, large or small, with the button below. Include your Forum Name in the PayPal Notes field.


To DONATE by CHECK, or make a recurring donation, CLICK HERE to learn how.

Forum statistics

Threads
165,673
Messages
2,200,732
Members
79,046
Latest member
GLINK964
Back
Top