• This Forum is for adults 18 years of age or over. By continuing to use this Forum you are confirming that you are 18 or older. No content shall be viewed by any person under 18 in California.

20 Vartarg - Case Forming from 223 (Irregularities and Testing)

It's been raining non-stop for a week (deluge) so I have been killing time experimenting with forming 20VTG cases from .223/5.56 Once-Fired/Range Brass using Ramos' case forming method.
1) Redding 221 Fireball Form Die #1
2) Redding 221 Fireball Form & Trim Die #83101
3) Redding 20 Vartarg Type S FL Sizing Die (internal components removed)
4) Redding 20 Vartarg Type S FL Sizing Die (two .228 bushings stacked inside)

Based on the markings/surface irregularities, most of the .223/5.56 Donor Brass was fired through an AR15. I carefully selected cases in good condition, but even with the front-end QC I still experienced a 30% rejection rate. Before moving on to the neck turning phase, I culled any newly-formed case that displayed a "potential" issue (deep nicks, creases, fissures, etc.) located in neck or shoulder area. Some of these issues may have ironed out after fire-forming, but others would have definitely remained. I was surprised by the pattern of the irregularities/defects in the newly-formed 20VTG cases, which made me curious and peaked my OCD.

I had two question that nagged me:
1) What was the cause of the defect on the newly-formed 20VTG cases?
2) How far did a defect located on the donor .223/5.56 brass migrate during case forming process... Where did it ultimately come to rest on the newly formed 20VTG case?

This turned into a light study/experiment to determine how the various defects/irregularities on the Once-Fired .223/5.56 Donor Brass transferred over to the newly-formed 20VTG cases. I hand-selected a sampling (50 cases) of Once-Fired Range Brass with different types of irregularities/defects as well as the location of the defects on the cases. I even did a side-by-side comparison using Imperial Sizing Wax and Hornady OneShot.

I thought I would share my results/observations.... enjoy. Its a bit of a deep dive.
 
Last edited:
Types of Irregularities:

1. Nicks and Linear Creases
(short or long, superficial or deep) – resulting from AR15’s Radial Finned Lugs
Post-Forming: Shallow marks sometimes ironed out, but deeper nicks remained and elongate.

2. Dents (minor and deep) – most often found at shoulder/body intersection – resulting from either the hitting the deflector or hitting the ground after ejection
Post-Forming: Superficial shallow depressions sometimes ironed out or remained shallow. However, most dents became more severe during the case reduction process as the edges along the sides of the dent were folded back toward each other creating an elongated crevices in the newly-formed neck.

3. Random Peening or Cluster of Dimpling (small pin-size indentions) – most likely caused by impact onto rock or rough concrete after ejection.
Post-Forming: Shallow marks sometimes ironed out. However, deeper peens creating mini-fissure/crevices that were more noticeable if they resided on the newly-formed shoulder.

4. Random/Swirly Scratch Pattern – spent case sliding/spinning across concrete or rock after ejection.
Post-Forming: Shallow marks sometimes ironed out. Deeper scratches remained and depending upon new location (neck, intersection of shoulder/neck or shoulder/body) could present an issue as deep crease/cut into the brass. Scratches relocated into the shoulder could take the appearance as cracks, gator skin, mini-fissures (superficial or deep).
 
Last edited:
Location of Irregularities/Defects on Donor Brass:

1. Irregularities located on the Neck
on Donor Brass were a Non-Issue because they relocated to the top of the elongated neck in the excess waste area that is above the neck cut-off line to form the 20VTG case.

2. Irregularities located along the Shoulder (above the Shoulder/Body Intersection) on Donor Brass were Non-Issue because they relocated to the above the neck cut-off line for the newly-formed 20VTG case.

3. Irregularities located at the Shoulder/Body Intersection on Donor Brass were “Potential” Issues because they relocated to the neck cut-off line for the newly-formed 20VTG case. Depending upon the size/severity of the defect on the donor case, the final location on the newly-formed case may fall below the cut-off line resulting in short necked 20VTG cases.

4. Irregularities located at Top of Case Body (from Shoulder/Body intersection and down 1/8”) on Donor Brass were Issues because they relocated below the neck cut-off line on the newly-formed 20VTG case.

5. Irregularities located at Upper Portion of Case Body (upper 1/3rd of Body ... above the Anneal Line) on Donor Brass were Issues because they relocated into the shoulder of the newly-formed 20VTG case.

6. Irregularities located in the Upper/Middle Portion of Case Body (below the Anneal Line) on Donor Brass were Issues because they relocated to the shoulder/body intersection of the newly-formed 20VTG case.
 
Last edited:
Wavey / Curtain Pattern around the newly-formed Shoulder on 20VTG case

While reading a bunch of the older 20VTG case forming threads, I stumbled across a comment from Ramos where he hinted that the pressure build-up during one of the forming steps using the FL Sizing Die was perhaps the culprit. He indicated that he backed out the ram to allow the trapped air to escape.

I decided to test this. I inspected the entire sample set before and after Step 3 - FL Sizing Die (guts removed) and Step 4 - FL Sizing Die (2x Bushings installed). Based on how my press responded, the 4th Step is the most likely culprit as it displayed the tightest fit (case & die) and greatest pressure during the forming pressure. I could hear my Rockchucker groan lightly as I approached the bottom of the pull before it was time to Cam-over.

I ran two sets of cases through Step 4 to determine the outcome: (1) Slow gradual stroke that I backed-up a couple of times to release trapped air; (2) firm continuous stroke from top to bottom (no pause or backing off). The cases that were formed with one stroke (no pause) under full pressure were more likely to display the light wavey pattern. Within my sample set were cases lightly lubricated with Imperial Sizing Wax and Hornady OneShot. Regardless of the type of lubricant used, the results were fairly consistent across both groups. Pressure is the culprit.

For the most part the Wavey Pattern was superficial and barely visible. I was more likely to notice it by touch when wiping away any lubricant with my bare finger. All of these shallow indentations will iron out during the first fire-forming of the case.
 
Last edited:
I have seen recommendations for using no lubrication... I'll pass. Not willing to play the odds.
I have seen a few recommended for using Hornady OneShot.... OK I'll give it a go.

During my testing (above), I ran a set of cases with Imperial Sizing Wax and a set with Hornady OneShot. All cases were lubricated at the beginning of the case forming process, and no additional lubricant was added during the process.

Imperial Sizing Wax:
Its common to see the term "wetting the case" or "lightly lubricating"... From my own experience think of putting on Chapstick and then wiping it off on back of your hand. You still have that thinnest layer. If my fingers leave clear marks on the case then there is too much wax.

Between each Case Forming step, I ran the case between my fingers to evenly redistribute the remaining wax on the case. As excess wax built up on my fingers, I wiped it off on a towel. The net effect, there was less lube on each case by the time it got to the final FL Sizing Die (bushings installed) step. I want to be sure that I didn't cause a build-up of lube inside the dies or have uneven build-up/deposit on the cases that might interfere with the contact between the die and brass resulting in dents or ripples.

Hornady OneShot:
I have used this product for Resizing all my brass (buckets) for the past 10 years. It replaced the RCBS water-based lubricant that I was using before it. I have never used as part of Case Forming. I applied the OneShot by placing the cases into a container and sprayed completely.... rolling and spraying (thoroughly covered).

Observations / Results:
The cases lubricated with Imperial Sizing Wax ran more smoothly through the dies with minimal resistance and no case stick. The newly formed 20VTG cases were smooth and nicely formed, and didn't show any indication of excess friction between case and die.

The cases lubricated with Hornady OneShot had a little more resistance through the die. There was some case stick during the first two forming dies steps that gave me a moment's trepidation, but the cases released with mild pressure. The newly formed 20VTG cases were nicely formed. but showed signs of solid contact between case and die. The entire length of the elongated neck was highly polished from the metal on metal contact.

I don't think you can go wrong with either lubricant. I am very comfortable/confident with Imperial Sizing Wax. I would need to do more testing with OneShot before I would be willing to consider switching.

The Hornday OneShot made the process very clean with no clean-up, which is its biggest selling point. If I were to use Hornady OneShot for Case Forming then I would recommend applying a second coat to the cases after before moving to Step 3 - 20 VTG FL Sizing Die (internals removed).
 
Last edited:
In Summary - the above exercise was academic rabbit hole. Simply use New Brass and you won't have to deal with impact of defects/irregularities that are common with Once-Fired Range Brass.

The other consideration/extra work is case prep for used brass (decapping, swaging crimped primer pockets and possibly addressing enlarged case bottoms with a small base sizing die). This isn't the worst thing, but just extra steps you may not want to do.
 
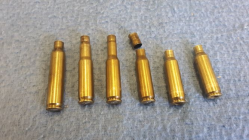
your step #4 makes it sound like you have not trimmed the excess brass from the length. two bushings stacked? I trim mine at the top of step#2. some people use a mini chop saw, I use a small battery power reciprocating saw with a very fine blade. below is a picture of the brass in the different steps
 
Chuckshooter - I was taught to do the trim to "Rough" case length after step 4, which requires double stacked bushings to handle the longer/elongated case neck (pre-cut). I use a mini-chop saw and a 300BO case cutting jig (Squirrel Daddy) for the initial cut.

I think you and I end of at the same place (different ways to skin the cat). What length do you make the initial rough cut before final sizing (debur and trim to length)?
 
I elected to use a partial case forming process (truncated). I only did the case forming steps that I need in order to identify the potential issues and outcomes of defects in the donor cases. There are several key steps remaining/required to be completed in order to produce a nice quality 20VTG case.

Annealing is important and also the easiest of the steps!
 
We
Chuckshooter - I was taught to do the trim to "Rough" case length after step 4, which requires double stacked bushings to handle the longer/elongated case neck (pre-cut). I use a mini-chop saw and a 300BO case cutting jig (Squirrel Daddy) for the initial cut.

I think you and I end of at the same place (different ways to skin the cat). What length do you make the initial rough cut before final sizing (debur and trim to length)?
we might both end up with useable brass but, I can't help wonder why you would want to size an extra long neck. I can't see any up side to it, just potential for a lot extra problems. just my opinion and no offense intended but, they call it a form and trim die for a reason. maybe you should try trimming at the top of the stroke (step #2) and see if some of the other issues go away. I've formed over 3000 cases and although I lose a few, in general I consider it very straight forward and easy. just a lot of steps. to answer the length question, ruff cut 1.411, in case you are wondering why 1.411, that happens to be the top of the stroke with the die set for chamber size and my little cutter. final trim 1.4 on all 5 of my vartargs . you can actually get a good trim with a file at the top of the stroke and it does not hurt the die because it hardened.

and yes annealing is necessary

wish I was where you are, because then I wouldn't be here
 
Last edited:
The big reductions (squeezing the case body down to form the neck and new shoulder) that happen in Steps 1-2 with the 221Fireball Forming Dies are the hardest steps on the case. Sizing down the elongated neck in Steps 3-4 is pretty easy with minimal effort/force. Not sure it really matters.... it just depends on how much brass you want to carefully trim away to achieve desired final case length right before neck turning.

If "Rough Trim" after Step 2 then the case length will continue to grow as the neck's OD continues to be reduced from .251" (Step 2 - 221FB Trim Die) to .228" (Step 4 - 20 VTG die). The additional length just means more to turn off during your final case length trim.

If "Rough Trim" after Step 4 (20 VTG die) then all of the case reduction has been effectively completed. There is no more meaningful case lengthening that will occur during remainder of case forming process. Using the mini-chop saw, I can cut closer to the targeted case length and reduce the amount of metal that I need to turn away during my final case trim.

I am willing to try both ways... I think either way is about the same. The end product from either processes should be the same.
 
Honestly, I have never seen a 221FB at my range or the brass on a shelf at any of my LGS... that is a Unicorn in Houston. During normal conditions, I can easily fill a 5gallon bucket with spent .223/5.56 cases as long as I am willing to bend down and pick it up... Brass Yoga

Case forming is nice therapy work, but it isn't for everyone.
I have bought a bunch of Remington and I bout 300 Lapua a few years ago on sale from graf's. I also shoot 17 mach IV. Would like to build a fireball but haven't yet
 
I appreciate the additional ease of simply converting a 221 Fireball case into a 20 Vartarg or 17 Fireball. I have more brass then I can ever use, including plenty of Lapua. I don't need to buy any more brass with a .376" base diameter. The chamber on my rifle is 1.421", and I didn't want short cases.

I recognize that there isn't just one way to form cases. If I didn't already own these dies then maybe Bullberry would be the magic sauce. I feel a sense of obligation to give each Die a chance to play a couple of down in the game... too late to start being a minimalist. Unbeknownst to me, I committed myself to a path or at least the Forming Dies by which I will get there. How is this possible ou ask. - buy a rifle and buy some dies... hit "pause" on the project for a few years, and then go open up a drawer sometime later to discover stuff you didn't know you had bought. Its like Christmas discovering everything the younger you decided to buy.

I'm having fun also trying to work out the Case Forming routine for a 17-222. The transition from .204 to .172 is proving to be more difficult as neck diameter gets smaller and case walls get thicker... navigating around creating a Doughnut.
 
Last edited:
Thanks. I have had a busy this Spring sorting out case formation and load development for several neglected projects. My first step was to tirelessly search through all the threads on case forming for the specific/related calibers, both here and on Saubier.

For the most part I have sorted out a Case Forming Procedure for 17-222 Rem. from .223 Brass. Here is a link to the process that I am using... it it a labor of love.
http://saubier.com/forum/showthread.php?t=37775
 
You can also buy 20vt already made from 223/5.56 brass. Unless of course you enjoy the workout.
 

Upgrades & Donations

This Forum's expenses are primarily paid by member contributions. You can upgrade your Forum membership in seconds. Gold and Silver members get unlimited FREE classifieds for one year. Gold members can upload custom avatars.


Click Upgrade Membership Button ABOVE to get Gold or Silver Status.

You can also donate any amount, large or small, with the button below. Include your Forum Name in the PayPal Notes field.


To DONATE by CHECK, or make a recurring donation, CLICK HERE to learn how.

Forum statistics

Threads
165,889
Messages
2,205,561
Members
79,189
Latest member
Kydama1337
Back
Top