It's been a few years since I made 20P brass for my AR 20P upper, and now have a 20P bolt gun, so I might make more to fit that chamber. I went through the learning process for going from once fired LC brass to ready to load 20P brass. I kept updating a word doc for myself so could go back and read it later, because I'm getting older and don't remember stuff as well as I used to

But here's my own notes on how to make brass work, and your chamber dimensions might vary from this. I know my bolt gun is different than my AR chamber, so come up with your own dimensions for sizing.
How to Form 20 Practical Cases for first conversion
Prepare cases by de-capping, primer pocked uniforming, and flash-hole deburring and cleaning the cases, BEFORE you do any sizing down. Clean with ultrasonic cleaner.
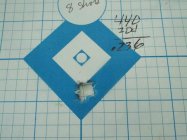
1. First size once shot cases in a Full-Length Small Base sizing die, with the Expander Rod removed. With my RCBS FL SB die it takes the neck diameter from outside diameter of .2520” to .2375”, and I only let the shoulder get pushed back to 1.575” or less approximately, not below 1.573” base to shoulder datum, with Hornady G240 case comparator. The concentricity from a Full-Length die should be about 0-1 thousandth.
2. Next, with Redding S Die put in 233 bushing with the lock-nut from the expander rod on top as a spacer. Set die to NOT “bump” or set back the shoulder for this first bushing sizing, or at least not to the final shoulder bump you want for the final dimension. The concentricity might not be very good, from .002” to .008” runout.
3. In Redding die, install 225 or desired final bushing size stamping facing down, and then set the die to bump the shoulder back to 1.569” base to shoulder with AR barrel (final bump .002 - .004 from shot case length for AR, .0015 to .002 for bolt action). With the bushing and the bump together in the final sizing, this should bring the concentricity to .001 to .004 on average. The shoulder bump and bushing sizing both together on final sizing seems to really help to bring the neck into concentricity with the case on the final sizing. I even had the .008 runout necks go back to about .002 to .004 using this method.
4. After it’s sized, then trim necks to OAL of minimum 1.760" maximum 1.775” for case, and chamfer & deburr the necks. Clean sizing lube off exterior, run a brush through the necks, and you’re ready to load.
Annealing It is a good idea to anneal after your cases are freshly converted, or at least after fired 2 or 3 times.
Neck Turning:
Necks can be turned after first forming them, or after first firing. Hornady mandrel will fit inside the neck of a 0 fired LC case (unfired after conversion) that was necked with a 225 bushing.
After the brass is shot and fire-formed to your chamber, it will be more concentric. This would be a better time to turn the necks. The sizing down of the neck from 223 to 20P tends to make the final thickness of the neck uneven, and a skim turn to bring it to uniform thickness will help in accuracy. First turning try .013” neck thickness, a skim turning.
For a more even neck thickness, turn to .012” & then use 224, 223 or 222 bushing for preferred neck tension.
Keep in mind, if you turn the necks, it will make change the outside diameter of the neck, and lessen how much your bushing ends up sizing your necks, and neck tension will be less. If you use a bolt action rifle the neck tension can be as low as one to two thousandths. If you are using an AR upper you will need more neck tension to keep the bullets from sliding forward when they chamber, so you might need a smaller bushing. In an AR four thousandths or more neck tension might be minimal to be safe. So, a final bushing might be 224, or what you determine is correct for your application.