I'm currently shooting a 6XC in f-class. Chamber has a neck about 0.275" and I'm shooting 105gr Lapua Scenars over 38.4gr of 4350, CCI BR primer and 1st Gen Norma brass, which turn to about .013", giving me a loaded round diameter of approx 0.269"
I FL size with a die built for me by Neil Jones, using a .267" neck bushing. Both fired and sized cases,using this die) are very concentric, with TIR about .001" or often less at shoulder/body junction and neck, using sinclair concentricity gauge.
Where things get a bit weird is when I seat bullets - also using a Neil Jones threaded micrometer seater. When I measure TIR on tbe seated bullet - just shy of the ogive, it blows out to about .004"-.005". I note the odd difference in apparent seating force required but the runout variance is across the board.
Does anyone have any suggestions on what the problem might be or what I might try to remedy things? My thought was that maybe sizing down about .008" in one step might be creating some issues but again - the concentricity tool seems to indicate not.
Press is a forster co-ax and shellholder has no problem - clearly no issues here given no runout issue when sizing.
Any ideas?
Thanks, Justin
JustinP: Neck runouts have been an on-going problem with me also, sometimes a lot more than the .004"/.005" you are seeing. For starters, you mentioned the changes in force needed to seat the bullet. If you are using only the "rocket ship" case mouth de-burring tool, you are leaving a sharp edge on the inside of the case mouth. There are several good tools out there for cutting a smoother entry angle/ I use the K&M tool, cutting a max. of 1/32" in depth. I can then take a flat base bullet, set it in the case mouth, without pushing it in, turn the case with the bullet pointing down, and it will not fall out. Try that after using the "rocket ship" only. When seating with the Forster/Redding sliding collet seaters & the Wilson chamber seater, the bullets seat without any undue resistance or pressure required. Another method I use is to seat in "steps": Seat about 1/3 of the way, rotate the case, seat 1/3, rotate the case for final seating. I spoke with Ken Merkle about taking the necks down in 2 steps, rather than 1, and he said all you would do is pull it out of alignement half ways, each time. If you are starting with new brass, it will straighten with the first firing, and all loadings after that will have near zero runouts. I have both the RCBS & Sinclair tools: use them all the time. With any rounds that have more than .004" of runout, I mark the case head, and use them for scope adjustment, fouling shots or a max of 100 yd. I've gotten some fantastics groups, 5 shots @ 100 yds. with as much as .008" of bullet runout/ go figure. Although at 200 & beyond, it does make a difference. I've found some factory rounds to have as much as .015" of runout: so much for their "high-quality".
When I first chamfered my current batch of cases, I did it with a Wilson 30deg tool mounted in my wilson trimmer and I noticed that some of the chamfer cuts had gone deeper on one side of the cases than the other and I think this was because the case mouthes were not square to the chamfer head. Despite my best efforts, I don't think I'm capable of trimming the cases to exact same length and squareness - any runout in the cases will only exacerbate this.
I think I need to, as you suggested, go to a shallower angle chamfering tool and my next batch will be done by hand. I think the chamfer tool needs to be able to self center in the case mouth to produce an even cut - maybe this will help with the seated bullet runout issues

Thanks for the suggestion, it's given me another variable to work on eliminating
Justin
You must be certain that the bullet is being pushed on
the ogive and not on the point. Sizing .008 is more than
you want,work hardening the brass very early. Annealing may be neccessary. Depending where your case is supported during indicating,you may not be getting the whole story. If using a bushing,rotate the shell in your fingers in good lite. If you
see a difference in the radius at a point were the bushing stops,there is an error. It is possible to have a case indicate
well at shoulder junction and not at the mouth,which says that
the neck points another direction.When that happens,the bullet will also. the chamfer on a case mouth will act no different than a bad crown.Case mouth needs to be square and chamfered
uniformly and polished so as not to scrape bullet.
Hi Bob
The bullet is being pushed on the ogive, not the point, by the die seater stem
I'm not sizing to give .008" of neck tension, it's just that with the fired cases blowing out to about .274" or so, sizing back down to .267" to give .001" to .002" of neck tension on my 0.269" loaded rounds means that the sizing operation reduces quite a bit and I am concerned about over-working the necks - to the point where I'm actively considering getting the barrel,s) set back and re-chambered with a .272" neck.
Fired cases and FL-sized cases indicate well at both shoulder junction and at the mid point on the neck - TIR for both measurements is often .001" or less
The .004" to .005" runout is indicated when I use the concentricity gauge on the bearing surface of the loaded projectile. Either there is some inconsistency on the surface of the projectile,doubtful there would be .004"+), or the projectile is going into the case crooked...
Is measuring loaded round runout on the bearing surface of the seated projectile an acceptable method?
1st, how do they shoot? Next, I do not believe that checking
bullet runout on the bearing surface is correct. Not knowing
how you are supporting cases during this test,I can't say
that for certain. I prefer to support the bullet near the tip
and forward of the expansion line, indicating in front of
case mouth and again where the base of the bullet rests
in the neck. By doing that I can tell if its seater or brass.
Supporting a case by the rim will lie to you every time,and
just in front of the extractor is nearly as bad.
They shoot quite well - but I'm getting the odd weird flyer. I guess that could be any one of 100 things though.
I'm measuring concentricity with a sinclair concentricity gauge.
-
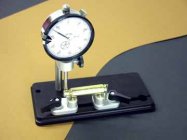
09-150.jpg
7.2 KB
· Views: 113
With low TIR on the case neck and high readings on the bullet shank, the only possibility is that the neck ID is irregular. This can be due to uneven neck wall thickness,Did you turn for 100% cleanup?), residue in the case neck,Did you brush them? I push a brass brush in and out once.) or a bur from inside chamfering,VLD chamfer tools generally leave a cleaner edge - I like the Holland carbide tool.).
If you place the indicator on the forward part
of the body,just behind the shoulder. It will often tell
you more,such as wether the neck and body are on the same axis.
sometimes you can't set the indicator behind the point were
the bushing stops on the neck.Particularly when sizing the
whole neck.Your seater aligns on the body and if the neck is not
on the same axis there can be a problem.The neck can indicate good and still have the body wobble.
I measure on the body just behind the shoulder and get less than .001" runout on both fired and sized cases
I measure on the neck at the midpoint b/t neck/shoulder junction and case mouth. Runout for fired and sized cases is around .001" with some a fraction higher
After seating, the neck runout is anywhere from .001" to .003"
Measuring the loaded round runout on the projectile bearing surface just forward of the case mouth, the runout is anywhere from .001" to .003"
Based on this, the misalignment problem is being caused during the seating operation.
I use a standard chamfering tool by hand to outside then inside chamfer the cases. I clean the neck ID with an RCBS nylon case neck brush. They are pretty stiff bristles.
I lubricate the neck IDs with powdered graphite prior to seating. Would uneven thickness of application contribute to the problem? I dip the case mouths into the graphite
Would a move to a shallower angle chamfering tool help? I am concerned about my inability to make a uniform chamfer cut and wonder if this is affecting things.
The chamfer does have an affect.The nice gentle seating that
comes with use of vld ch.tools is nice,but near impossible
to get even.Contrary to current trends,I believe a reg.
chamfer is better. Done lightly and polished wit steel wool on a pencil. Its like a crown,the steeper it gets the mor unlikely
it is true and concentric. As you move the indicator closer
to the point,things get worse. Try sizing less than the whole neck,if seating will tollerate this it may help.
Thanks again guys for all your good advice
I will look again at the neck clean ups and chamfering and I've already contacted the seating die manufacturer and we're discussing the potential for looking at the die and perhaps trying a new seater stem.
Maybe I'll just try and shoot straighter as well... :idea:
I agree about the seater,rarely is anything perfect.
Neil Jones does nice work,but who knows. I will also
say this. Brass work hardens quickly and you are sizing
a bit more than many and that is not good. The brass
in the necks may not be hardening at the same rate
all the way around.Therefore as the bullet enters the
case,the brass may yield more on one side than the other.
Brass work hardened has a memory and those most crooked
will do it over and over. As few as 5or 6 firings can do it.
I'm betting ronemus is right about the neck thickness variation. It goes something like this. Your chamber is nice and concentric so after firing the outside neck is perfect and extra neck thickness is pushed to the inside of the neck. Likewise your die is good and concentric as it sizes down the outside of the neck to a consistent concentric diameter the thick parts of the neck are again pushed to the inside. Now when you seat a bullet these thicker portions are then pushed the opposite direction to the outside. A bullet seater is not a precision sizing tool so as an added bonus you get runout.
I would:
1. Use a neck micrometer to check neck wall thickness variation and clean them up by turning as required. Then have another go at measuring runout on loaded rounds.
2. Much as I hate to say it possibly use an expander button - this will push the defects from the inside of the neck to the outside where they will do less damage to bullet runout.
3. You could consider a Lee collet style die - heaven forbid not a Lee -- instead of the expander button. They do much the same as the expander button with less problems ie. they push variable wall thickness to the outside but they also improve overall concentricity of the internal of the loaded round. Expander buttons sometimes drag the neck out of concentricity if they are not well setup and made. Lee may not make a collet die in your chambering though.
If this is the problem there are more solutions I'm sure.
I do turn the necks but not 100% - enough just to clean up the high spots.
No lee collet die available for 6BR, let alone 6XC, which is what I'm dealing with now.
If you want low TIR, you must turn nearly 100% or the neck thickness variation will contribute to runout.
Justin,
I don't have any feedback for you on the concentricity issue... but I did notice you mention the L.E. Wilson 30 Deg. chamfer and your inability to get it to cut evenly. I have a solution for you.
When I started using my L.E. Wilson 30 Deg. chamfering attachment, I also noticed that it was cutting one side of the case mouth deeper that the rest... and also noticed that it was almost invariably on the "top" side of the case as held in the case sleeve adapter. I deduced that the centerline of the trimmer was either offset, or the case was not being held perfectly centered in relation to the chamfer tool axis.
Instead of trying to chase an impossible set of machining inconsistencies and rebuild everything, I came up with a solution that is the ESSENCE of simplicity.
When trimming using the 30 deg. chamfer tool, I just let the case and holder "float", not applying any pressure to the case holder other than what is required to keep the case head against the rear stop. I kind of apply "leftward" force on the case holder with my fingers, without trying to push the case holder into the rails or otherwise affect the axial alignment of the case. I've found that this works perfectly - the "floating" case mouth will follow the force of the chamfer tool, and cases come out with perfectly even chamfering.
Hope this helps!


