• This Forum is for adults 18 years of age or over. By continuing to use this Forum you are confirming that you are 18 or older. No content shall be viewed by any person under 18 in California.

Savage bolt assembly screw and measuring pin fall

Does anyone know where I can buy a savage assembly screw for the bolt, one with a hole in the middle of it so I can easily measure firing pin fall?

its a model 12 action I believe, but not 100% sure.

Or is there some other way to measure firing pin travel from cocked to fired position on a savage?

thanks for any advice and help

Ryan
 
It's been a few years since I did all this in a 110. I took notes. I don't know if the same applies to a 12.
 
Although I have done a lot of firing pin fall measurements on Remington clones I have never done it on a Savage. I guess the main reason for this is that Savages have a good size cocking ramp (approximately .300" based on my crude measurement) and firing pin fall is normally not a problem. Firing pin protrusion can be a problem but with a savage it is adjustable.
As far as a an assembly screw for a Savage bolt with a hole in the middle PT&G makes a Savage Bolt Accessory kit (bolt lift kit) that features a screw with a drilled and tapped hole in it. The hole is tapped for a set screw and is used in conjunction with a sleeve centering disk so that you can vary the firing spring compression to get a somewhat lighter bolt lift. The link to the web page is below:


I have used this kit with success however, to measure pin fall from the back of the bolt you would have to install the screw without the sleeve centering disk and set screw in order to be able to get through the hole to the firing pin itself.
Just for my own curiosity I attempted to measure pin fall on one of my Savage 12 target action bolts with the bolt out of the gun. Please don't take this as gospel because my measuring methods were nothing short of very crude. What I came up with was somewhere between .280
and .290. I have no way of knowing if the pin fall would be the same with the bolt installed in the action although I would guess it would be close.
Again, on a Savage 12 as long as the firing pin spring is in good condition, the firing pin isn't binding in any way, and firing pin protrusion is between .045 - .055 I have not encountered any ignition problems.
Hope this helps.
 
With the assembly screw removed put the bolt in the action and measure to the back of the firing pin.
Thanks everyone. This worked KRP. But i had to use an Allen wrench to press the firing pin forward up to the sear due to the sear being spring loaded in a savage, marked the wrench at cocked and fired positions, in reference to the back of the bolt. Not exact but enough to know i have roughly .270” pin travel
 
Thanks everyone. This worked KRP. But i had to use an Allen wrench to press the firing pin forward up to the sear due to the sear being spring loaded in a savage, marked the wrench at cocked and fired positions, in reference to the back of the bolt. Not exact but enough to know i have roughly .270” pin travel
You can push on the bolt release to hold the sear against the trigger in the cocked position.
 
You can push on the bolt release to hold the sear against the trigger in the cocked position.
Oh duh. Didn’t even think of that, I have massive brain fog lately thanks.. i guess i just like to simulate the actual real world scenario for when its all working too, but its not like pushing the bolt release with a thumb would twist and change the measurement enough of any concern most likely. Im over thinking it like usual.
 
Send me one of those screws and I'll put a hole in the middle of it for you.
I appreciate that, I think im good now. This is another reason of many that I want a lathe…the things you could do are endless… i dont have a drill press either.. could even tap the hole and have a little set screw in the middle to keep out debris…
 
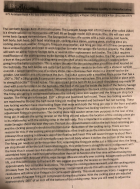
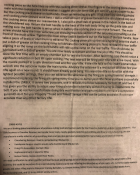
The Lambeth Savage Bolt Lift kit sold by Custom Guns and Ammunition, LLC has a .250 x 28tpi cone point set screw inside the main bolt screw. It also comes with a shouldered cap to be inserted in the cocking piece sleeve. The firing pin protrusion is adjusted by the adjustable firing pin stop on the front of the firing pin assembly. The firing pin tension can be adjusted to a point. You do not want the cocking piece pin bottoming out on the bolt body. It should have clearance or you will eventually crack your bolt body but in the process you will shoot flyers. My bolt lift kit allows for adjusting firing pin compression wthout bottoming out the cocking piece pin. This adjustment can be done externally with an allen wrench. They come in Stainless or black oxide finish.
 
The Lambeth Savage Bolt Lift kit sold by Custom Guns and Ammunition, LLC has a .250 x 28tpi cone point set screw inside the main bolt screw. It also comes with a shouldered cap to be inserted in the cocking piece sleeve. The firing pin protrusion is adjusted by the adjustable firing pin stop on the front of the firing pin assembly. The firing pin tension can be adjusted to a point. You do not want the cocking piece pin bottoming out on the bolt body. It should have clearance or you will eventually crack your bolt body but in the process you will shoot flyers. My bolt lift kit allows for adjusting firing pin compression wthout bottoming out the cocking piece pin. This adjustment can be done externally with an allen wrench. They come in Stainless or black oxide finish.
Thanks Nat,

so you’re the one that wrote these instructions originally? I thought it was Dave Kiff from looking at an old forum post, i know he used to sell your kit.

also i found a new version of these instructions on your website thank god, that old one is hard to see, LOL

im building a new rifle off a bighorn sr3, and been learning more about ignition and firing pin fall etc.. cock on close, timing, bolt cams, how the firing pin shoulder should contact the bolt head, NOT the bolt body, has been very interesting and awesome. Thanks for the knowledge. I thought I might as well check over my savage while Im at it too.
 

Attachments

  • AB7B414C-ACB7-48DE-96A4-673320AB0233.png
    AB7B414C-ACB7-48DE-96A4-673320AB0233.png
    1.9 MB · Views: 26
  • 48141F55-6EF7-44B8-9D51-15A0B8473BFA.png
    48141F55-6EF7-44B8-9D51-15A0B8473BFA.png
    1.7 MB · Views: 24

Upgrades & Donations

This Forum's expenses are primarily paid by member contributions. You can upgrade your Forum membership in seconds. Gold and Silver members get unlimited FREE classifieds for one year. Gold members can upload custom avatars.


Click Upgrade Membership Button ABOVE to get Gold or Silver Status.

You can also donate any amount, large or small, with the button below. Include your Forum Name in the PayPal Notes field.


To DONATE by CHECK, or make a recurring donation, CLICK HERE to learn how.

Forum statistics

Threads
165,000
Messages
2,187,641
Members
78,620
Latest member
Halfdeadhunter
Back
Top