60 years ago on a trip to the beach in California, my dad showed us kids how to shoot. Yea, you could do that back then! He had a Remington model 12a, .22 pump action rifle, a very popular youth rifle back at the turn of the 20 Century. We only got to shoot it a few time before it quit working, as I recall while using a sand dune as a backstop
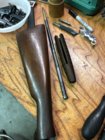
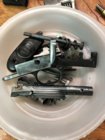
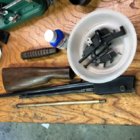
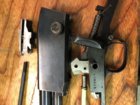
Fast forward to today, I pulled it out of the gunsafe and looked it over, curious if it still worked. Didn't take long to discover a broken firing pin. As I continued to tear it down, a complete restoration seemed to be in it's future. The blueing was in great shape where it wasn't worn off , wood too, so it seemed a pretty simple job. I ordered parts from Numrich, and continued to tear it down to bits.
Then I ran my Teslong down the bore, and to my horror I found it was filled with rust! After much bronze brush work, then Intensive pellets with bore polish, not much had changed. I needed something much more aggressive if I was ever going to get out all the rust.
After looking at the options, I concluded that electrolysis was the only way that would take less than a month to get the rust out. The big concern was would it harm the blueing, and would it etch the parent metal.
The answer to both was an astounding NO.
I submerged the barreled action in a tub of water with 1/4 cup of Arm & Hammer Washing Soda (Sodium Carbonate). The purpose of the soda was to enhance the electrical conductive characteristics of water, which surprisingly isn't so good. BTW: don't use Bicarbonate of Soda, it's not the same chemical. It'll work but it may damage blueing and metal.
A piece of cold rolled steel bar was to be the cathode so I drilled and tapped it for a screw to hold the copper wire for connecting to the power supply, a 12 volt battery charger.
A similar copper wire was attached to the action via the take down screw. Easy peasy. I hooked the red lead from the charger to the steel bar, and the black to the barreled action. Set at 2 amps and plugged it in.
Immediate fizzing! I let it go a few minutes and turned off the power and looked at the barrel. No visible changes, so back on with the power. More fizzing and now the water was turning rust brown, and old oils were coming out and floating on the surface making a putrid yellow foam.
After 10 minutes or so I again checked for any unwanted changes to the blueing. Nothing! Perfectly fine. I pulled it out, rinsed and blew it off, dried it with paper towels and still the blueing looked like it did before I went in the tank. I ran the Teslong camera down the bore and it still had horrible rust. Going to take a while.
5 hours later, the water is very, very dirty, the cathode bar is incredibly rusted and caked, but the barrel and action exterior looked just like it did when I started. Another look with the Teslong saw a very bright and shiny bore that was completely frosted looking from rust pits, but no rust. It looked like it was chrome lined it was so shiny. Rifling was still apparent, but I suspect it's days as a shooter are long gone.
I sanded the barrel to shiny metal with 600 and 800 wet/dry paper, leaving the action alone as it was in great shape. I cold blued the barrel and action, the action only taking blueing where it was rubbed off. Came out a perfect match, and very original looking.
I worked the wood parts with a steam iron to remove dents after stripping the finish with Krud Cutter, then several coats of MinWax Tung oil finish and it's starting to look as good as new.
If nothing else, I've learned a great deal with this project. And I am forever a convert to electrolysis for rust removal, as long as it's not hardened steel. The fizzing produced by the process is hydrogen gas being released and hardened steels are susceptible to hydrogen embrittlement.
I'll gather some pics and post later if there's interest, but I really didn't plan a thorough photo record from start to finish.
Your questions are welcome.
Last edited:


