P1ZombieKiller
Silver $$ Contributor
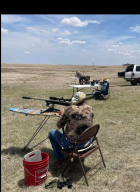
I have read a few of the posts about portable shooting benches, and I have to say there are some really smart people on this site. I took some of those suggestions, and tried to make me one that would not only be sturdy, but look decent too. Since I'm just a city boy living in the country, I had to think about it a few times before I settled on anything. Once I decided on the 'single post' style bench, all I had to do is get in the shop, and fire up the welder.
I first wanted to get my table top done. I went to home depot and got a nice 3/4' piece of plywood. I cut it in half, then cut it in half again. I figured if I messed it up, I still have another half to try it. I glued those two 24†wide pieces together, and clamped it down over night. Once firmly together, I began the cutting and shaping. That's where I should have slowed down a bit, and took more time. Once cut, I placed 2 coats of stain on both the top and the bottom. I clear coated it twice to helps seal out the moisture. I bolted it together with hex head furniture bolts and locking inserts.
Once the top was done, I had to figure out how to make a heavy top sturdy with only 1 post. I took the design I have seen on other benches, and just tried to duplicate it. I already had some 2' 11 gauge steel legs for a few feeders I was going to built years back that I never got too, so I used those as stabilizing legs. I decided to place the inserts on the post and cut 1 side of them in a semi circle, and leave the other side square. This would make a natural downward angle. All I needed to do is choose the angle and make sure all three were the same, and weld them up. Last I just needed to get my collar and plate mounted to the table top. As you can see, it came together pretty good.


