• This Forum is for adults 18 years of age or over. By continuing to use this Forum you are confirming that you are 18 or older. No content shall be viewed by any person under 18 in California.

KMW loggerhead(terry cross) DIY cheek riser hardware install

Nathan Gravitt

Silver $$ Contributor
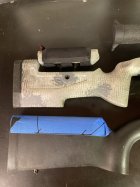
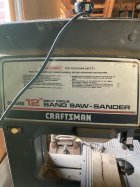
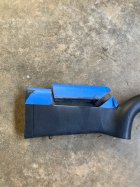
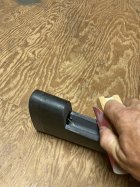
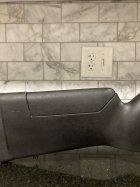
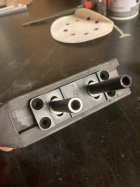
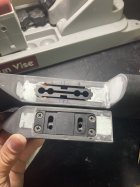
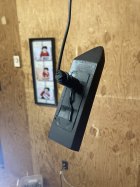
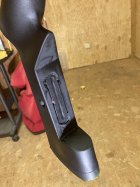
I haven’t seen much on this so I figured I would post. I have been wanting to install one of these cheek riser hardware kits for sometime now. I purchased the hardware from Stocky’s for $50 plus the ride. This is the same hardware that some top stock companies use, including Manners. I have done quite a few of the Mathew’s cheek riser style cheek risers that mount by simply drilling 2 holes in the stock but I wanted something a little bit better. I have a Savage FCP that came with an HS Precision stock. I used my manners T4A as a reference and laid out some painters tape on the stock and drew out the design I liked. The top piece is 1 5/8” deep(this was what I measured my manners cheek riser to be.) once laid out, I simply cut out the shape on my bandsaw by hand. I suppose it would have been better to make some sort of jig but it worked out pretty close to square. I then put the stock in my gun rest(a bipod would also work) and leveled the stock from left to right across the barrel channel. I then checked to see how level my cut was. It was about 1/16” from being level. I started with a block of wood and some 150 grit sandpaper. This was time consuming so I got out my orbital sander and some 60 grit. Once I made the sides level, I then dropped back to 150 grit and made sure the long edge was perfectly flat. Again using the flat block of wood and sandpaper. Once I was satisfied, I moved to the front and rear sides and sanded them flat as well. Once I had leveled and flatted the stock on all 3 sides, I fit the cheek piece on top to see how it fit. I followed the same process as before to get all 3 sides flat and smooth. Once I was satisfied with the fitment, I simply rounded the sharp edges with 150 grit sandpaper by hand and wiped down with soap and water. The hardware has not arrived yet. I am on vacation next week but I will continue this thread when I get back from vacation. I’ll be happy to answer any questions
 

Attachments

  • 64E258F9-D940-46C5-A795-A6F066C1CC51.jpeg
    64E258F9-D940-46C5-A795-A6F066C1CC51.jpeg
    483.5 KB · Views: 151
  • EA010BD4-4614-490B-841F-582174F0CA48.jpeg
    EA010BD4-4614-490B-841F-582174F0CA48.jpeg
    478.6 KB · Views: 141
  • 2E79930D-6922-4570-A8F3-E22B292BDDBF.jpeg
    2E79930D-6922-4570-A8F3-E22B292BDDBF.jpeg
    614.2 KB · Views: 135
  • 0FC5B594-7008-401F-8ECE-4966E3556A78.jpeg
    0FC5B594-7008-401F-8ECE-4966E3556A78.jpeg
    448.6 KB · Views: 135
  • C02ED79F-028B-46FA-A9F4-A174C47AE0A5.jpeg
    C02ED79F-028B-46FA-A9F4-A174C47AE0A5.jpeg
    606.9 KB · Views: 148
Last edited:
More pics
 

Attachments

  • EF53C036-0149-4F39-9988-84BBB08542C6.jpeg
    EF53C036-0149-4F39-9988-84BBB08542C6.jpeg
    411.3 KB · Views: 100
  • 45DBB276-7CB3-4ABD-ABC9-07C62E81746A.jpeg
    45DBB276-7CB3-4ABD-ABC9-07C62E81746A.jpeg
    507.9 KB · Views: 85
  • 33BA1C25-CFBA-44DF-97B1-82D732DAA9D0.jpeg
    33BA1C25-CFBA-44DF-97B1-82D732DAA9D0.jpeg
    550.6 KB · Views: 88
  • 88052CF8-497F-4E6A-9A77-86ECD74A49EB.jpeg
    88052CF8-497F-4E6A-9A77-86ECD74A49EB.jpeg
    500.9 KB · Views: 98
  • 108F216E-6FC2-49F9-ABD4-64A9F9719526.jpeg
    108F216E-6FC2-49F9-ABD4-64A9F9719526.jpeg
    352.9 KB · Views: 102
This is my manners factory stock. I am not overly impressed with the inletting….. especially in the cheek piece. Hopefully I can do a little neater job.
 

Attachments

  • C3E9BE91-A0A3-477C-98BB-D276667A709D.jpeg
    C3E9BE91-A0A3-477C-98BB-D276667A709D.jpeg
    397.5 KB · Views: 121
  • 6FBCDB9E-711D-4EB7-9B07-FB9CDDA4B2EE.jpeg
    6FBCDB9E-711D-4EB7-9B07-FB9CDDA4B2EE.jpeg
    378.8 KB · Views: 116
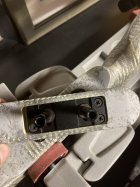
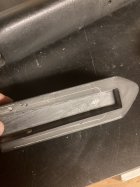
Back from vacation. I marked out the top piece with a razor blade. I just scored around it once I centered it up. I have a small laminate router that I put a 1/4” bit into. I set the depth of the router to match the hardware depth. I then took off about 1/8” per pass until I got it right to the line. I then fine tuned any adjustments with 150 grit sandpaper. Test fit, and sand, until it is just right.

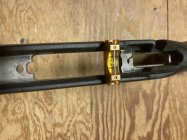
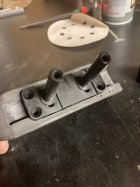
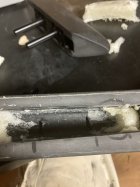
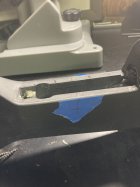
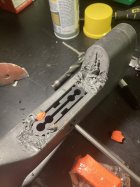
The next step was to inlet the stock for the bottom metal. It’s very important that when the stock top piece closes all the way, it is perfectly aligned with the bottom portion of the stock. Measure and mark the center of the post as this is the most critical. You also need to make sure that the top posts have enough clearance in the stock so that the cheek riser will close all the way. The inletting for this was made a little more difficult since their was a void already there. After making sure everything was aligned, I drilled the holes to clearence the top post and inletted the stock as needed using the same process and tools that I used for the top piece. That’s about all I had time for after work today. I will try to post tomorrow.
 

Attachments

  • 4ADC2546-628B-46C4-A189-04E43BF92F5C.jpeg
    4ADC2546-628B-46C4-A189-04E43BF92F5C.jpeg
    457 KB · Views: 54
  • 8FE1CD1C-AF54-4BC2-8A5F-4D24C5DCF739.jpeg
    8FE1CD1C-AF54-4BC2-8A5F-4D24C5DCF739.jpeg
    403 KB · Views: 51
  • 43EB0E00-4A17-4DE7-873D-EB18B271CDD7.jpeg
    43EB0E00-4A17-4DE7-873D-EB18B271CDD7.jpeg
    397.8 KB · Views: 54
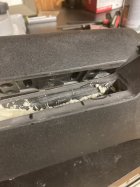
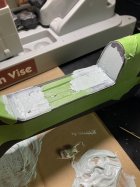
I added spray foam in the stock to fill some of the voids. I am trying not to add too much weight. (Although this stock is already pretty heavy)
 

Attachments

  • 86150133-23BE-4D3F-9D68-F948642E9C03.jpeg
    86150133-23BE-4D3F-9D68-F948642E9C03.jpeg
    388 KB · Views: 71
  • BAF7C526-B6B3-4565-9DB2-BE9130B0BBE3.jpeg
    BAF7C526-B6B3-4565-9DB2-BE9130B0BBE3.jpeg
    378.1 KB · Views: 70
  • 711472AB-A78B-4B90-A8CA-4915D7D4E1E6.jpeg
    711472AB-A78B-4B90-A8CA-4915D7D4E1E6.jpeg
    341.9 KB · Views: 70
“ It’s very important that when the stock top piece closes all the way, it is perfectly aligned with the bottom portion of the stock.”
Nathan, nice work so far.
Don’t you know the posts can be loosened with an Allan wrench and moved side to side? It’s one of the reasons I love his hardware.
 
Last edited:
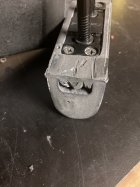
Correct. The top hardware will be very snug since it is attached with screws. You were opening up the bottom a little bit more so that it can move around. Once roughed in you can then use epoxy of your choice to hold it in place. There is a Screw and nut that have to go crossways through the stock and the hardware
 
Ok, I feel like this is the most critical step. Drilling the hole through the stock. I layed out the stock on both sides and drilled a 9/16” hole from both sides. The hardware is 1/2”. After drilling, test fit the hardware. As a side note, I decided to recess the hardware 1/16” so there would be not clearance issues. I would recommend just making it flush. Recessed would probably work if your stock does not have voids but it made it a pain to fill in around the hardware.

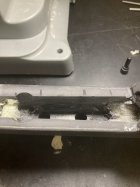
With the lower hardware in place, I double checked the the cheek piece would fit. After confirming fit, you will need to epoxy the lower hardware in place. I used devcon because of the recesses around it but I would probably just use a 5 minute 2 part epoxy if the inletting was exact. As you can see, the devcon didn’t fill all the voids since I had to work it in 2 different directions
 

Attachments

  • 17845DFE-406C-497C-B5F6-10D092D893E6.jpeg
    17845DFE-406C-497C-B5F6-10D092D893E6.jpeg
    311.8 KB · Views: 62
  • 67FAA5B7-81E0-4B1A-A24F-63BE320B803E.jpeg
    67FAA5B7-81E0-4B1A-A24F-63BE320B803E.jpeg
    377.4 KB · Views: 62
  • 74A211F8-A944-4D9B-BB5C-862B782593AC.jpeg
    74A211F8-A944-4D9B-BB5C-862B782593AC.jpeg
    406.5 KB · Views: 57
  • 4D956DA6-698E-442D-B747-0B962ADD0158.jpeg
    4D956DA6-698E-442D-B747-0B962ADD0158.jpeg
    409.2 KB · Views: 58
  • 63C0A1CA-392D-4530-B617-0B4AB481B5A2.jpeg
    63C0A1CA-392D-4530-B617-0B4AB481B5A2.jpeg
    419.9 KB · Views: 61
The last step was to bondo any voids. After taping everything up, I bondoed any voids, and then hand sanded with a block. I then primed and painted black. I plan on doing a camo sponge job that I will post when I finish
 

Attachments

  • FE4DA736-C187-482C-A765-C79834974EA9.jpeg
    FE4DA736-C187-482C-A765-C79834974EA9.jpeg
    402.3 KB · Views: 53
  • F7BCC91A-8ADE-415D-BDF2-77E54957684D.jpeg
    F7BCC91A-8ADE-415D-BDF2-77E54957684D.jpeg
    414.7 KB · Views: 49
  • 331584DE-DE67-4A80-A5D0-449014E2BD07.jpeg
    331584DE-DE67-4A80-A5D0-449014E2BD07.jpeg
    371.3 KB · Views: 51
  • 0803173C-EEDC-4F03-AA7B-C9BBC482D735.jpeg
    0803173C-EEDC-4F03-AA7B-C9BBC482D735.jpeg
    345.7 KB · Views: 54
  • 0B1697EE-B027-4730-86B3-2B0C7C901ECB.jpeg
    0B1697EE-B027-4730-86B3-2B0C7C901ECB.jpeg
    390.8 KB · Views: 57
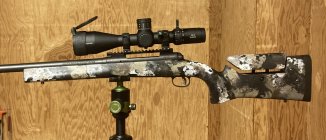
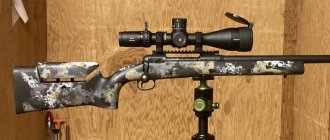
Finally got everything finished up. I wanted to show pictures all along the way. Hopefully it may encourage some of you to go ahead and try it!
If I had it to do over again I would have made sure that the bottom hardware was flush with the stock rather than trying to recess it. Also, the bottom hardware needed to have been located about a 16th of an inch further towards the rear for a perfect fit. I could have done one more coat of Bondo to make things absolutely perfect but I knew I was going to put a camo paint job it would hide any imperfections . More than likely I will never have the cheek piece fully down. I was happy with the result.

This was more of a “ it’s not that hard“ post, then a tutorial. I did learn a few things along the way. Feel free to ask questions. I am by no means an expert but if I can do it so can you. And probably save yourself about $300-$350 on a stock
 

Attachments

  • BFDEA69A-1B30-4AF3-BB1C-E310A0DC9284.jpeg
    BFDEA69A-1B30-4AF3-BB1C-E310A0DC9284.jpeg
    308.2 KB · Views: 78
  • 9E402DE4-1B0E-4D81-B874-CF088D584EE7.jpeg
    9E402DE4-1B0E-4D81-B874-CF088D584EE7.jpeg
    271.8 KB · Views: 74

Upgrades & Donations

This Forum's expenses are primarily paid by member contributions. You can upgrade your Forum membership in seconds. Gold and Silver members get unlimited FREE classifieds for one year. Gold members can upload custom avatars.


Click Upgrade Membership Button ABOVE to get Gold or Silver Status.

You can also donate any amount, large or small, with the button below. Include your Forum Name in the PayPal Notes field.


To DONATE by CHECK, or make a recurring donation, CLICK HERE to learn how.

Forum statistics

Threads
165,470
Messages
2,196,622
Members
78,936
Latest member
Mitch.Holmes
Back
Top